Viewing environments
To view your , select Environments from the left-hand navigation.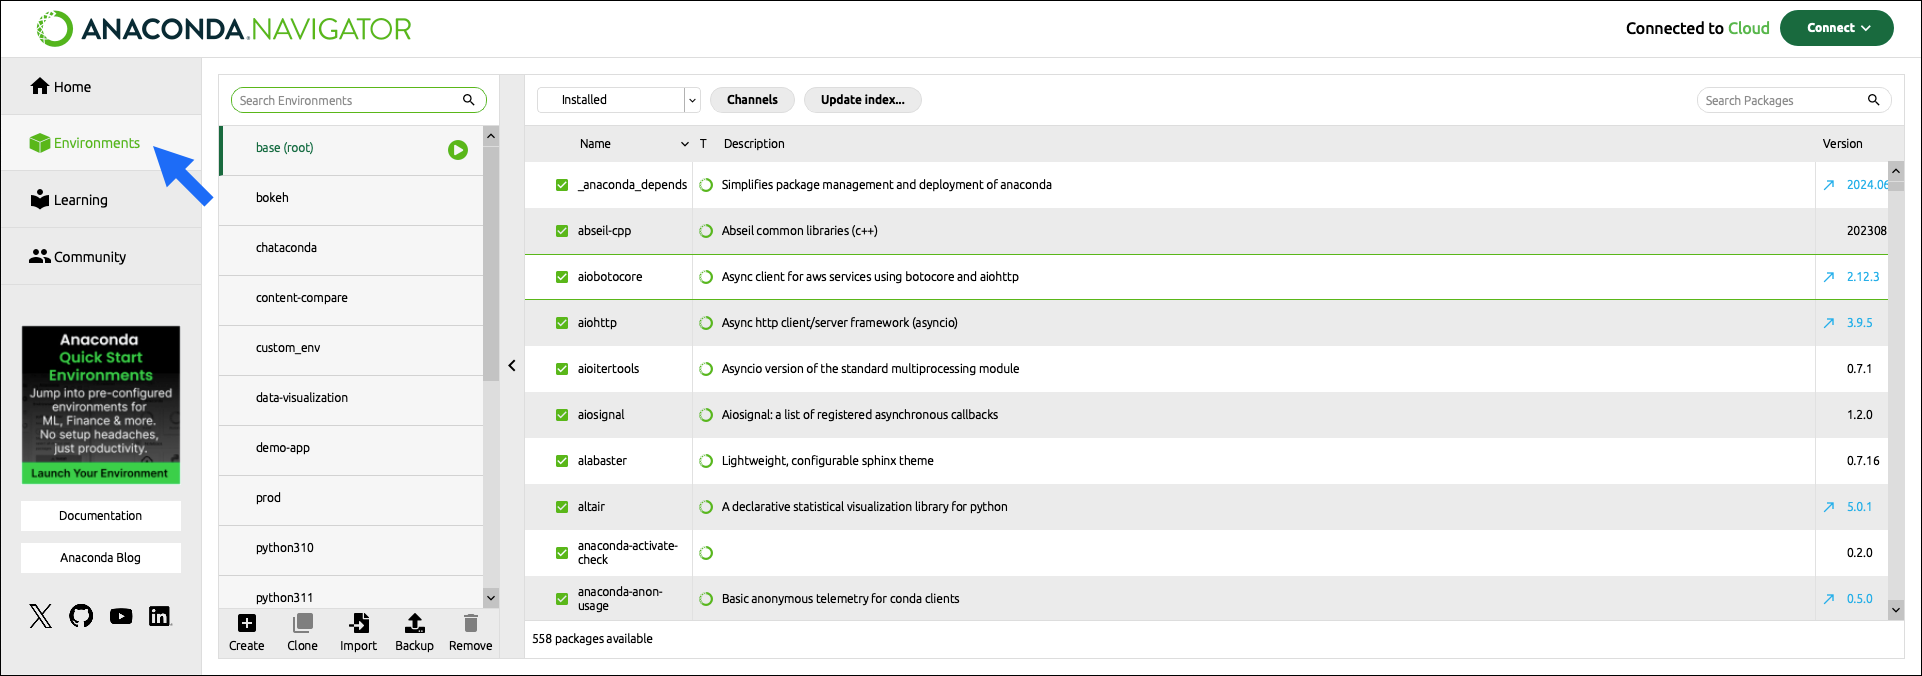
Searching for an environment
Use the Search Environments box to locate an environment by name. Enter all (or part of) an environment’s name to filter the list to display only environments that contain the .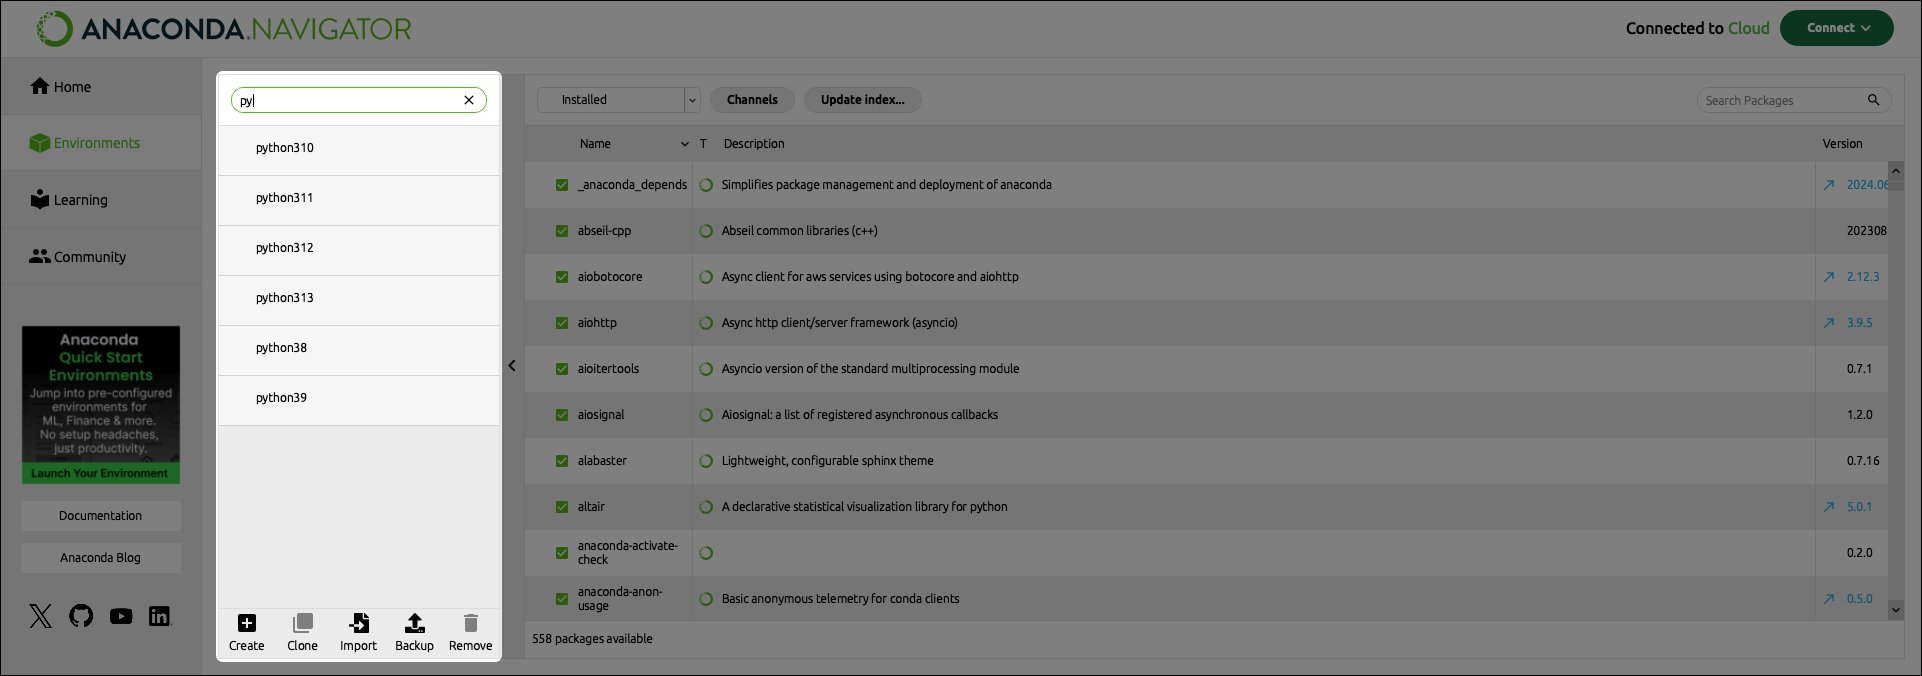
Managing environments
Anaconda Navigator provides a set of buttons at the bottom of the environments list to help you manage environments.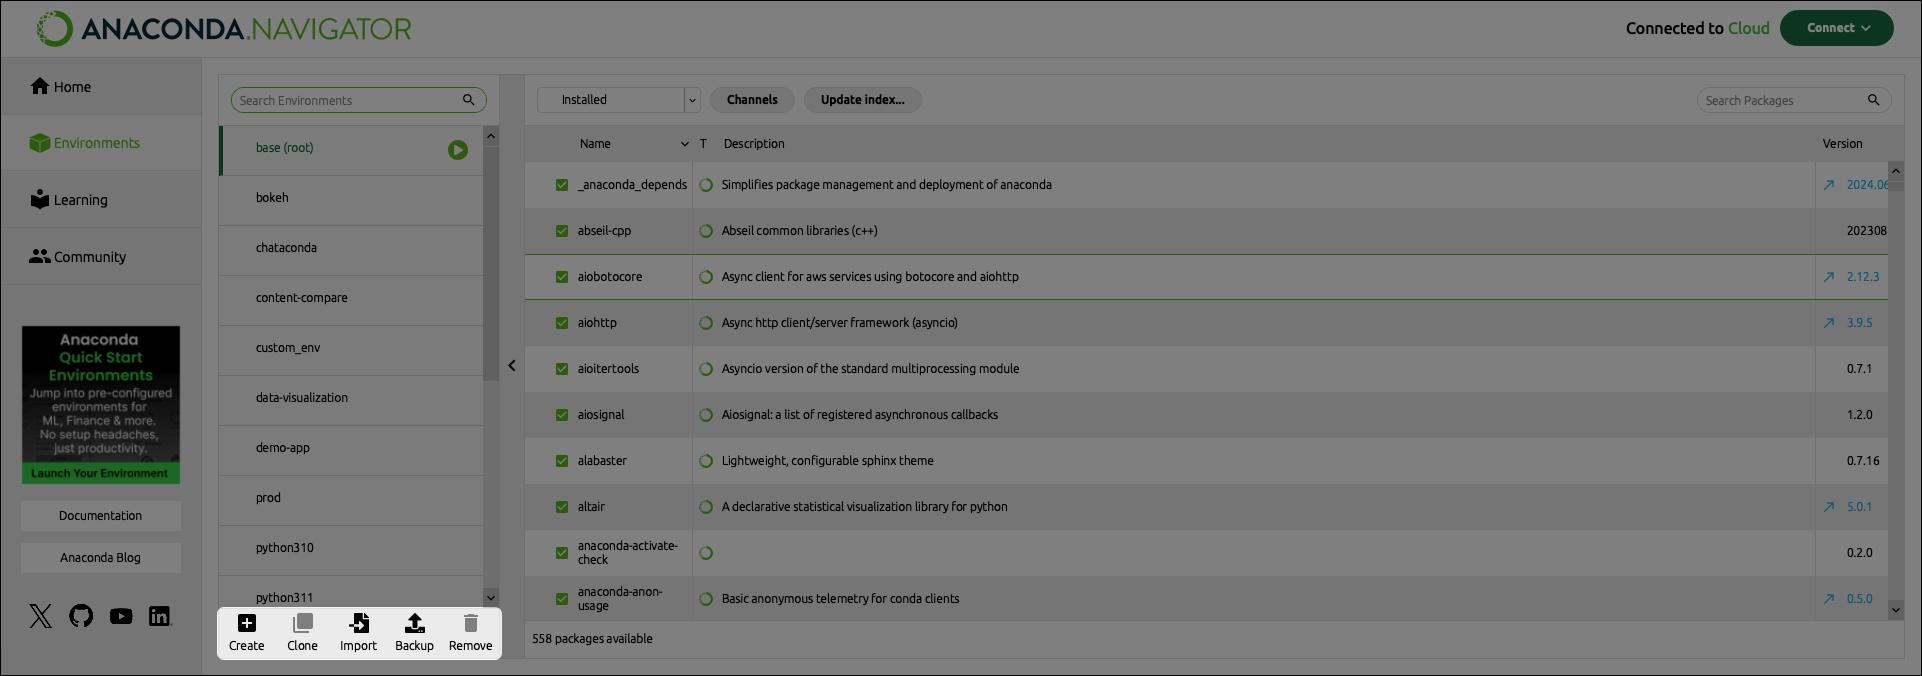
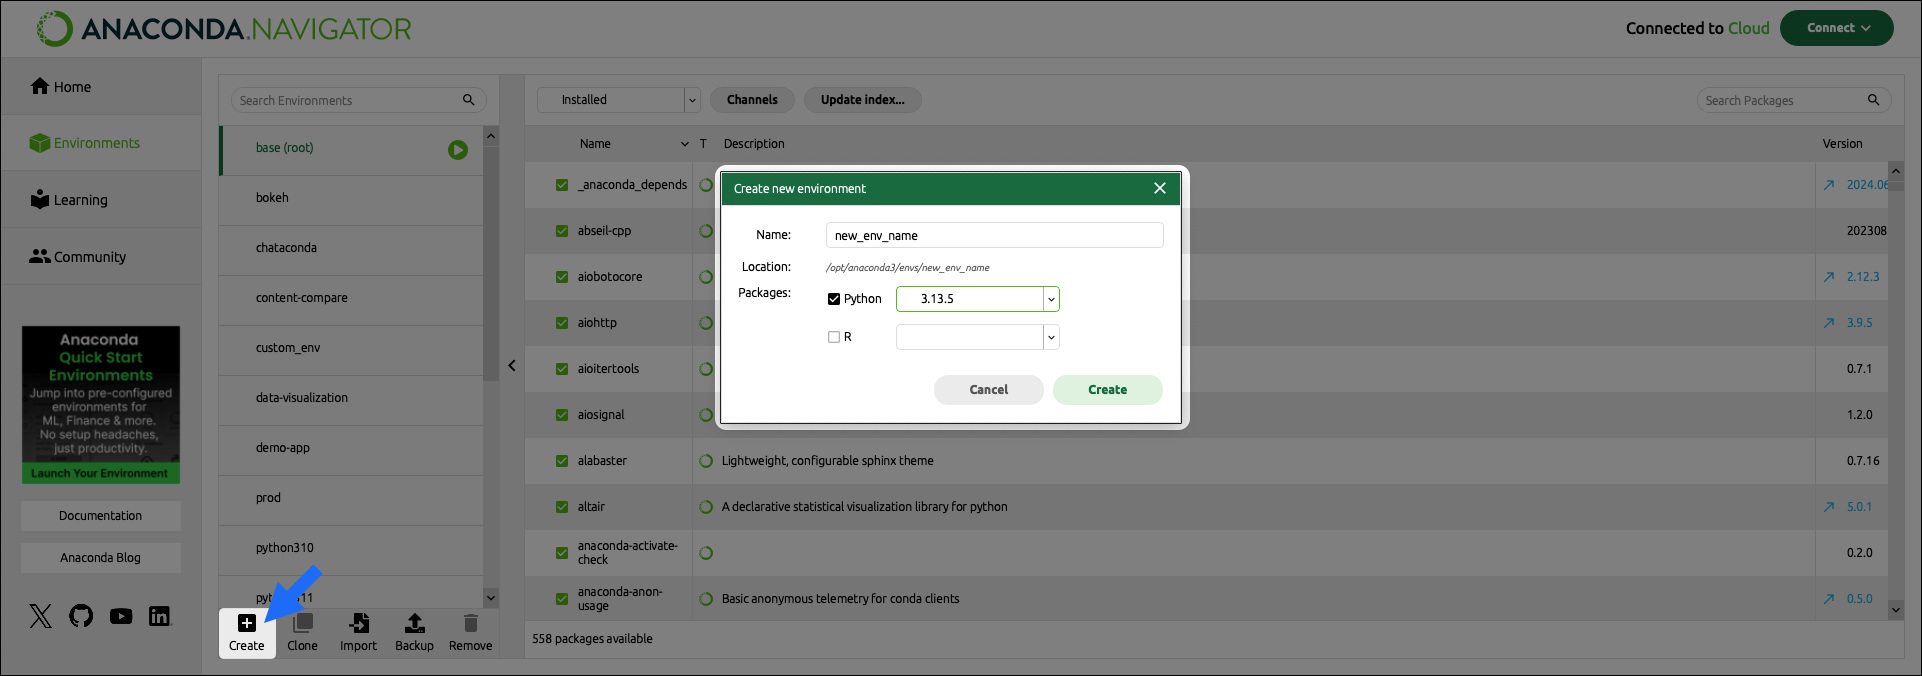
Creating a new environment
- Click Create at the bottom of the environments list.
-
In the Create new environment dialog, enter a descriptive name for the new environment.
-
Select either Python or R as the language for your environment.
Why do I need to pick a Python or R version?
Conda packages are built for a specific language . Choosing Python or R adds the matching interpreter to the environment so packages you install and code you write operate correctly. - Open the dropdown and select a version for your interpreter.
- Click Create.
Activating and using an environment
- Click on an environment in the list to activate it.
-
Click the button beside the environment’s name to open the activation options dropdown.
Some activation options require additional packages to be installed in the environment.
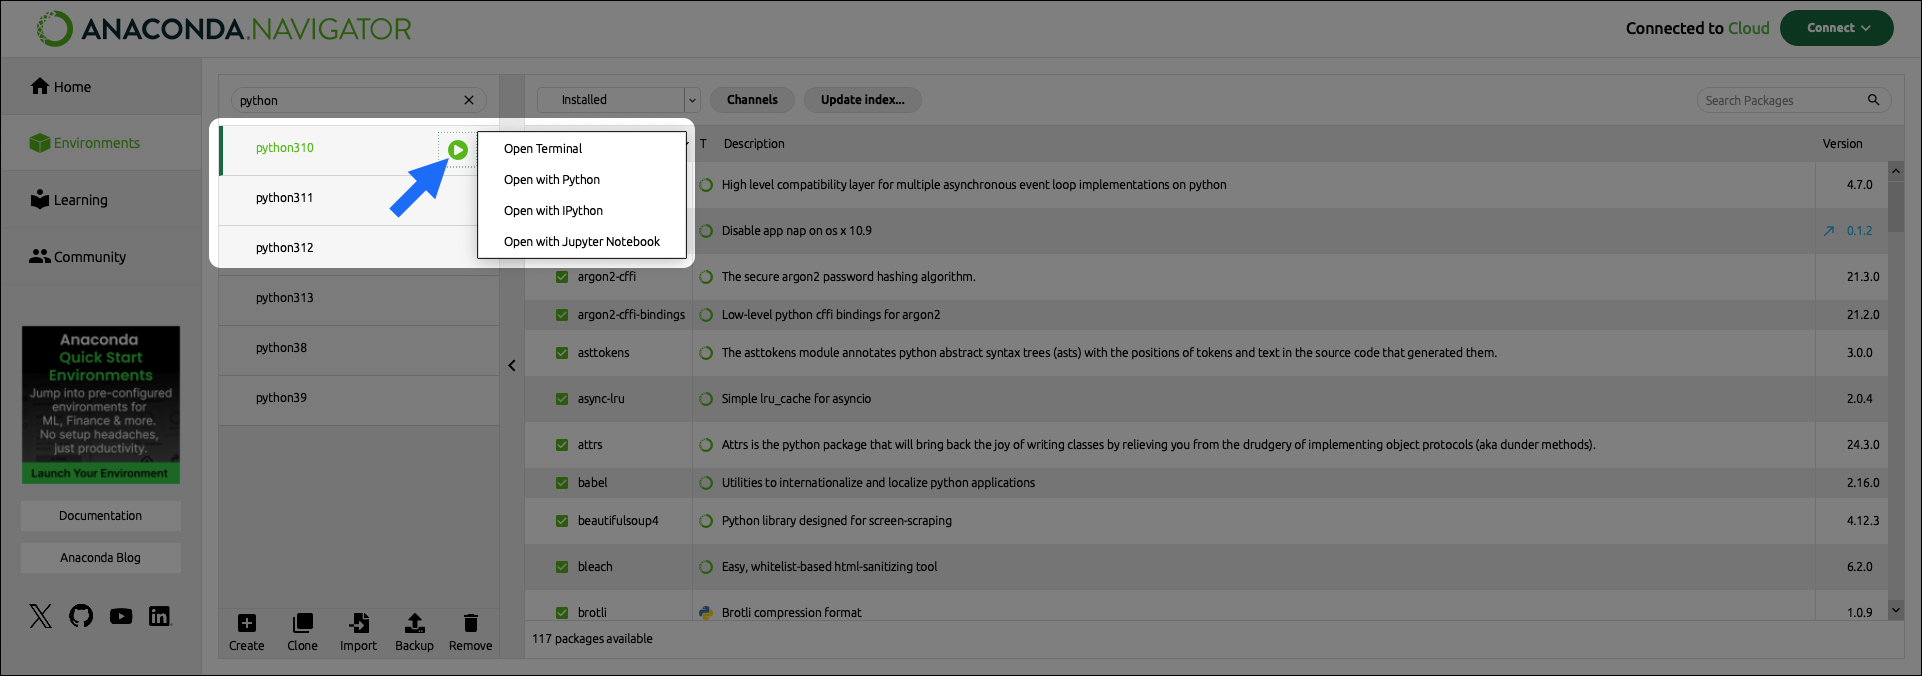
Option Description Required packages Terminal Opens a shell session ( bash,cmd, or PowerShell, depending on OS) with the environment activated. Use it for CLI tools or shell commands.None Python interpreter Launches the standard pythonREPL inside the environment. Useful for quick checks or running scripts.None IPython Console Starts an enhanced interactive Python shell. ipythonJupyter Notebook Opens Jupyter Notebook in your default browser, letting you create and run notebook files. notebook
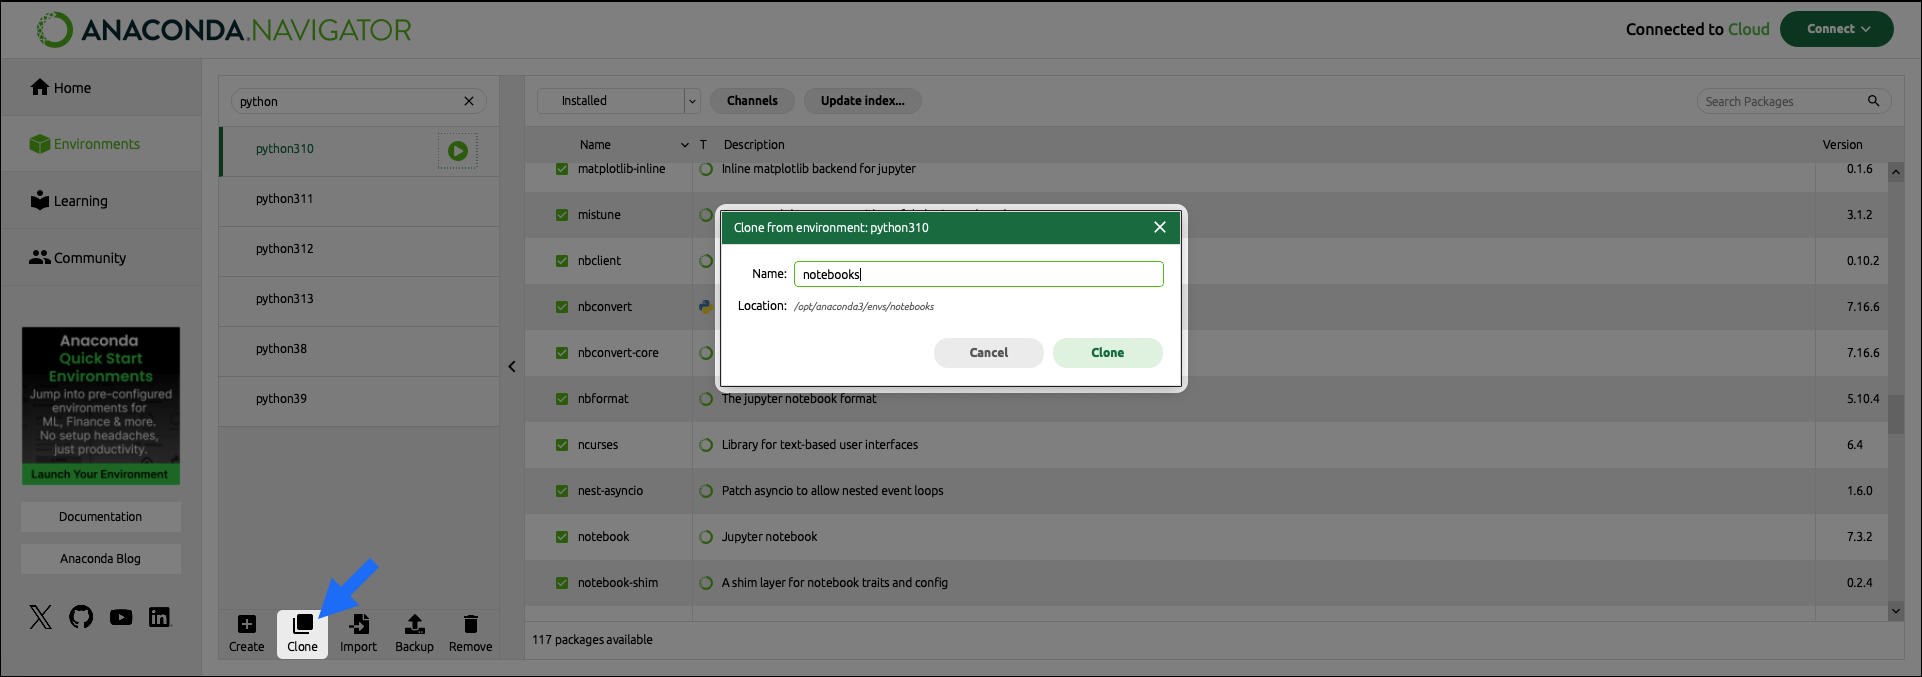
Cloning an environment
- Activate the environment you want to clone by selecting it from the environments list.
- Click Clone at the bottom of the environments list.
- Enter a descriptive name for the new environment.
- Click Clone.
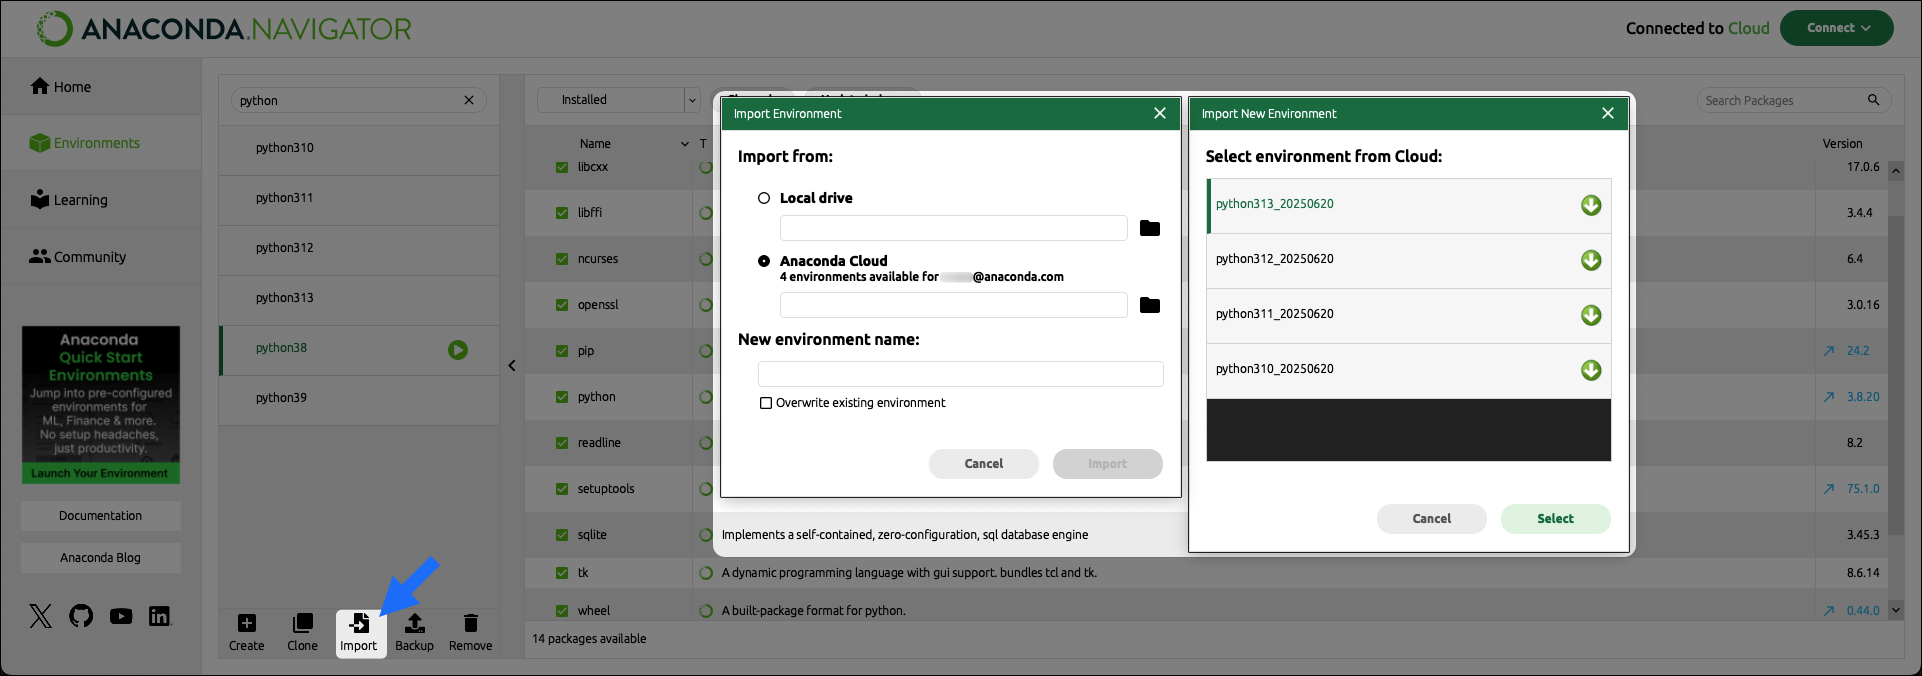
Importing an environment
There are two situations in which you might want to import an environment:- Someone has exported their environment to a
environment.ymlfile and shared it with you, and you want to reproduce their environment on your machine. - You have backed up an environment (either locally or to Anaconda.com), and you want to restore it to the backed up state.
- Importing from a local .yml file
- Importing from Anaconda.com
If someone has shared an
environment.yml file with you, or you have backed up an environment locally:- Save it somewhere on your computer.
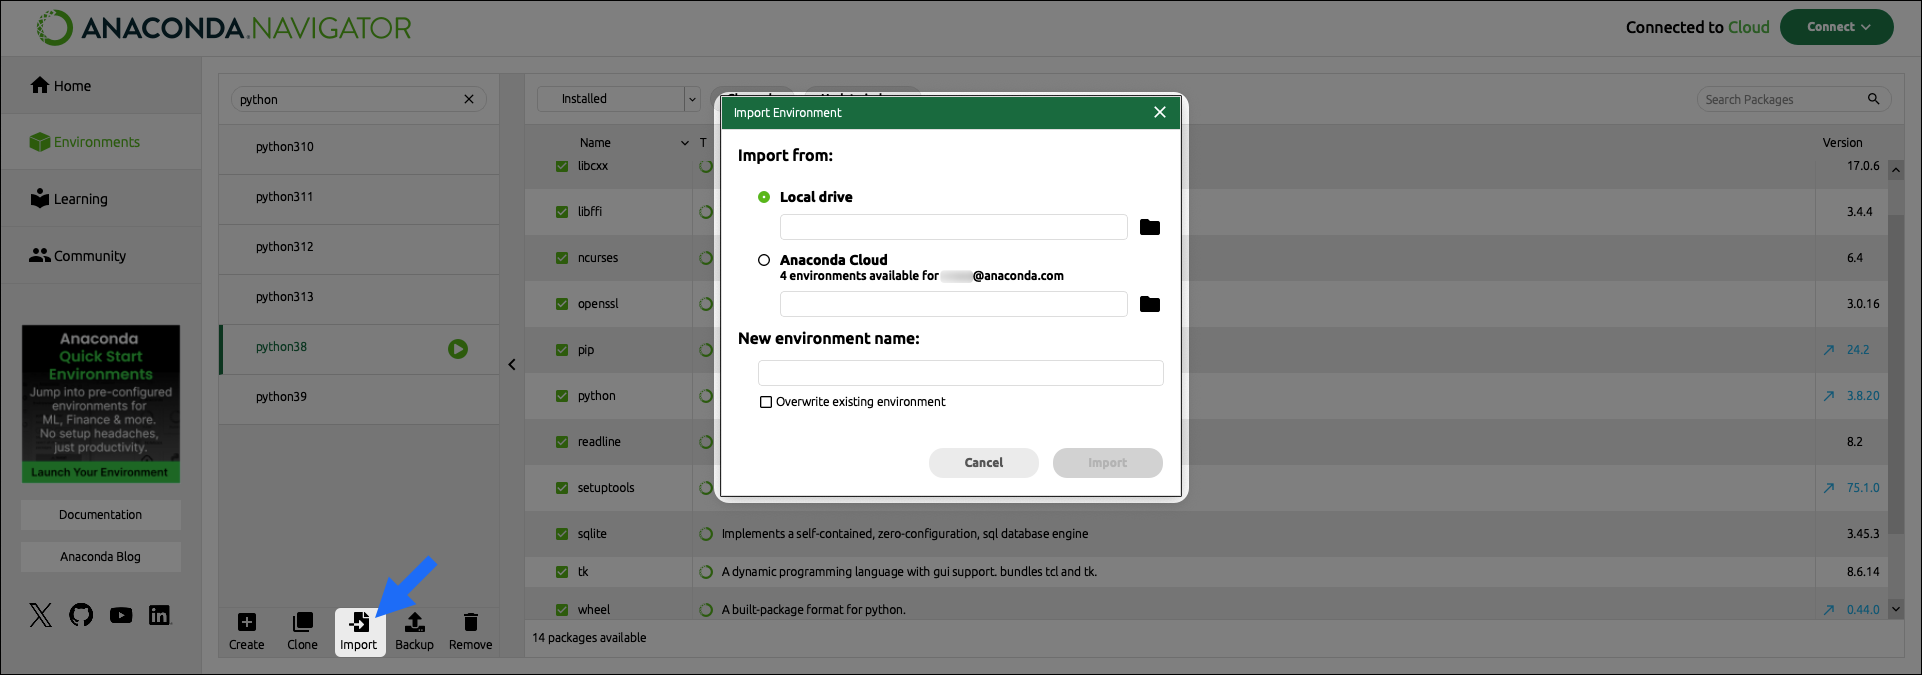
- Click Import at the bottom of the environments list.
- Select Local drive.
-
Click the folder beside Local drive.
-
Browse your local files and select the
.ymlfile you want to import. -
Enter a new name for the new environment (or use the existing name).
Environment names must be unique. To overwrite an existing environment with the same name, select the Overwrite existing environment checkbox.
- Click Import.
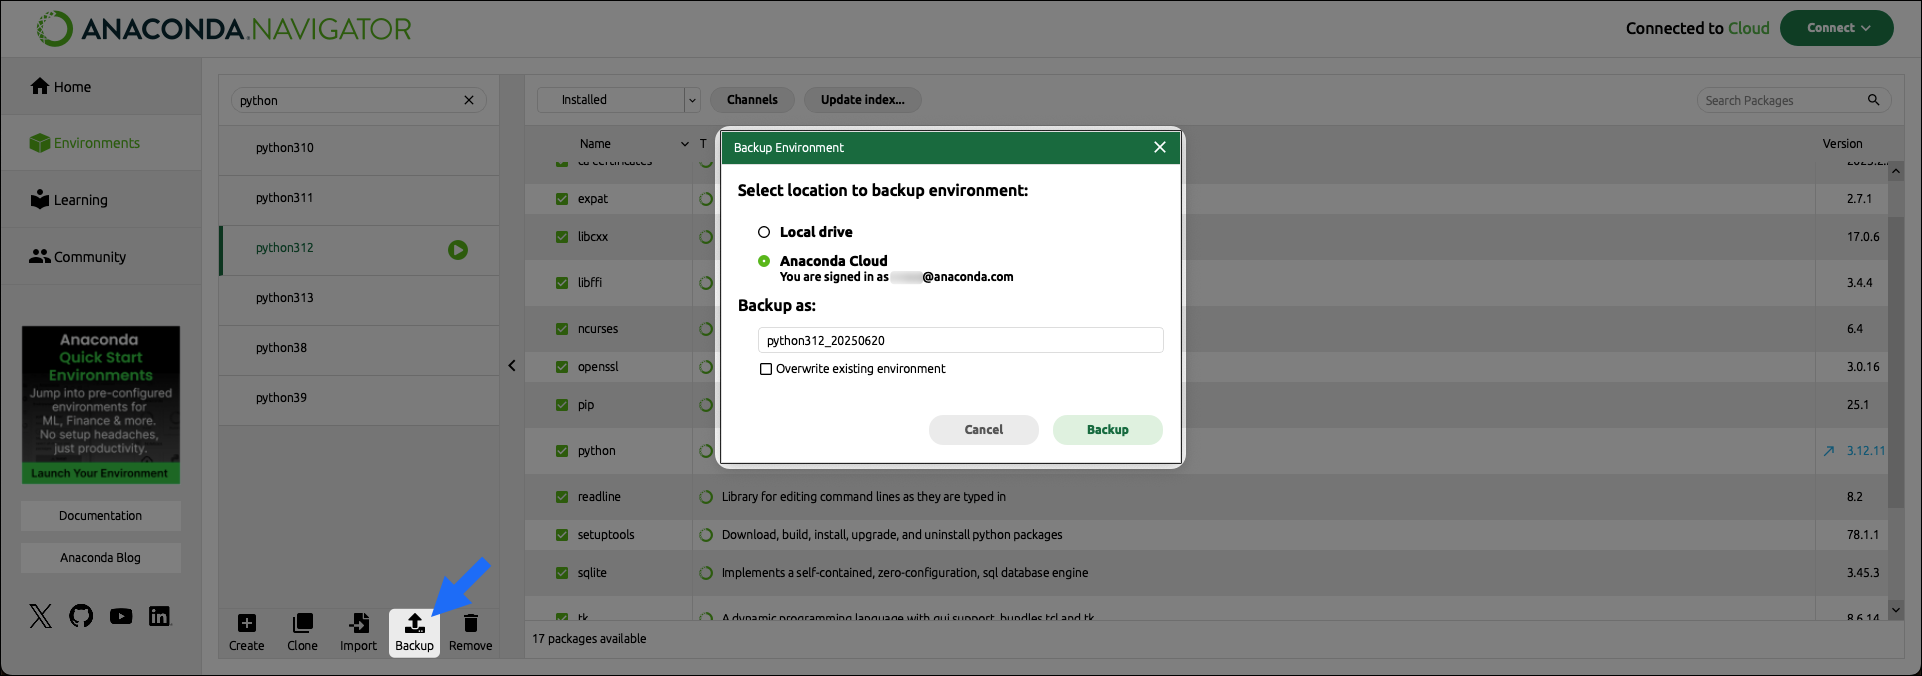
Backing up an environment
Backing up an environment to Anaconda.com protects it from machine malfunctions, such as hard-drive failure, while local backups are valuable for restoring your environment to a previous working state (in case you encounter a package-dependency issue). Anaconda Navigator provides two ways to back up an environment:- Backing up locally
- Backing up to Anaconda.com
- Click on an environment in the list to activate it.
- Click Backup at the bottom of the environments list.
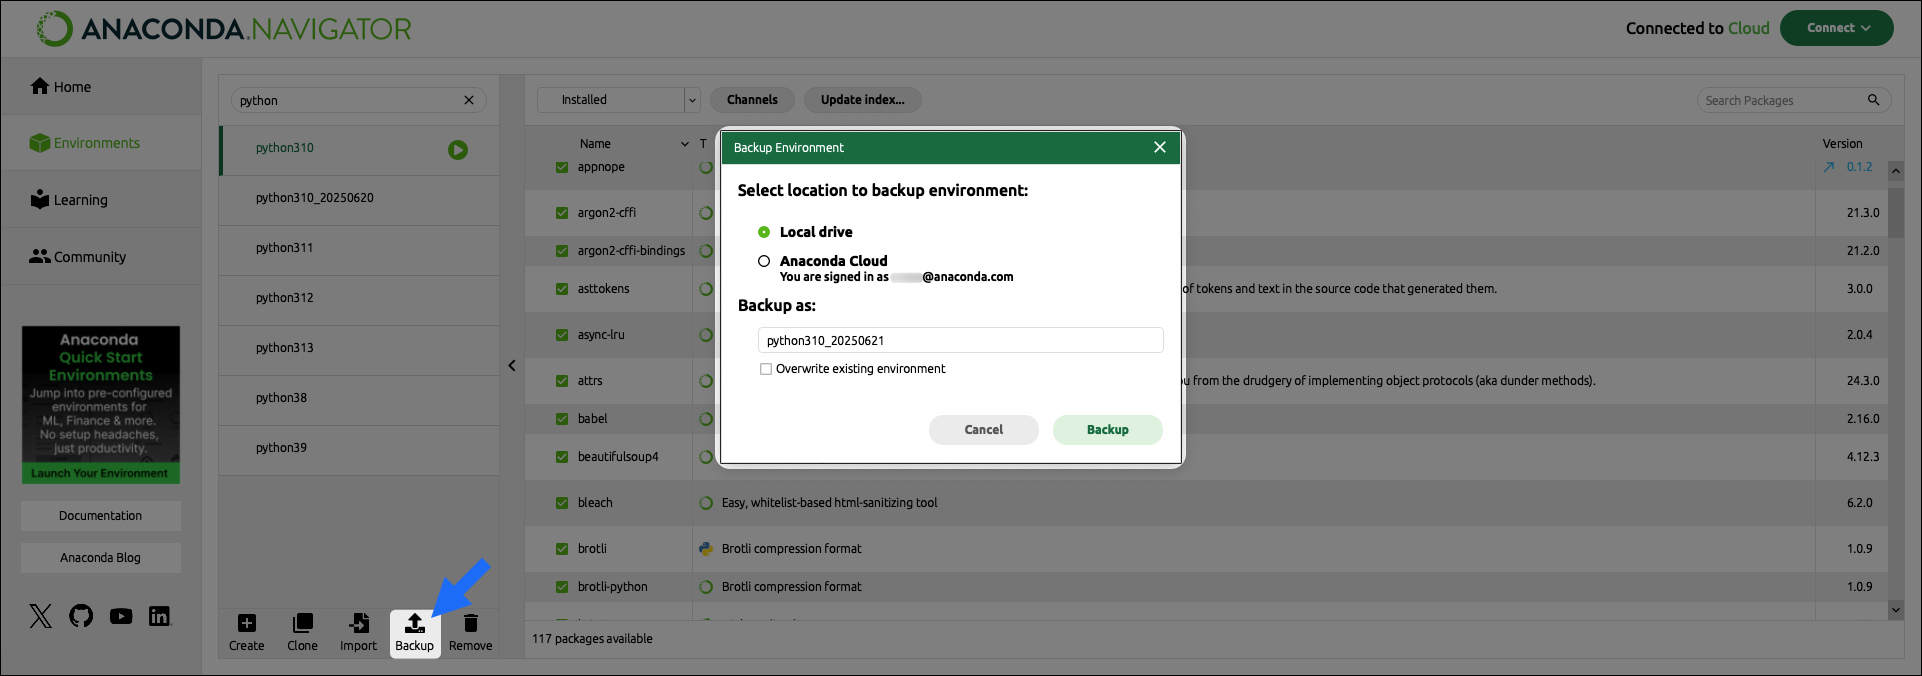
- Select Local drive.
- Click Save.
-
Enter a descriptive name for your backup. By default, backups are named
<ENV_NAME>_YYYYMMDD.yml.Environment names must be unique. To overwrite an existing environment with the same name, select the Overwrite existing environment checkbox. - Choose a location on your computer to save the environment backup file.
- Click Save.
Removing an environment
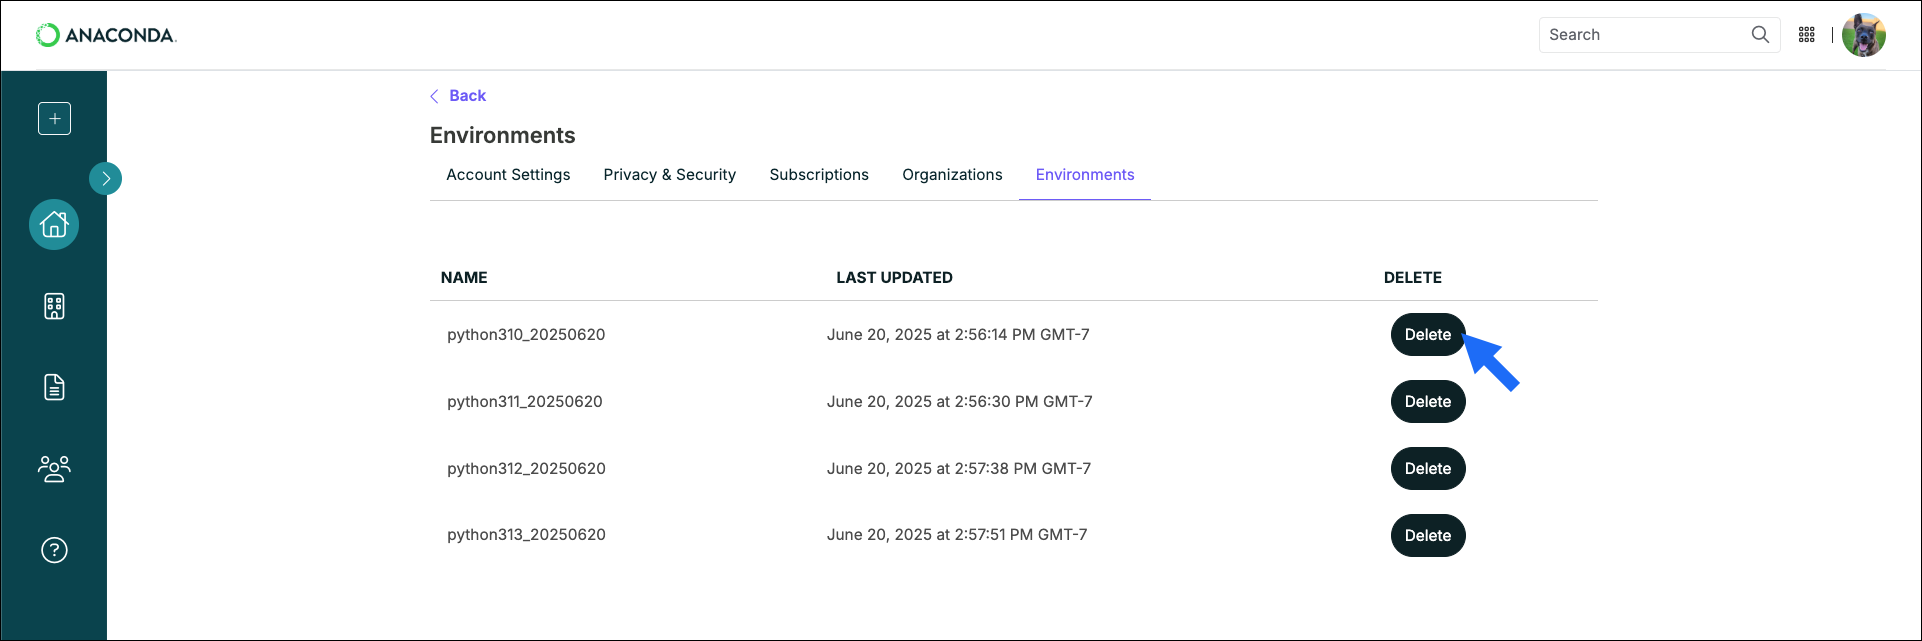
You can use Navigator to remove environments that are stored locally on your computer. Environments that you have backed up to Anaconda.com must be removed from your Anaconda.com Account Settings.- Removing local environments
- Removing backups from Anaconda.com
- Click on an environment in the list to activate it.
-
Click Remove at the bottom of the environments list.

- Click Remove.