Getting started with Package Security Manager (Cloud)
Before you begin
Using Package Security Manager (Cloud) requires membership to an organization with a current subscription. If you’re working with an Anaconda representative, they will create and subscribe your organization for you. Getting started involves installing conda software on your computer, then configuring it to access your organization’s . Configuration involves issuing and setting an organization access , then adding your organization’s channels to your.condarc file. Once you’re set up, you can start building conda for your projects using secure, approved software .
Installing Anaconda software
Installing conda
You can obtain conda by installing either Anaconda Distribution or Miniconda. If you already have conda installed, skip ahead to Installing Anaconda Navigator. If you do not have conda installed, go to anaconda.com/download, create an account or sign in, select either Anaconda Distribution or Miniconda, and then install it on your system before proceeding.If you’re unsure which to download, refer to Getting Started with Anaconda for guidance.
Installing Anaconda Navigator
Anaconda Navigator is a desktop graphical user interface that uses conda to help you manage your environments.If you installed Anaconda Distribution, you already have Anaconda Navigator and can skip ahead to Installing token management tools.
Installing Anaconda Navigator is optional. You can manage your environments and packages using the CLI, if you prefer.
Installing Anaconda Navigator is optional. You can manage your environments and packages using the CLI, if you prefer.
If you received a “conda: command not found” error, see this troubleshooting topic to resolve the issue.
Installing token management tools
Install both of the following tools to manage your Anaconda.com organization access token.Installing anaconda-auth
Installing anaconda-auth
anaconda-auth is used to authenticate you (log you in) to your Anaconda.com organization at the command line. It can also be used to issue and set a new Anaconda.com organization access token, and can (optionally) configure your .condarc file to use Anaconda’s curated repository channels by default.- Open Anaconda Prompt (Terminal on macOS/Linux).
-
Install
anaconda-auth:For more information about theanaconda-authpackage, see anaconda-auth reference.
Installing conda-token
Installing conda-token
conda-token is used to set an organization access token that you have issued for yourself from your Anaconda.com organization or received from your organization administrator.- Open Anaconda Prompt (Terminal on macOS/Linux).
-
Install
conda-token:https://repo.anaconda.cloud/repo/anaconda-toolsis a public channel hosted and maintained by Anaconda that contains theconda-tokenpackage.
Issuing and setting your token
In order to authenticate to Anaconda, you must issue and set an organization access token for yourself. For more information about tokens, see Tokens.You must be assigned a seat within your organization to issue yourself a token. If you have not been assigned a seat, speak with your organization administrator.
- If you are issuing a token for the first time or need to issue a new token, use the
anaconda-authCLI method. - If you prefer to use applications with a user interface, issue your token from Anaconda.com and set it with Anaconda Navigator.
- If a token has been provided to you, set it using the
conda-tokenCLI method.
Issuing a token using
anaconda-auth automatically sets the token for you.- Open Anaconda Prompt (Terminal on macOS/Linux).
-
Issue and set your token by running the following command:
This command initiates a sign-in workflow in a browser window. If you are already signed in, authentication is automatically completed. If you are not signed in, you are prompted to sign in with your Anaconda.com credentials.If your organization has configured SSO, you are redirected to your company’s SSO login page.
If you belong to more than one organization, use the arrow keys to select the organization you want to issue and set a token for.
This command also configures your.condarcfile to use Anaconda’s curated repository channels atrepo.anaconda.cloud. - Return to your terminal and follow the prompts to complete the workflow.
For information about where your token is stored on your system, see Token storage.
Important information about the .condarc file
The .condarc file is a configuration file that tells conda where to look for packages. Here is an example of what your .condarc file might look like:
Example .condarc file
channels: list in your .condarc file. If the requested package is not located in that channel, conda continues searching using the next entry in the channels: list.
When conda reaches the defaults entry in the channels: list, it searches the channels listed under the default_channels: list, in the same descending order. This is called “channel priority”, and it determines which source conda uses first when resolving packages.
In this example for Business tier, conda will look for a requested package in your organization’s channel first, then will look in the default channels in listed order, starting with https://repo.anaconda.cloud/repo/main, then https://repo.anaconda.cloud/repo/r, and finally, in https://repo.anaconda.cloud/repo/msys2.
For Pro tier (legacy), conda will look in the default channels in listed order, starting with https://repo.anaconda.cloud/repo/main, then https://repo.anaconda.cloud/repo/r, and finally, in https://repo.anaconda.cloud/repo/msys2.
For more information regarding the .condarc file, see the official conda documentation.
Viewing your .condarc file
You can view and edit your .condarc file in either Navigator or the CLI:
In Anaconda Navigator, navigate to Preferences from the menu bar and select Configure Conda.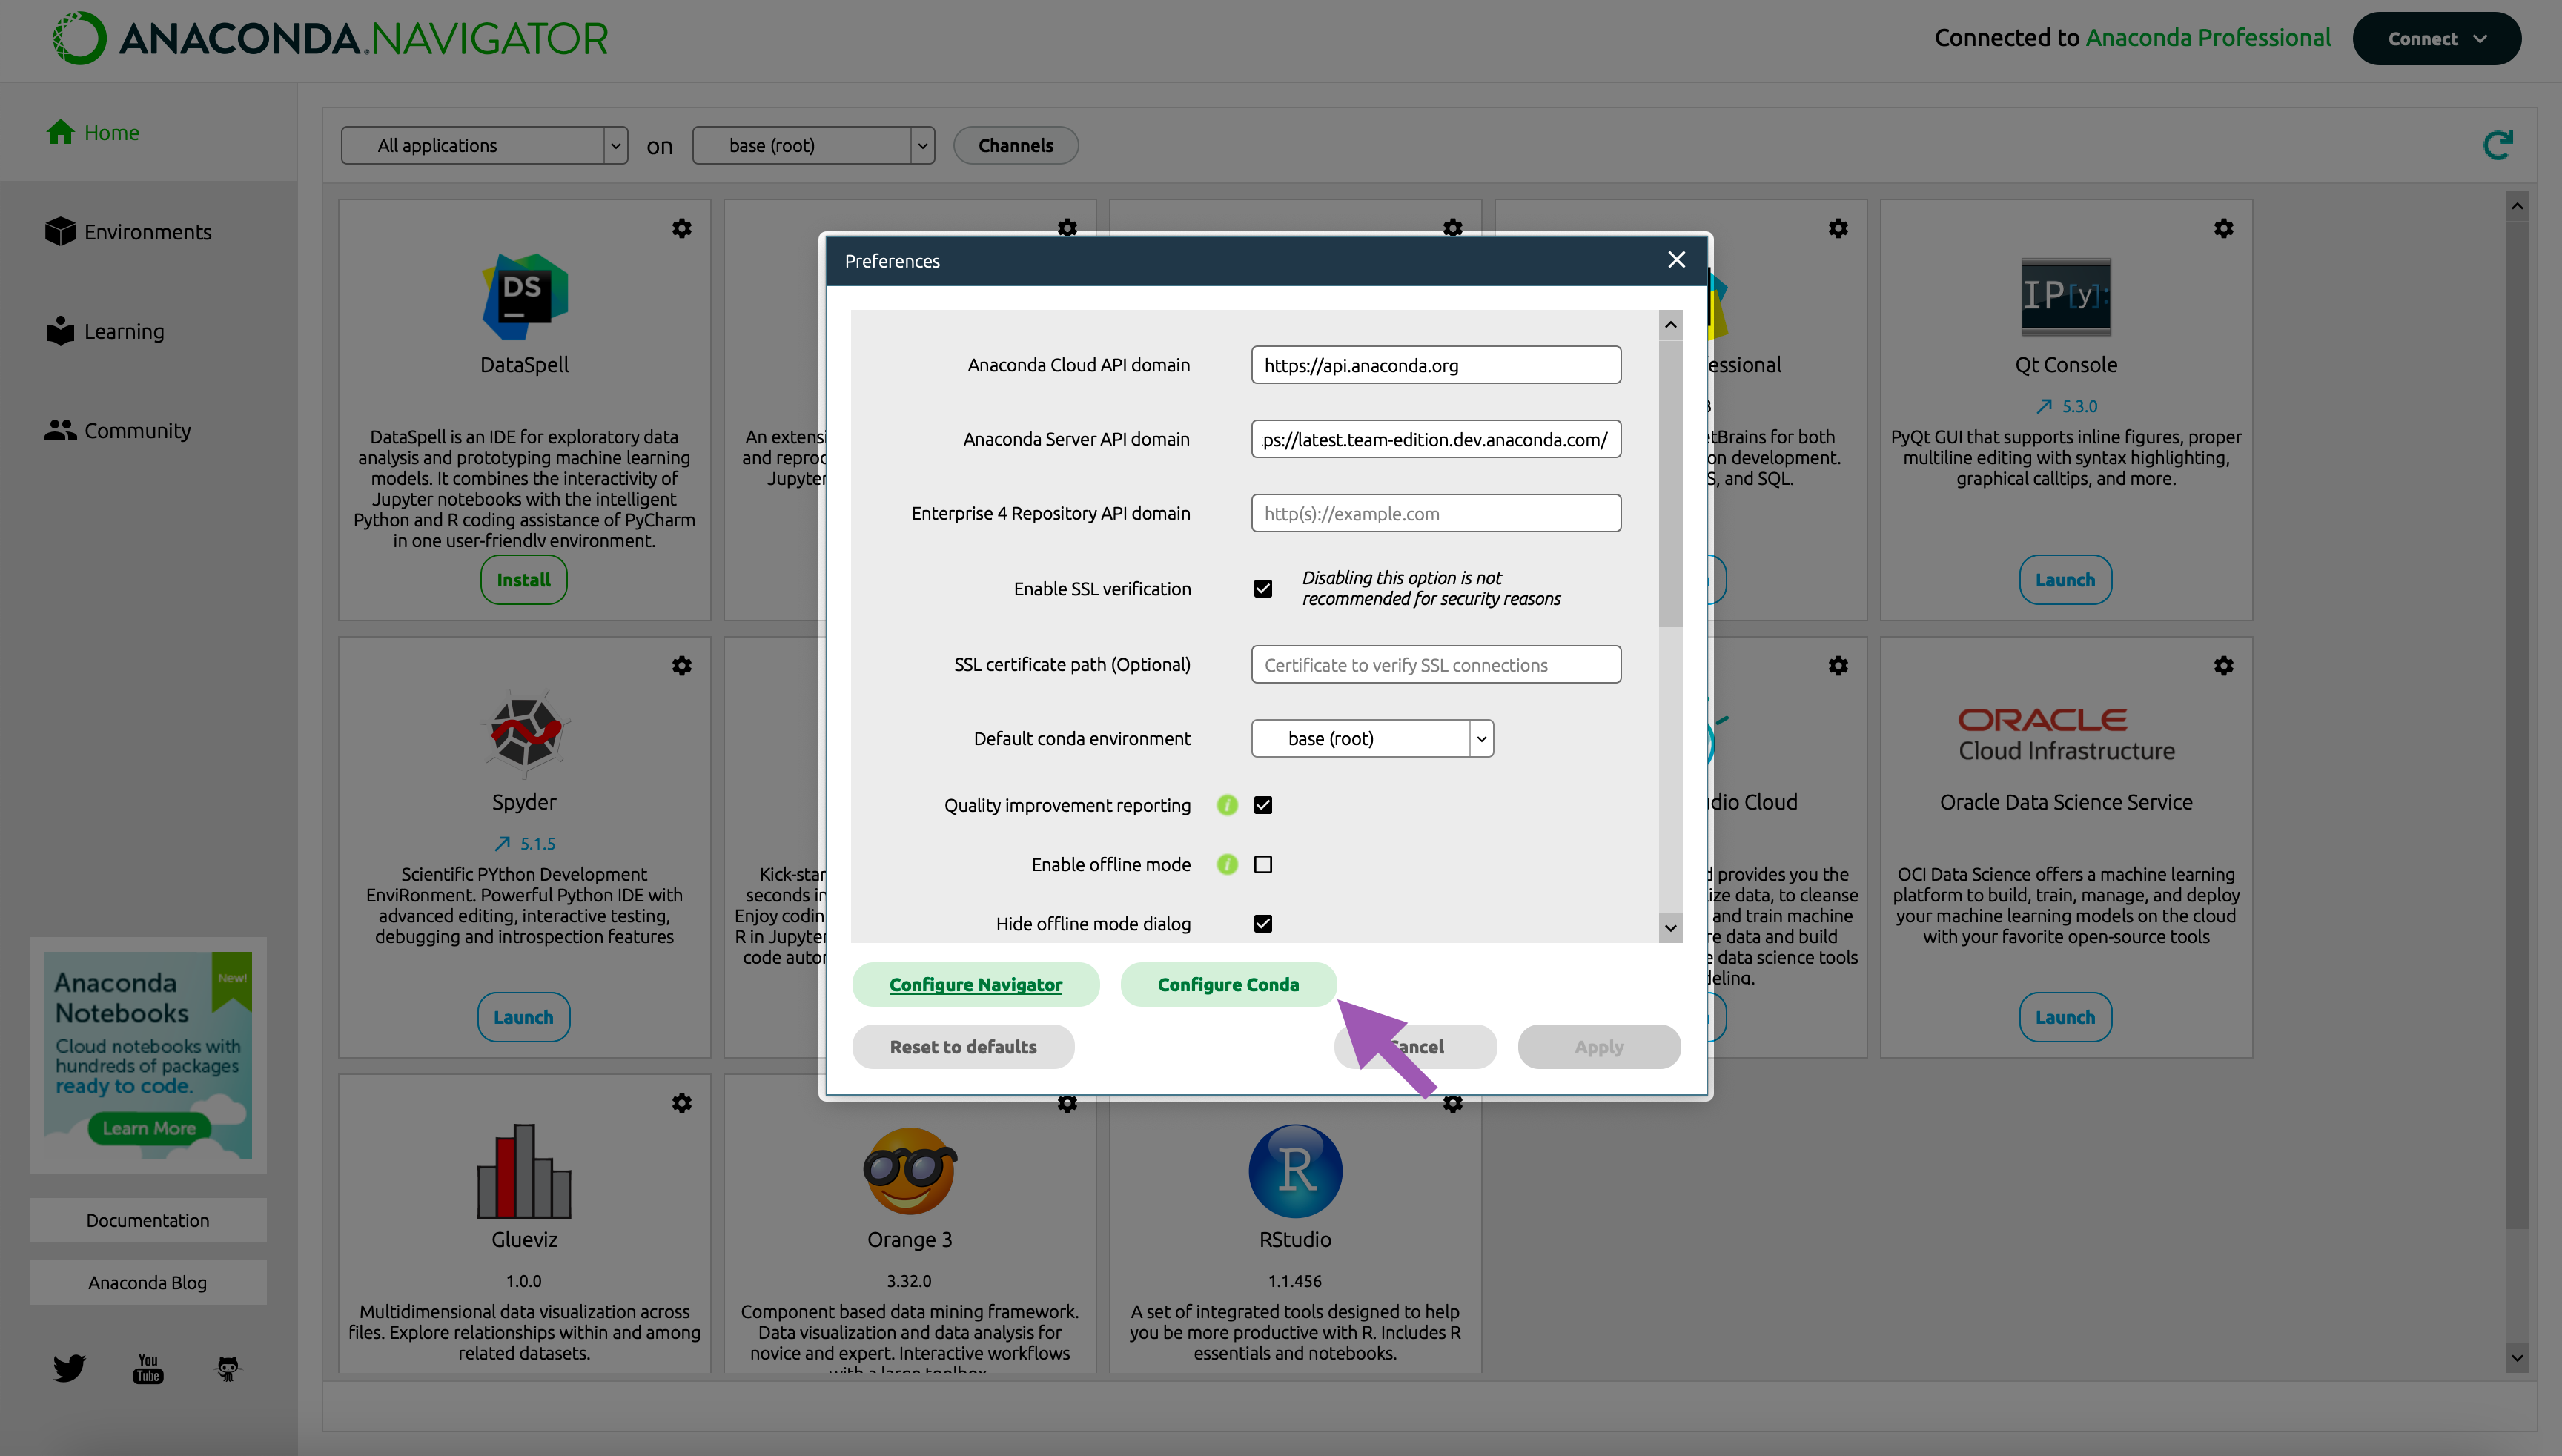
You can edit the
.condarc file directly from this view.Adding an organization channel to your .condarc file
Business tier only.
.condarc file to tell conda where the channel is located.
Complete the following steps to add one of your organizations’ channels to your .condarc file:
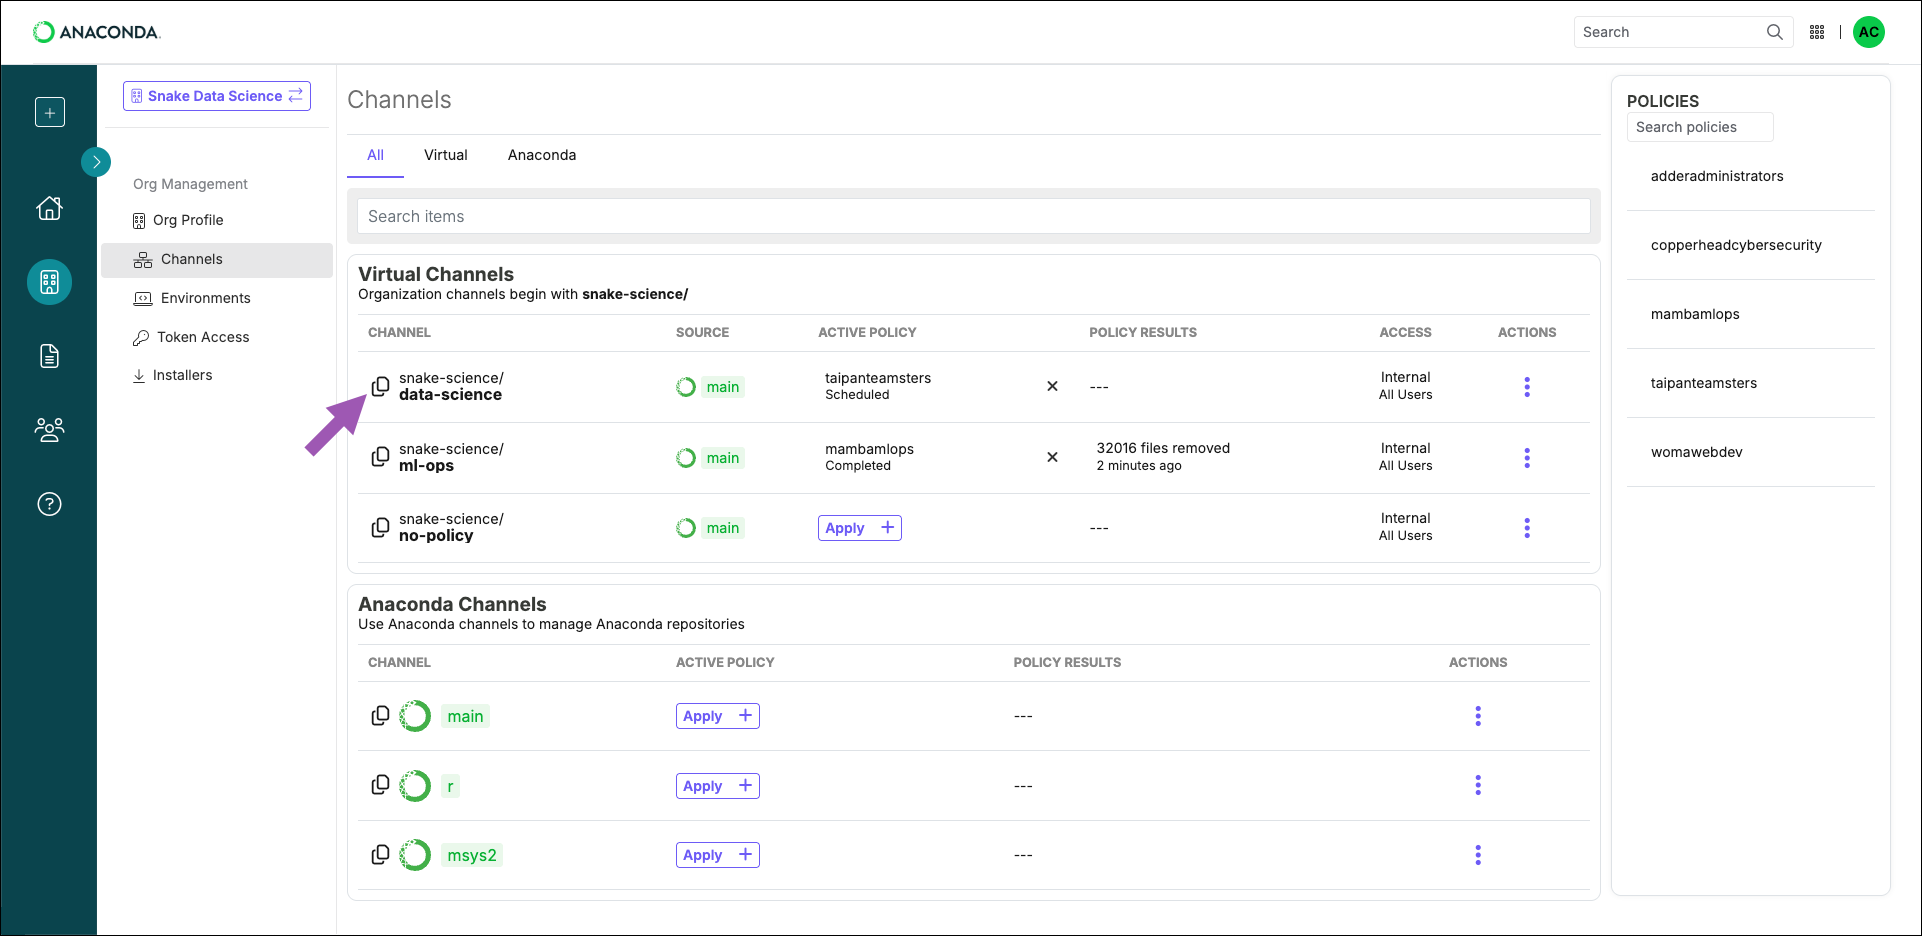
- Navigate to your Organizations page.
- Select your organization.
- Select Channels from the left-hand navigation.
-
Select Copy channel path.
-
Open your terminal and run the following command:
This command adds the specified channel to the top of your
channels:list, giving it top priority when conda is searching for packages. For more information about channel priority and additional conda config command arguments, see Channels.Example .condarc fileIf you want to use your organizations’ channels exclusively, make sure that they are the only channels present in your.condarc’schannels:list.
Using Anaconda behind a firewall or proxy (Optional)
Some companies have security policies that prevent communications on their network with external servers like Anaconda. Under these circumstances, you’ll need to connect to your company’s firewall/proxy server in order to download packages successfully. To connect to a firewall/proxy server, you’ll need to include aproxy_servers: section in the .condarc file that contains the URL to the proxy server. This entry must also contain a username and password for logging in to the proxy server. Speak with your IT Administrator if you do not have this information.
There are no commands to include this portion of the .condarc file, so you need to manually include the following lines:
If your password contains special characters, you’ll need to escape them using percent encoding as described here.
HTTP_PROXY and HTTPS_PROXY environment variables to utilize the proxy server. To export your environment variables, open a terminal and run the following commands:
Verifying your configurations
Test your configurations and verify that conda downloads packages from the desired channel in either Anaconda Navigator or the CLI:-
Open Anaconda Navigator.
If you downloaded miniconda, you can start Anaconda Navigator by running
anaconda-navigatorin your Anaconda Prompt (Terminal on macOS/Linux). -
Go to Environments in the secondary navigation, then select Create at the bottom of the window.
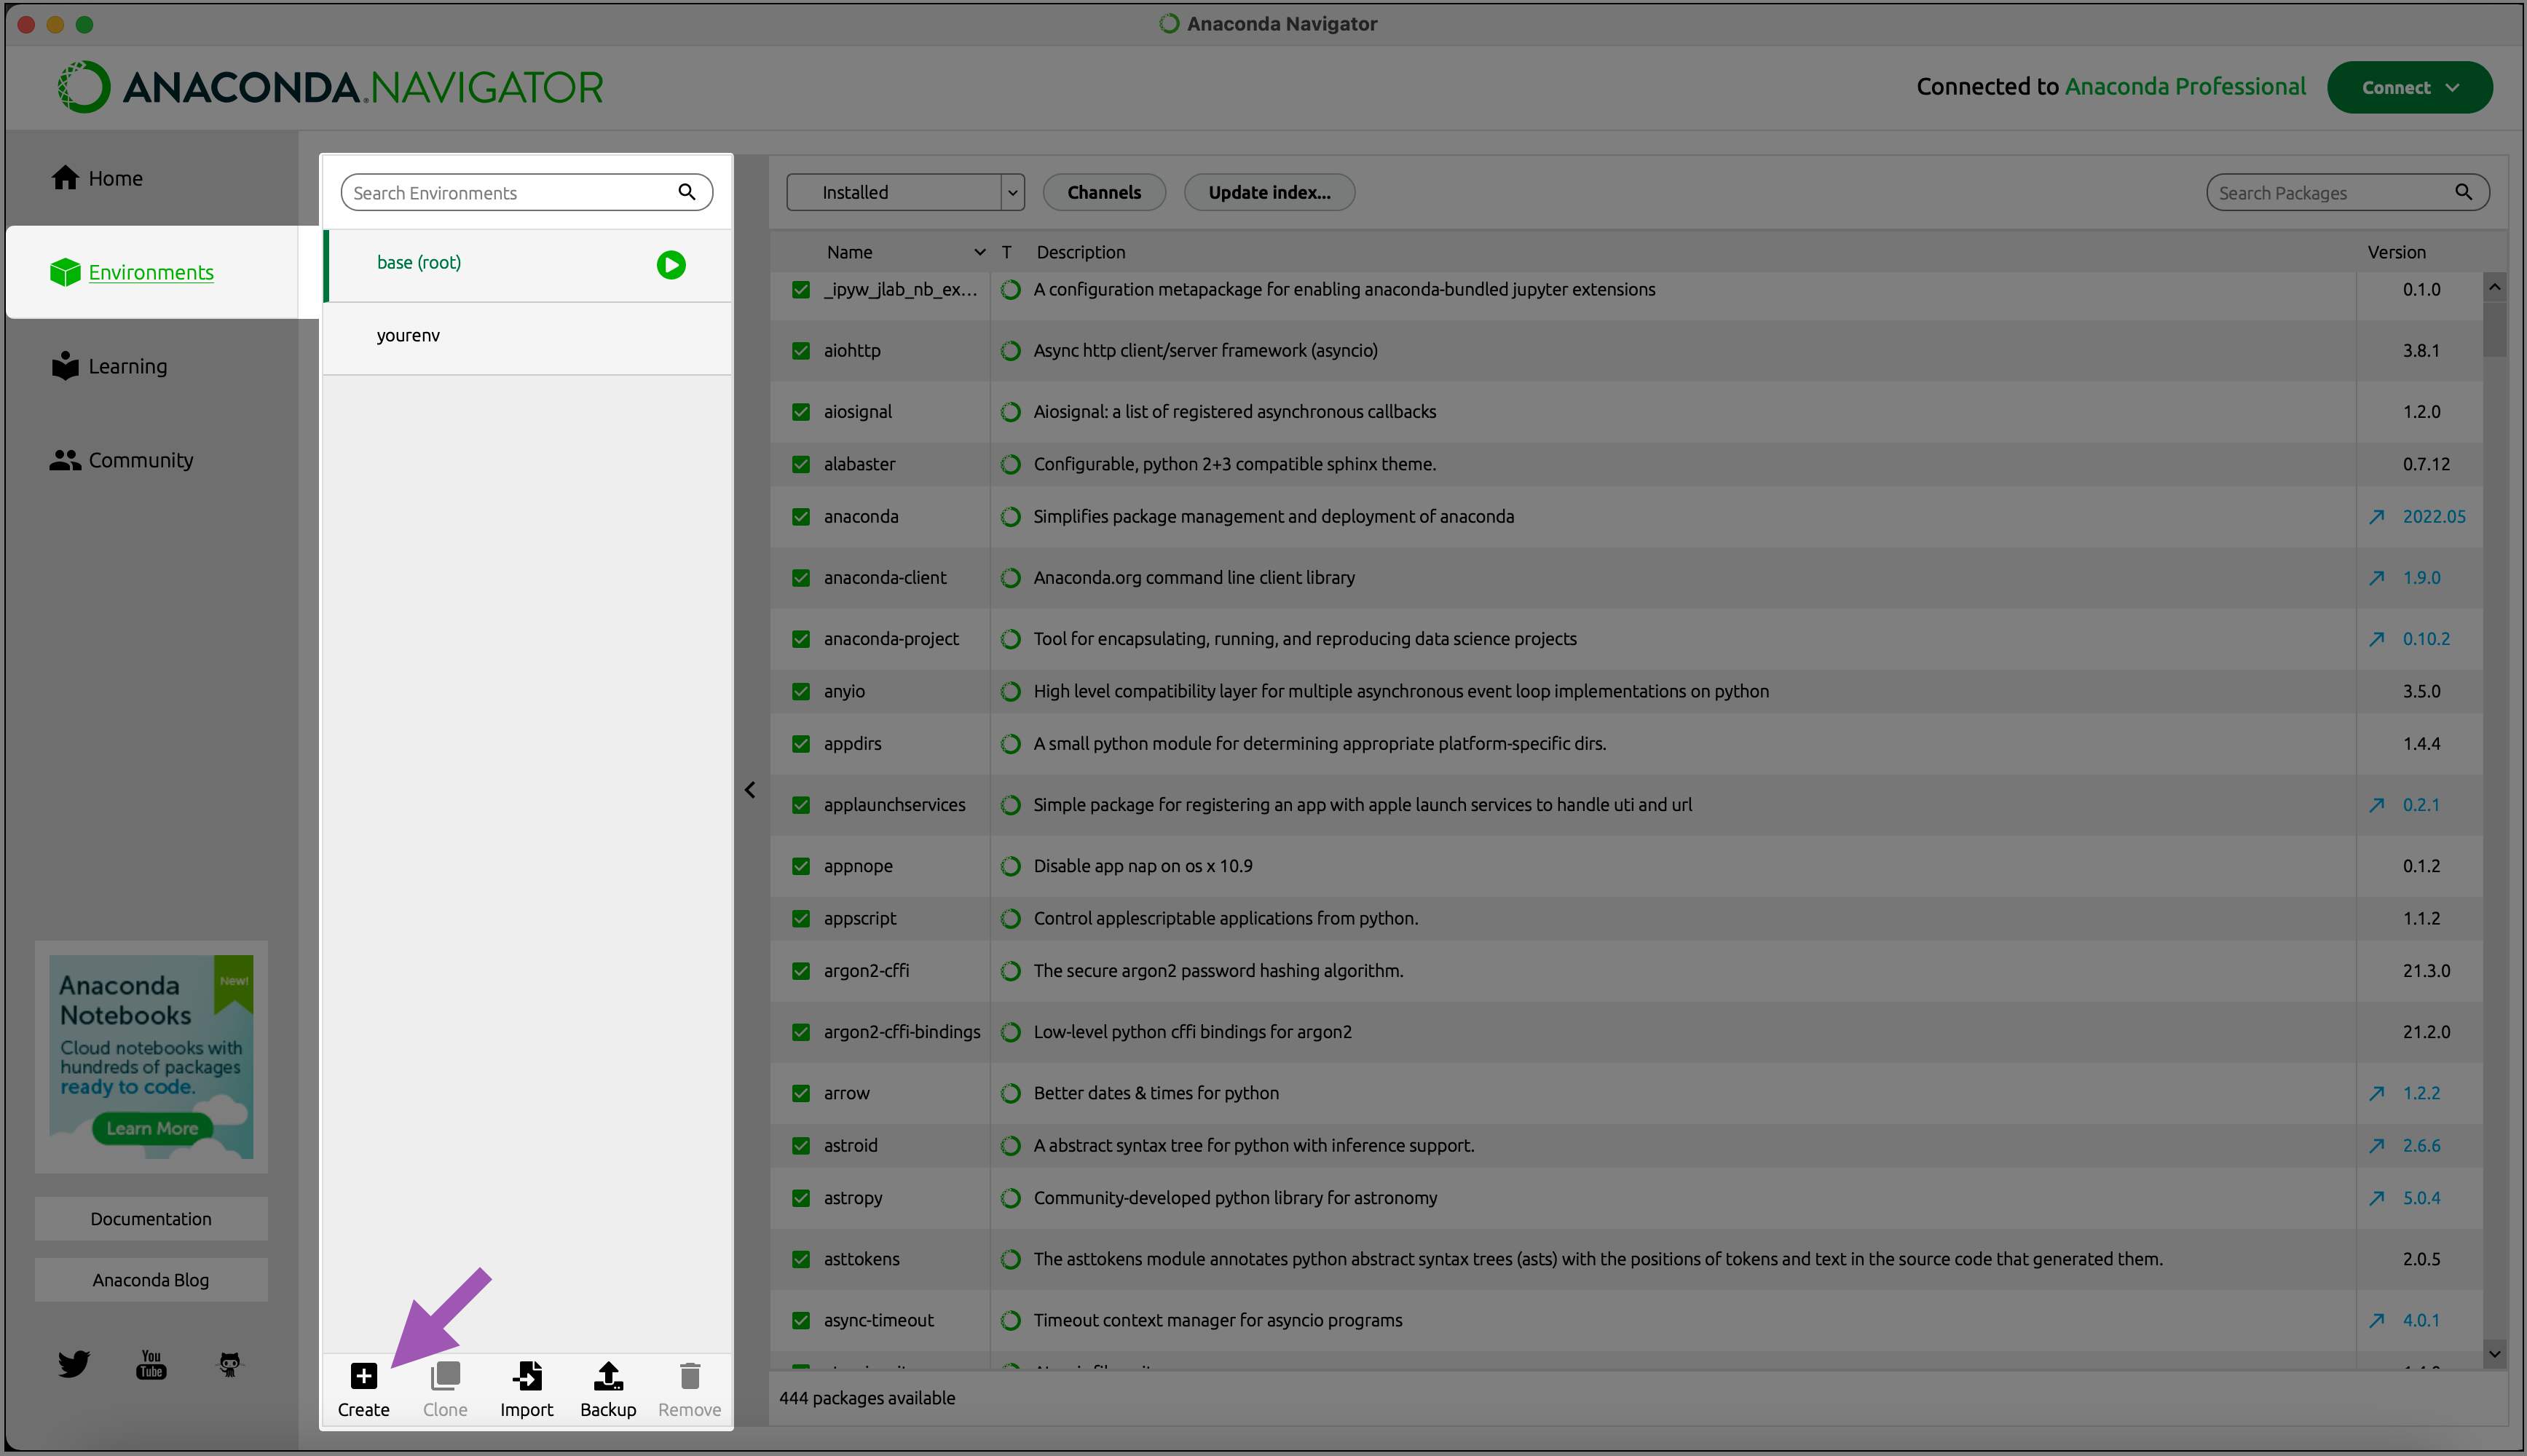
- Enter a name for your environment and select a version of Python (3.11 is preferred) from the dropdown menu, then click Create.
-
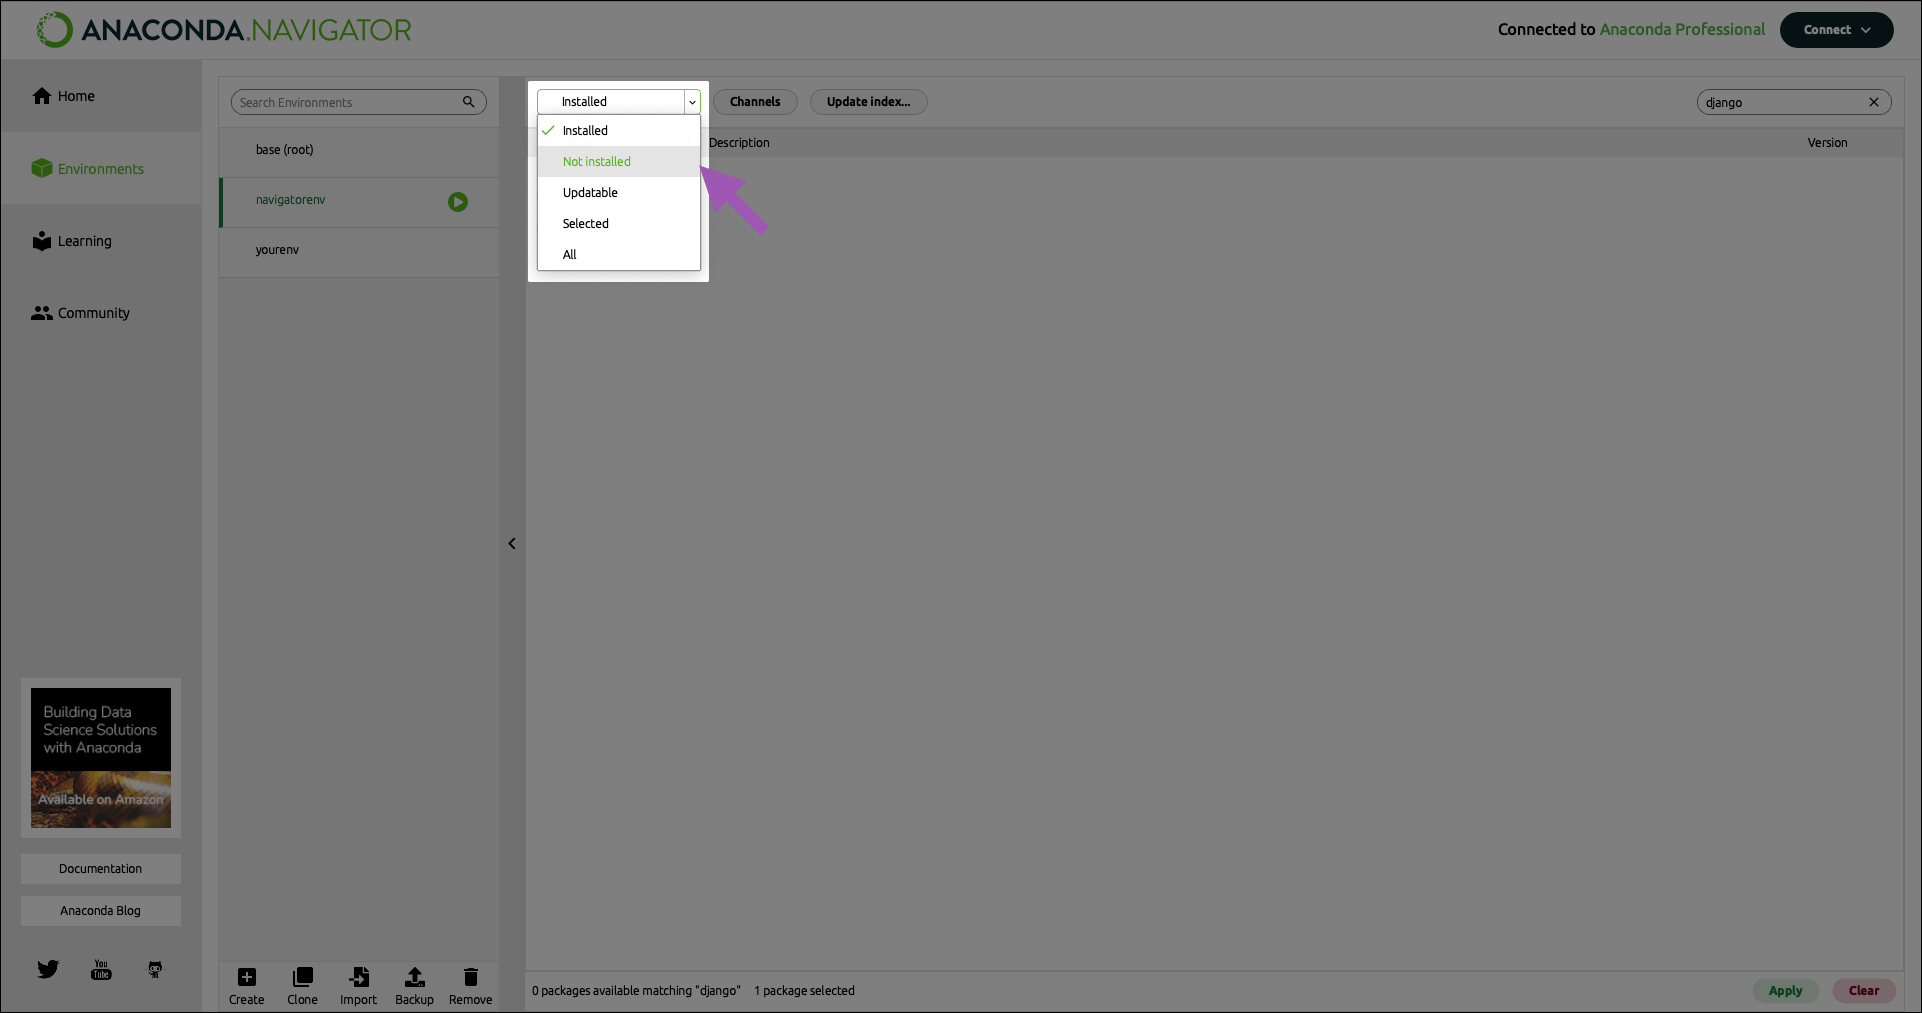
Change the package selector to Not installed. This will show you packages that are available from your channel but are not installed on your machine.
-
If you know the name of the package you need, you can enter it in the search bar to locate the package. Select a package to download and click Apply.
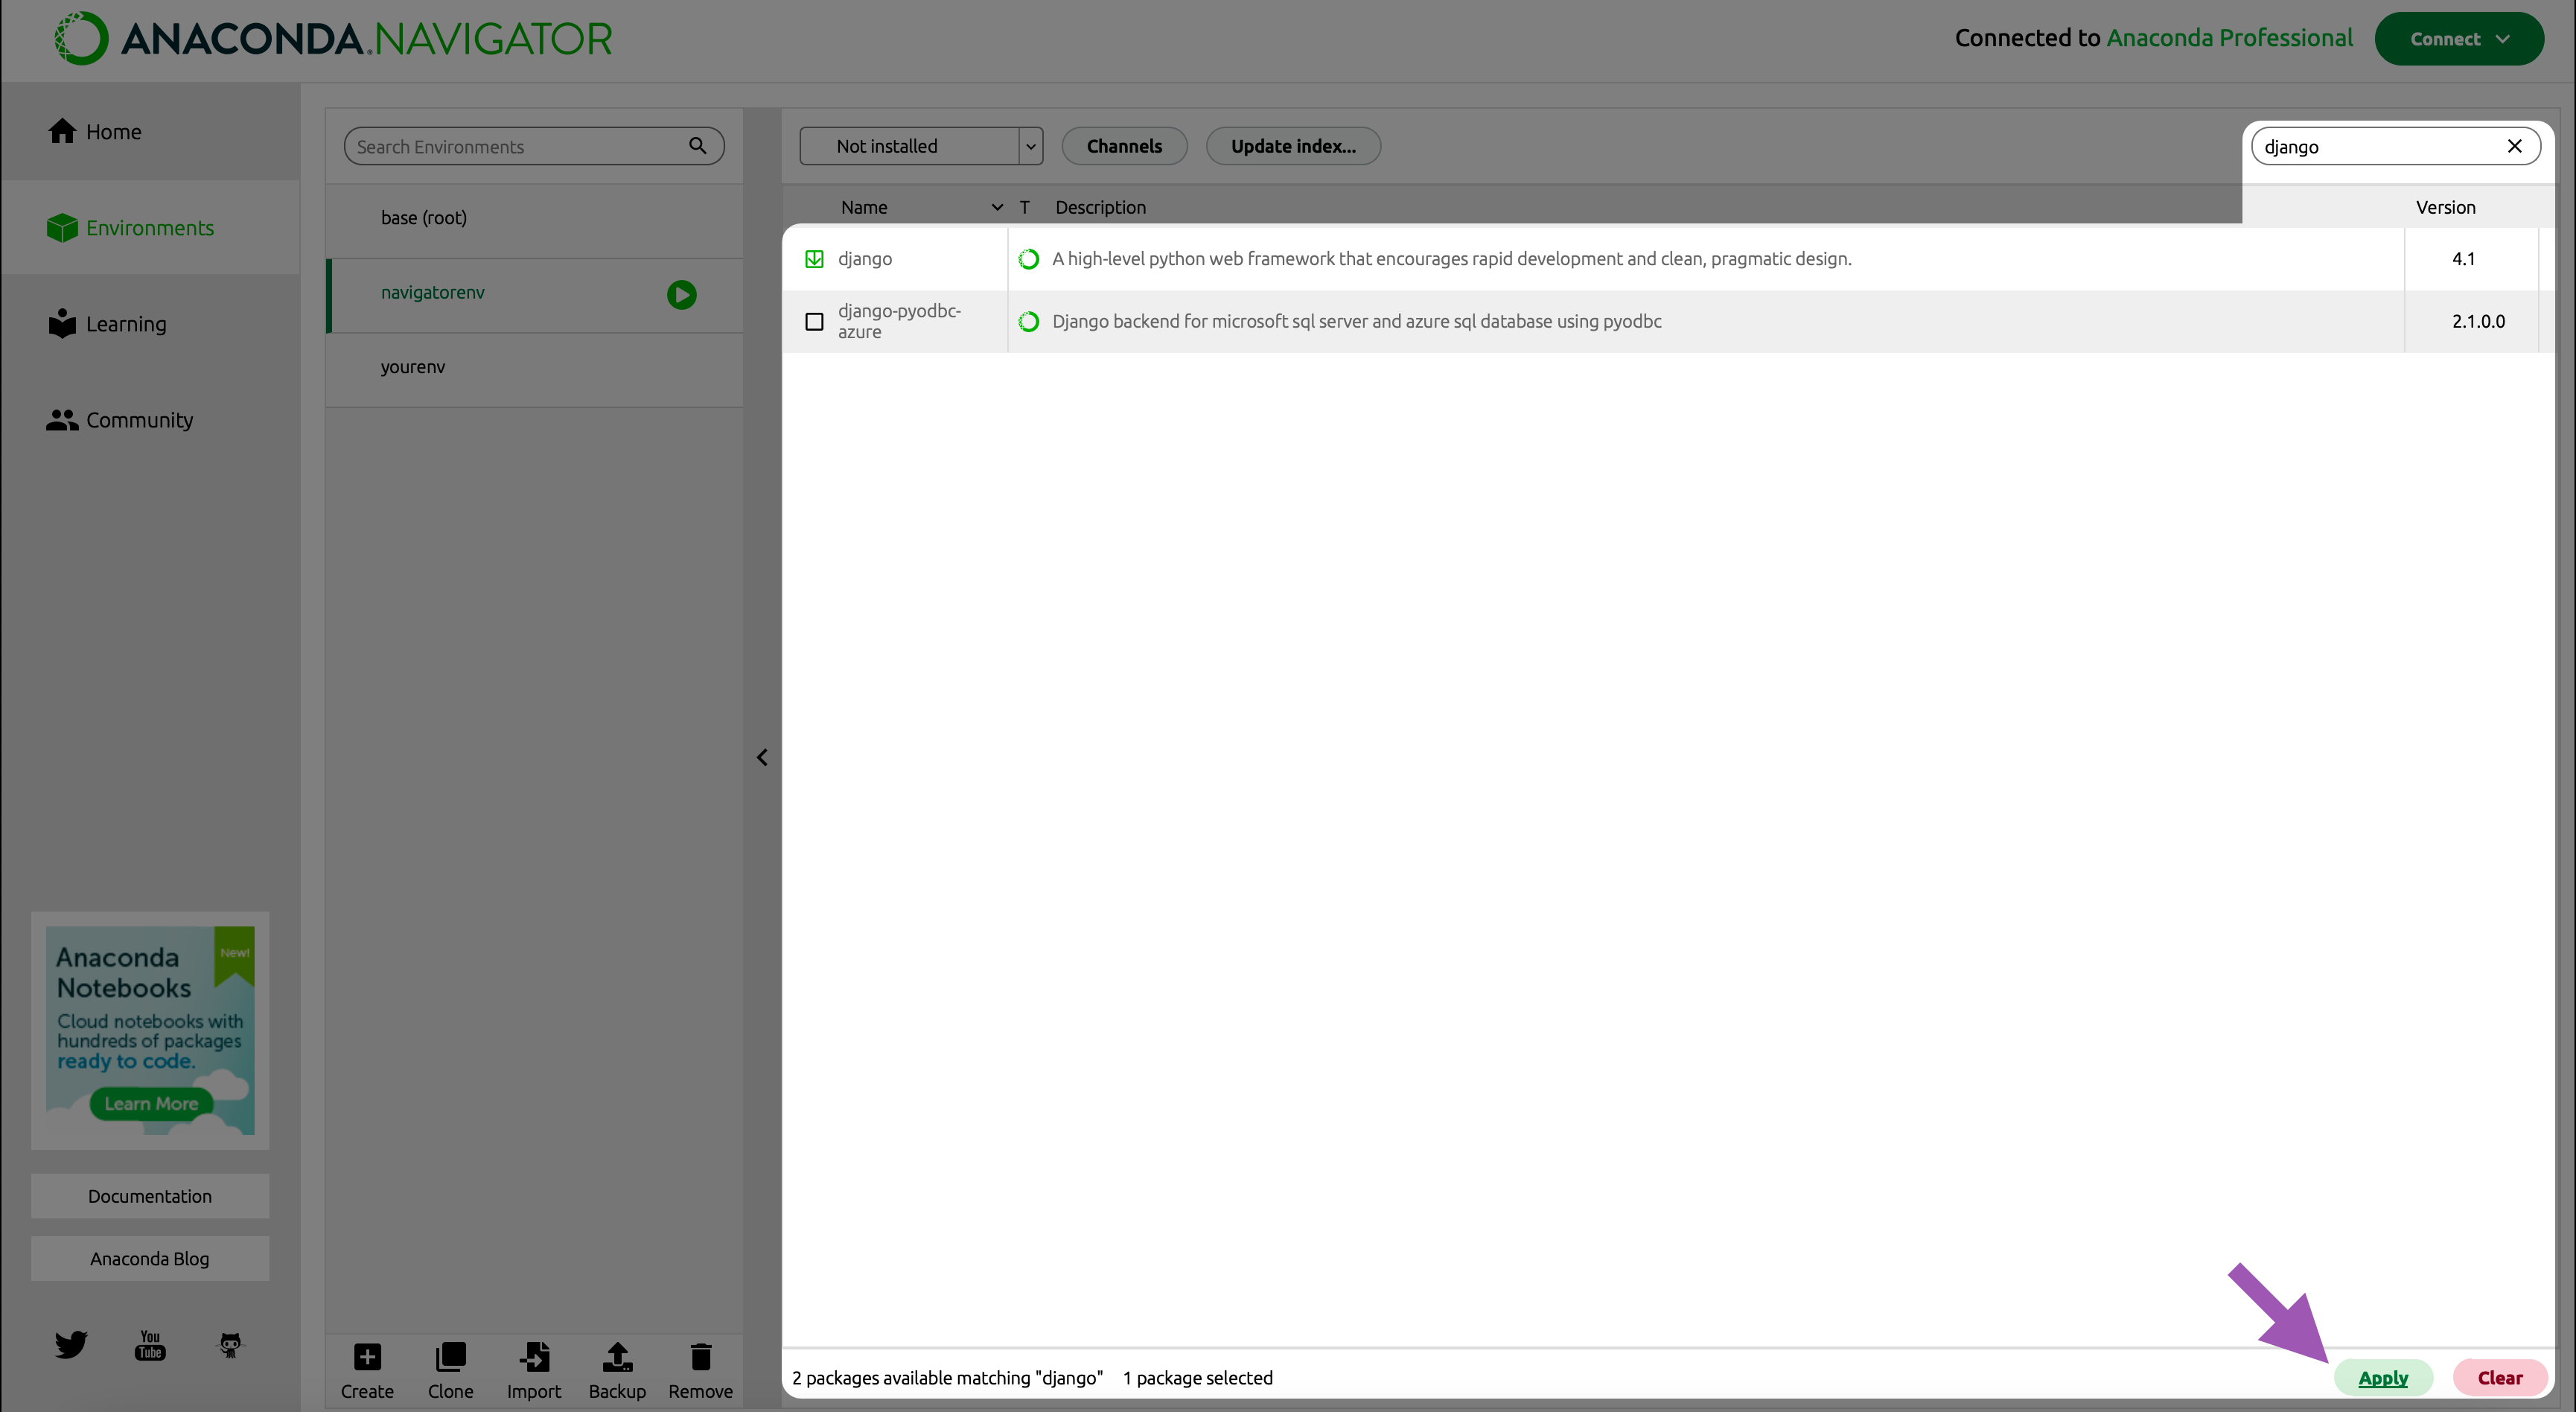
-
Click Apply to install the selected packages (and their dependencies).
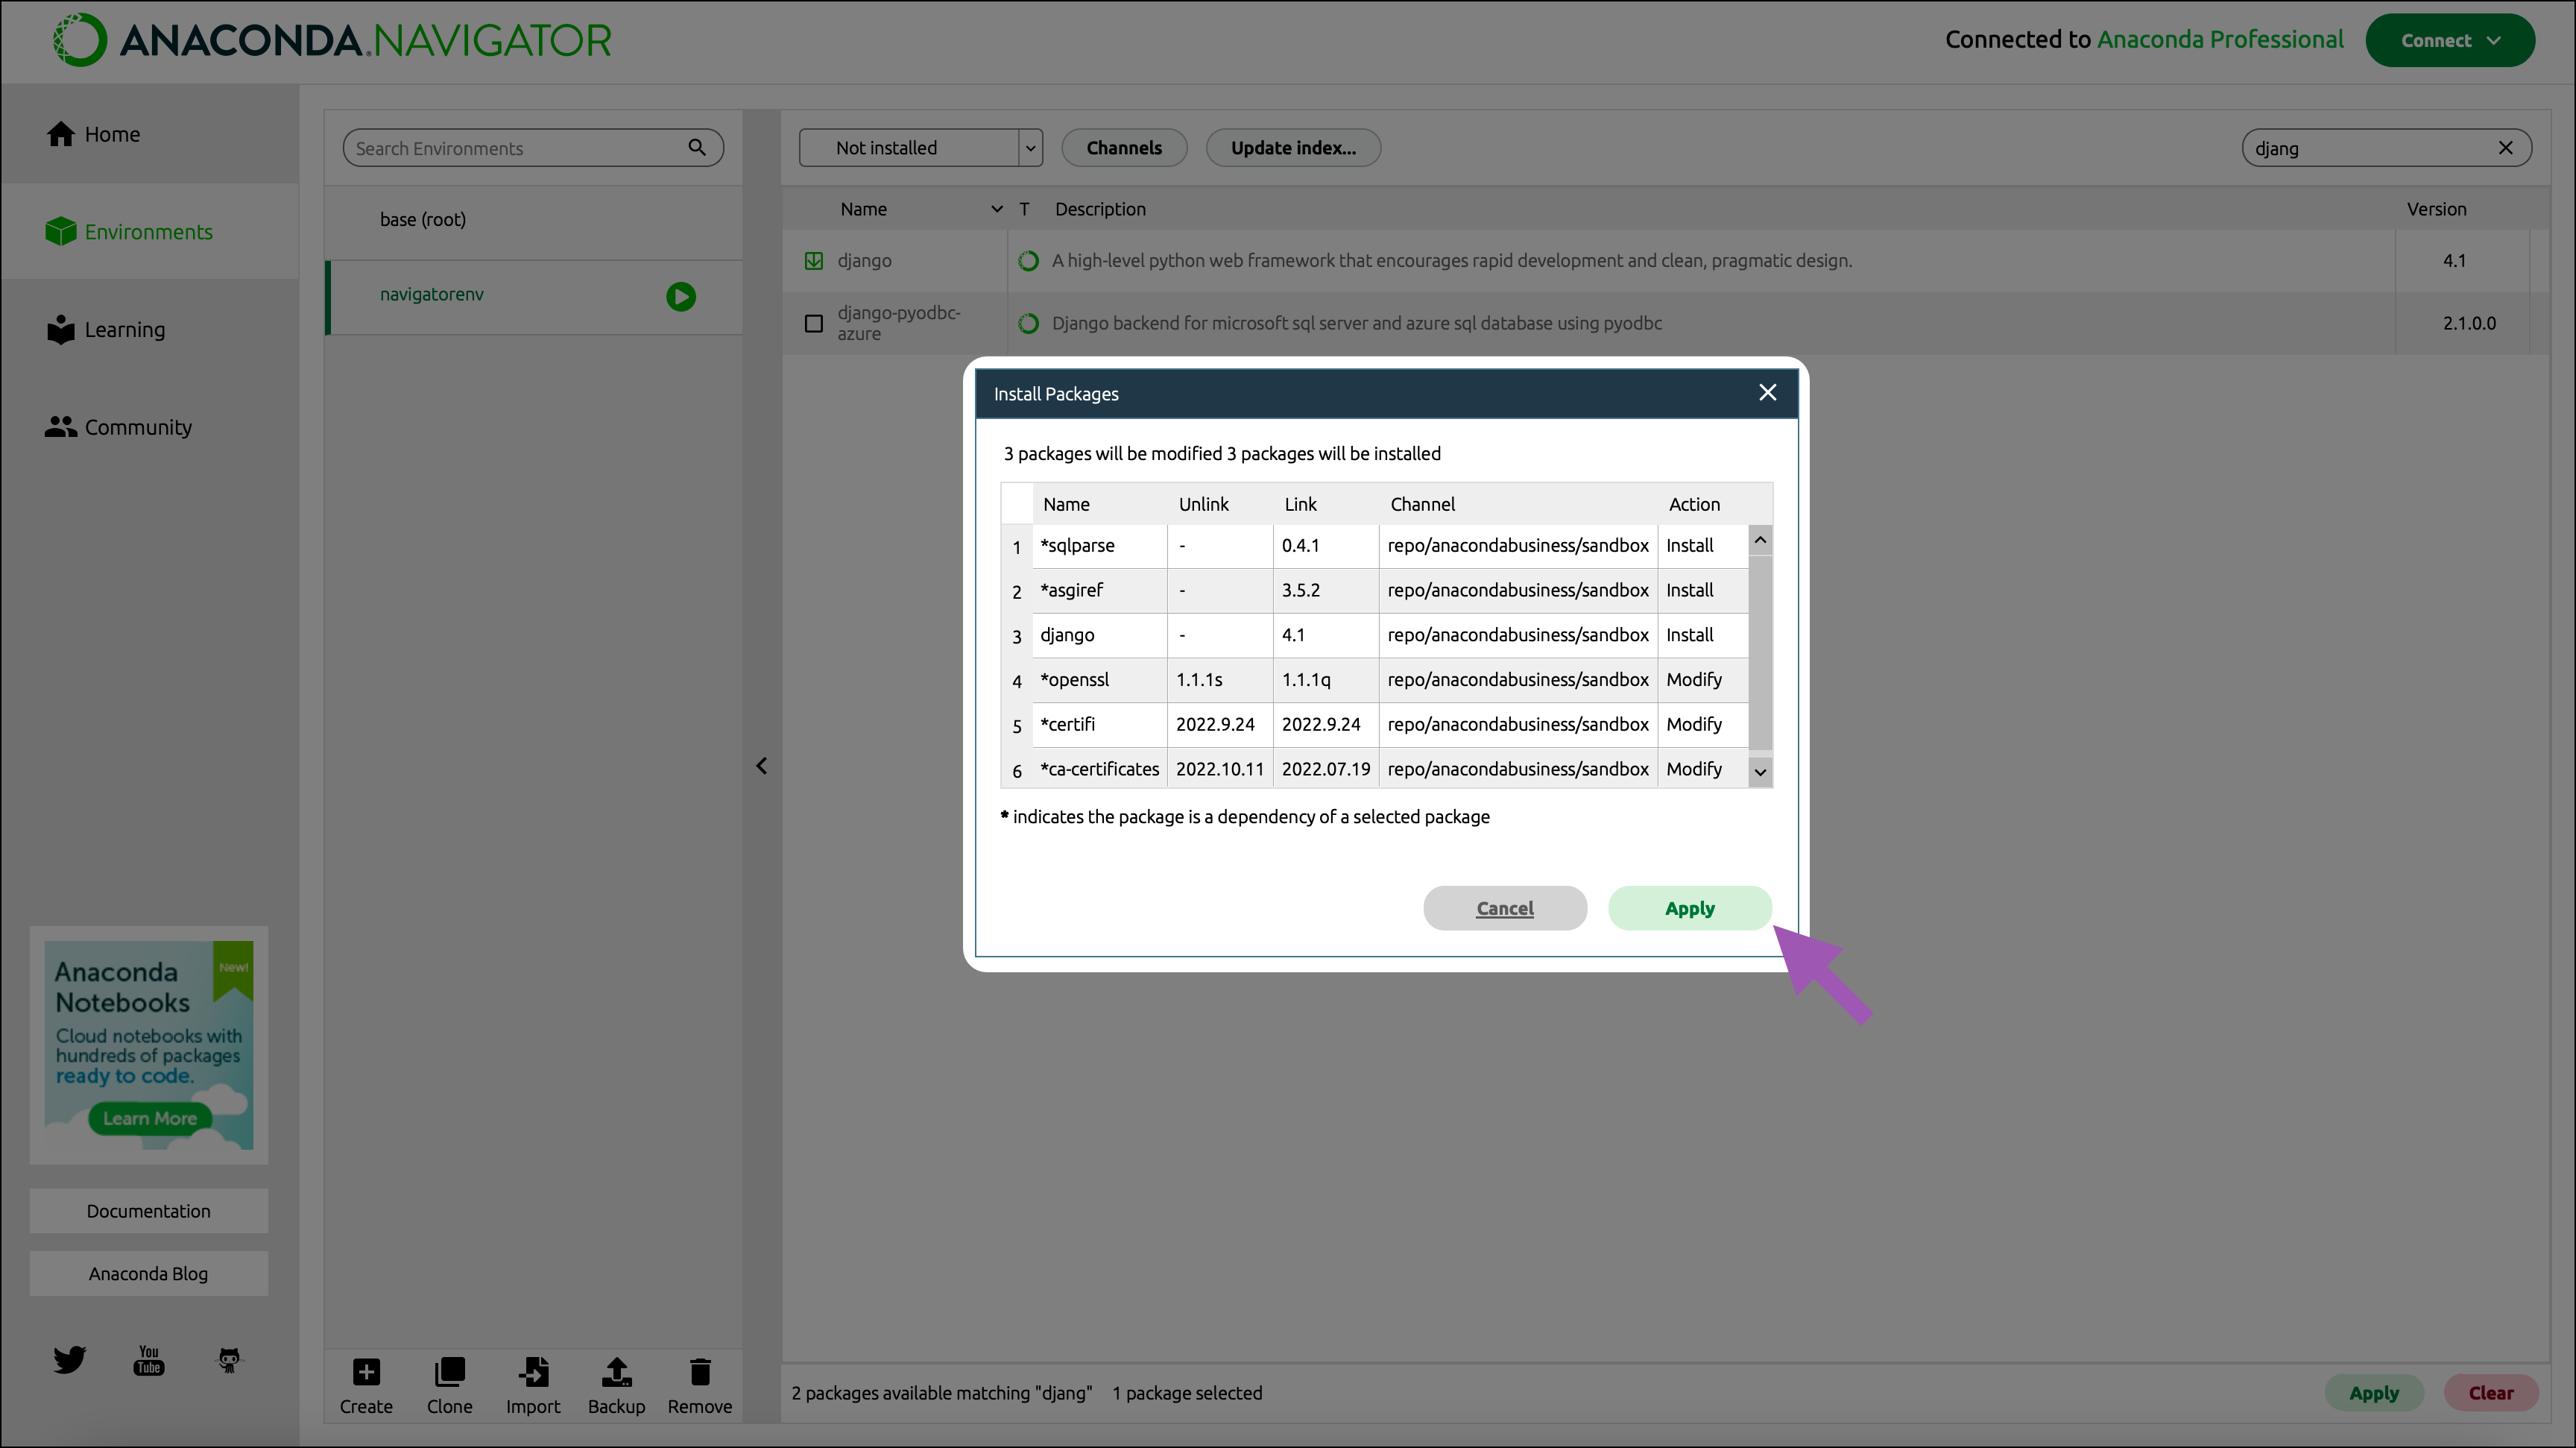 The Channel column will display your organization’s channel path, if correctly configured.