Prerequisites
You must have managed persistence enabled.Set environment variables
Setting environment variables allows MLflow to be accessible from all sessions, deployments, and schedules. This also sets the deployment-wide values for the MLflow tracking server endpoint.- Connect to your instance of Workbench.
-
Edit the
anaconda-enterprise-env-var-configconfig map by following the process for setting global config variables. -
Include the following lines:
Here is an example of what your file might look like when complete:If your
ENV_VAR_PLACEHOLDER: fooentry still exists, replace it now.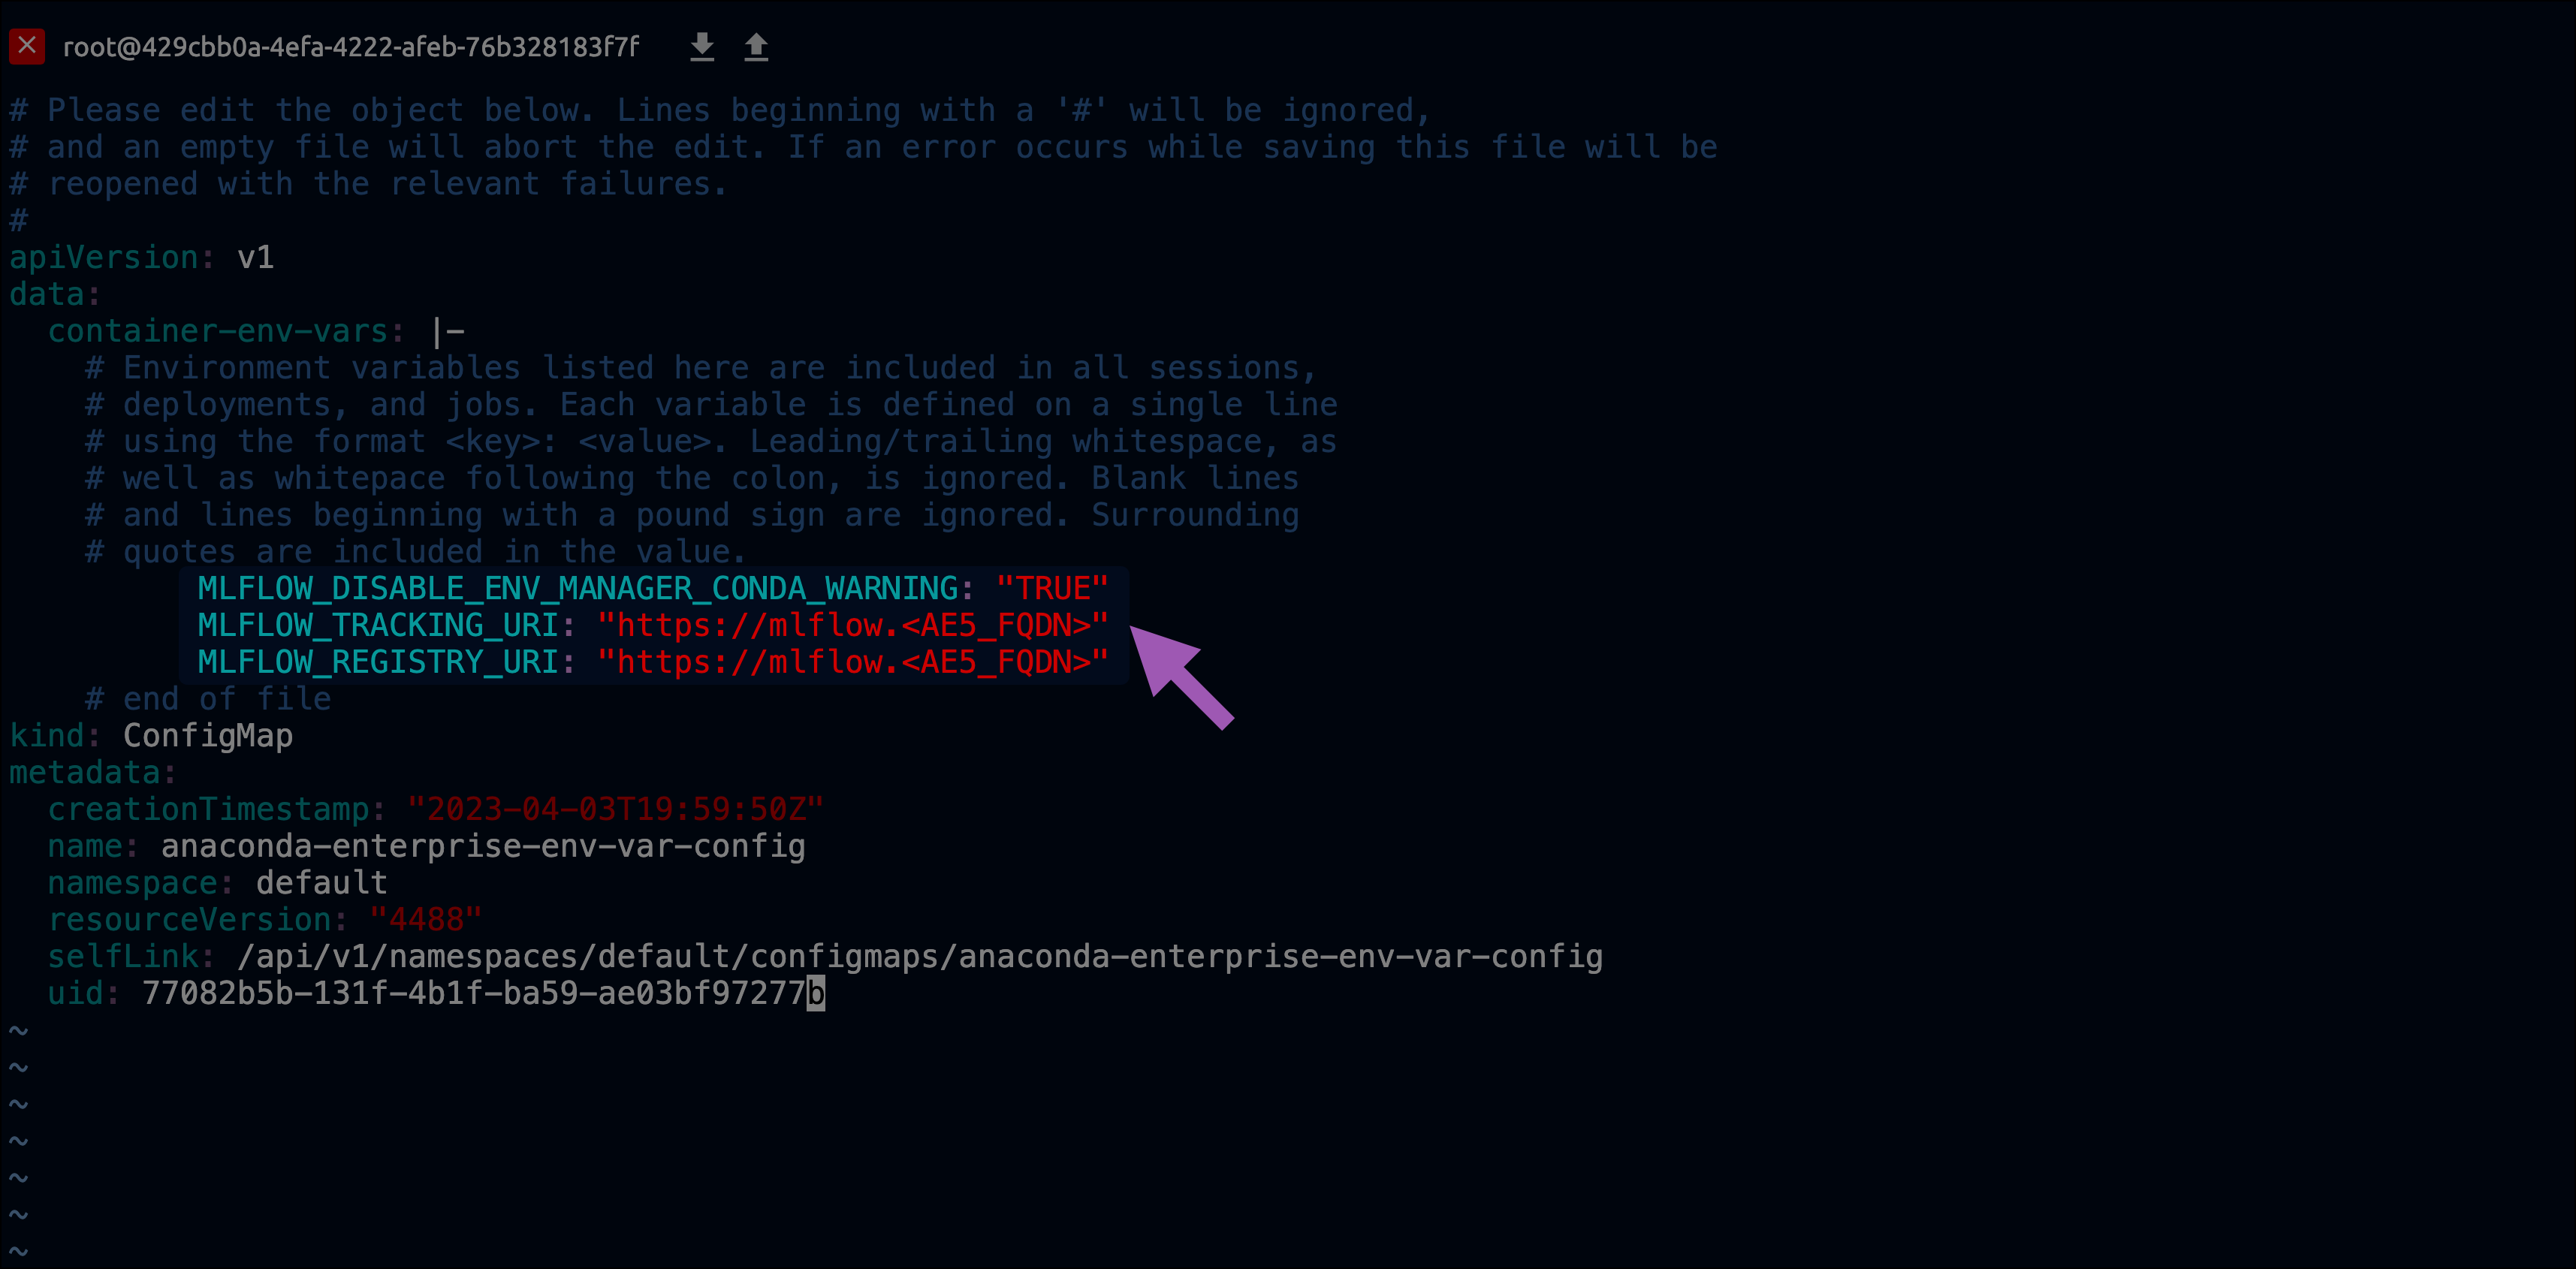
Download MLflow
- Download the latest MLflow release.
- Extract all files from the tarball you just downloaded.
Install MLflow
- Open a browser and navigate to Workbench.
- Log in as an administrator account with managed persistence permissions.
- Click Create +, then select Upload Project from the dropdown menu.
- Click Browse.
-
Locate the extracted files from your download and select the
MLflowTracking ServerProject-<VERSION>.tar.gzfile. - Provide a name for your MLflow Server project.
- Click Upload.
- Open a session for your new MLflow Server project.
-
Upload the
migrate-<VERSION>.pyandanaconda-platform-mlflow-runtime-<VERSION>.tar.gzfiles to the root of the project. -
Open a terminal in your session, and run the following command:
-
Activate your new environment by running the following command:
-
Verify your installation was successful by running the following command:
-
Open the
anaconda-project.ymlfile in the project with your preferred file editor. -
Update the
MLFLOW_TRACKING_GC_TTLvalue to something that makes sense for your use case.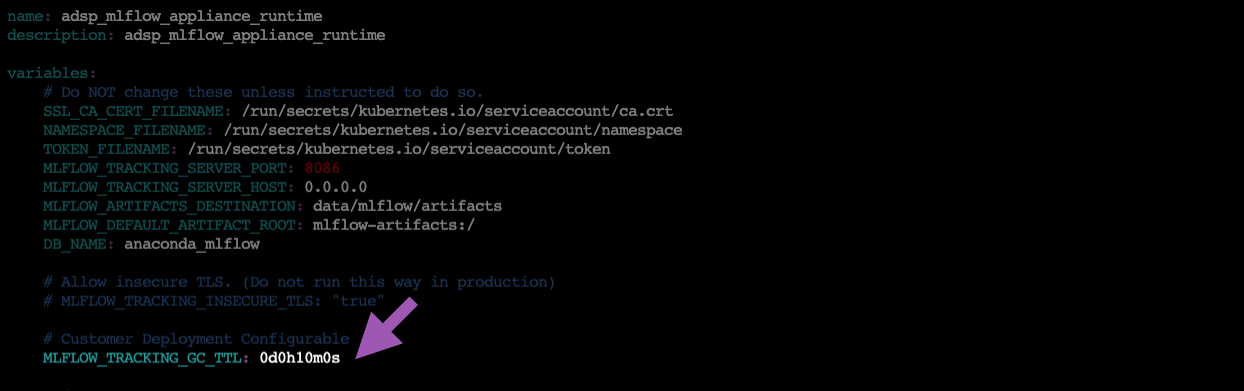 The
TheMLFLOW_TRACKING_GC_TTLvariable instructs MLflow to perform garbage collection on deleted artifacts that have reached a specified age. -
Commit the changes you’ve made to the project.
It is not necessary to commit the
migrate-<VERSION>.pyfile to the project. Once installation is complete, you can safely delete this file. - Stop the project session.
Deploy MLflow
- Select Deployments from the left-hand navigation.
- Click Deploy.
- Enter a name for the deployment, set the static url to the same value used in your
anaconda-enterprise-env-var-configfile (https://mlflow.<AE5_FQDN>), and then click Deploy.
Provide access
- Select the deployment you just created.
- Select Share from the left-hand navigation menu.
-
Enter the names of users or groups to provide with permissions to access MLflow, then click Add.
This list populates from Keycloak.
- Select Settings from the left-hand menu.
- Click Generate to create a token for this deployment.
Every user who needs API access to MLflow also requires this token. You must share this token manually.
Set up garbage collection
When a client deletes a resource, MLflow transitions the resource into adeleted lifecycle state and hides it in the UI, but does not purge it from the system. Deleted resources will block creation of new resources with the same name until the garbage collection process has purged it.
The garbage collection process works in tandem with the MLFLOW_TRACKING_GC_TTL variable that is set in the anaconda-platform.yml project file. When a resource reaches the age specified by the MLFLOW_TRACKING_GC_TTL variable AND the garbage collection process runs, it will be purged.
- Create a schedule within the MLflow Server project.
- Name the schedule MLflow Garbage Collection.
- Open the Deployment Command dropdown menu and select gc.
- Schedule an interval to run the garbage collection. Custom schedules utilize cron expressions.
- Click Schedule.
Upgrading MLflow
- Download the latest MLflow release.
- Open a browser and navigate to Workbench.
- Log in as an administrator account with managed persistence permissions.
- Open your MLflow Server project.
- Select Deployments from the left-hand navigation.
- Terminate your current deployment.
- Select Schedules from the left-hand navigation.
- Pause all scheduled runs.
- Start a new session in your MLflow Server project.
-
Upload your newly obtained
migrate-<VERSION>.pyandanaconda-platform-mlflow-runtime-<VERSION>.tar.gzfiles to the root of the project. -
Open a terminal in your project and run the following command:
- Redeploy your MLflow Server project.
-
Generate a new token to share your deployment.
Remember, you must generate an access token and provide it to users each time the server is restarted!
- Restart all scheduled runs.