

Installing Spyder
Spyder is included with Anaconda Distribution and can be installed using Navigator. To use Spyder with Miniconda, you must install the Spyder package on the command line.- Command line
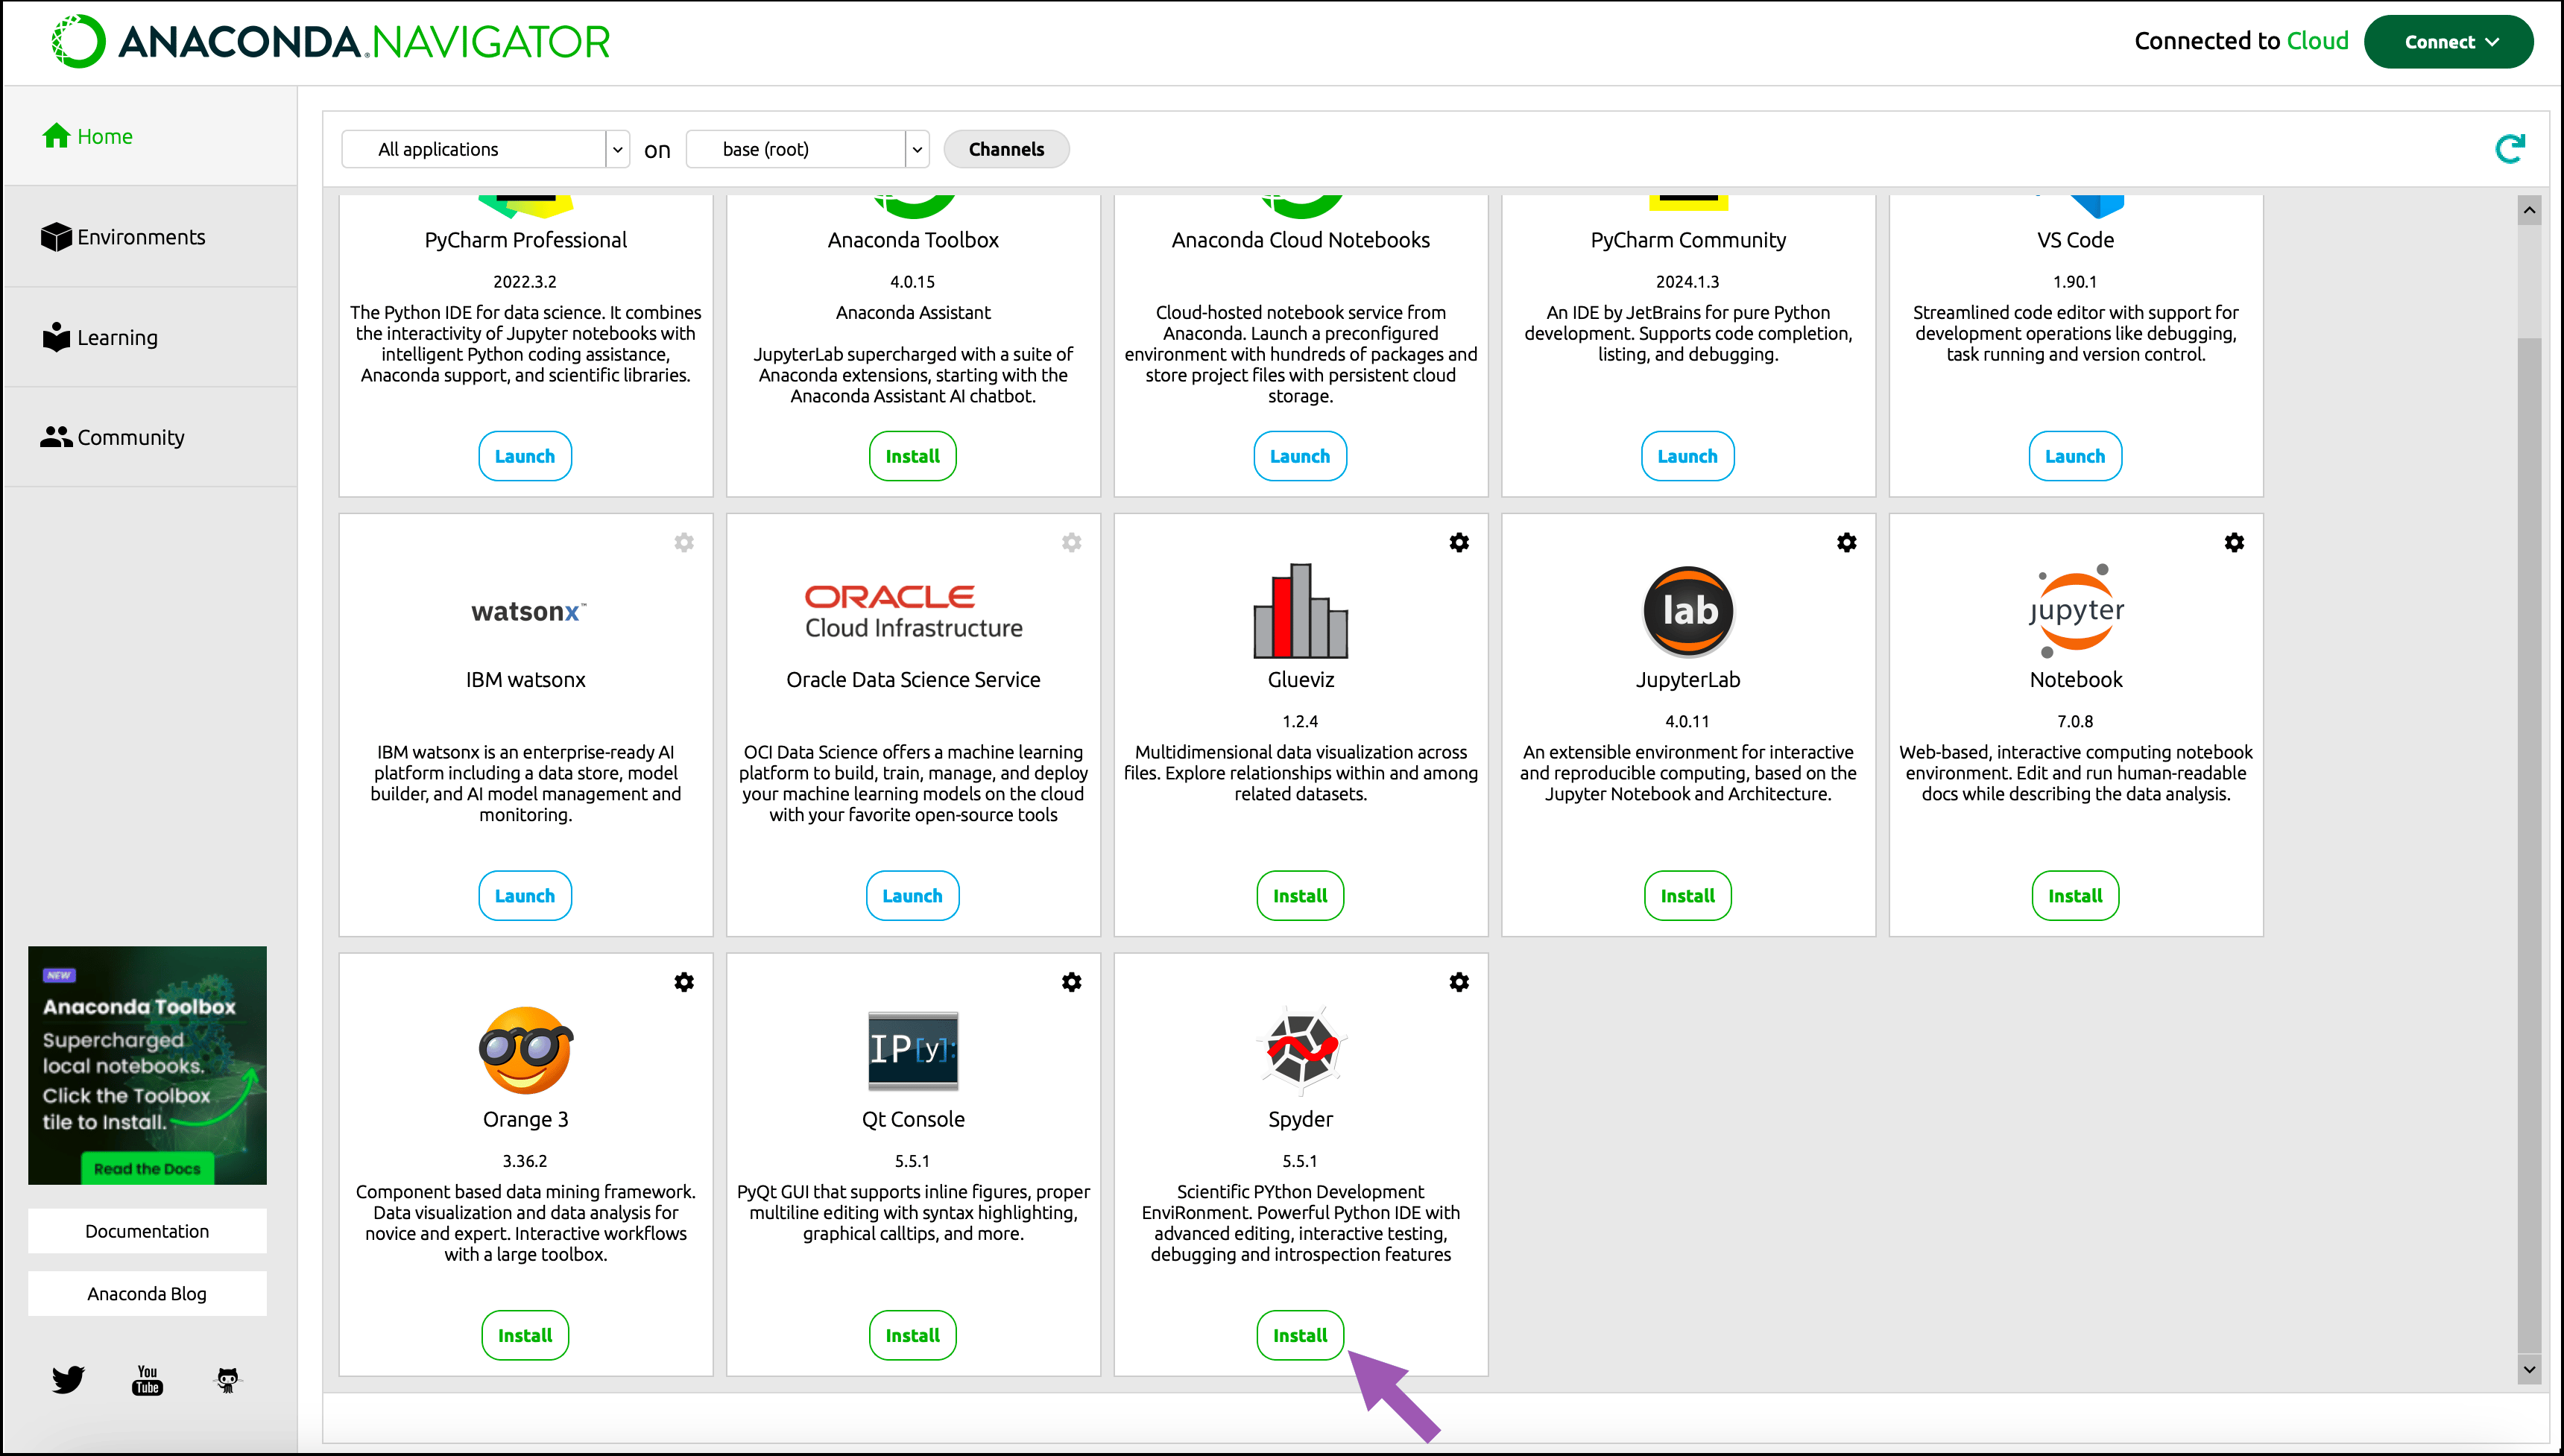
To install Spyder using Navigator:
- Activate the environment where you want to install Spyder.
-
Click Install on the Spyder tile.
Launching Spyder
Launch Spyder using either Navigator or a command line terminal:- Command line
Creating and activating a conda environment
Before starting your Python project, Anaconda recommends creating a to isolate your project’s software packages and manage their dependencies. For more information about creating and activating a conda environment, see Environments.Selecting your environment’s Python interpreter
To ensure your code has access to the correct code completion and type information for your project, select the conda environment associated with your project as the Python interpreter in Spyder.- Open Spyder.
-
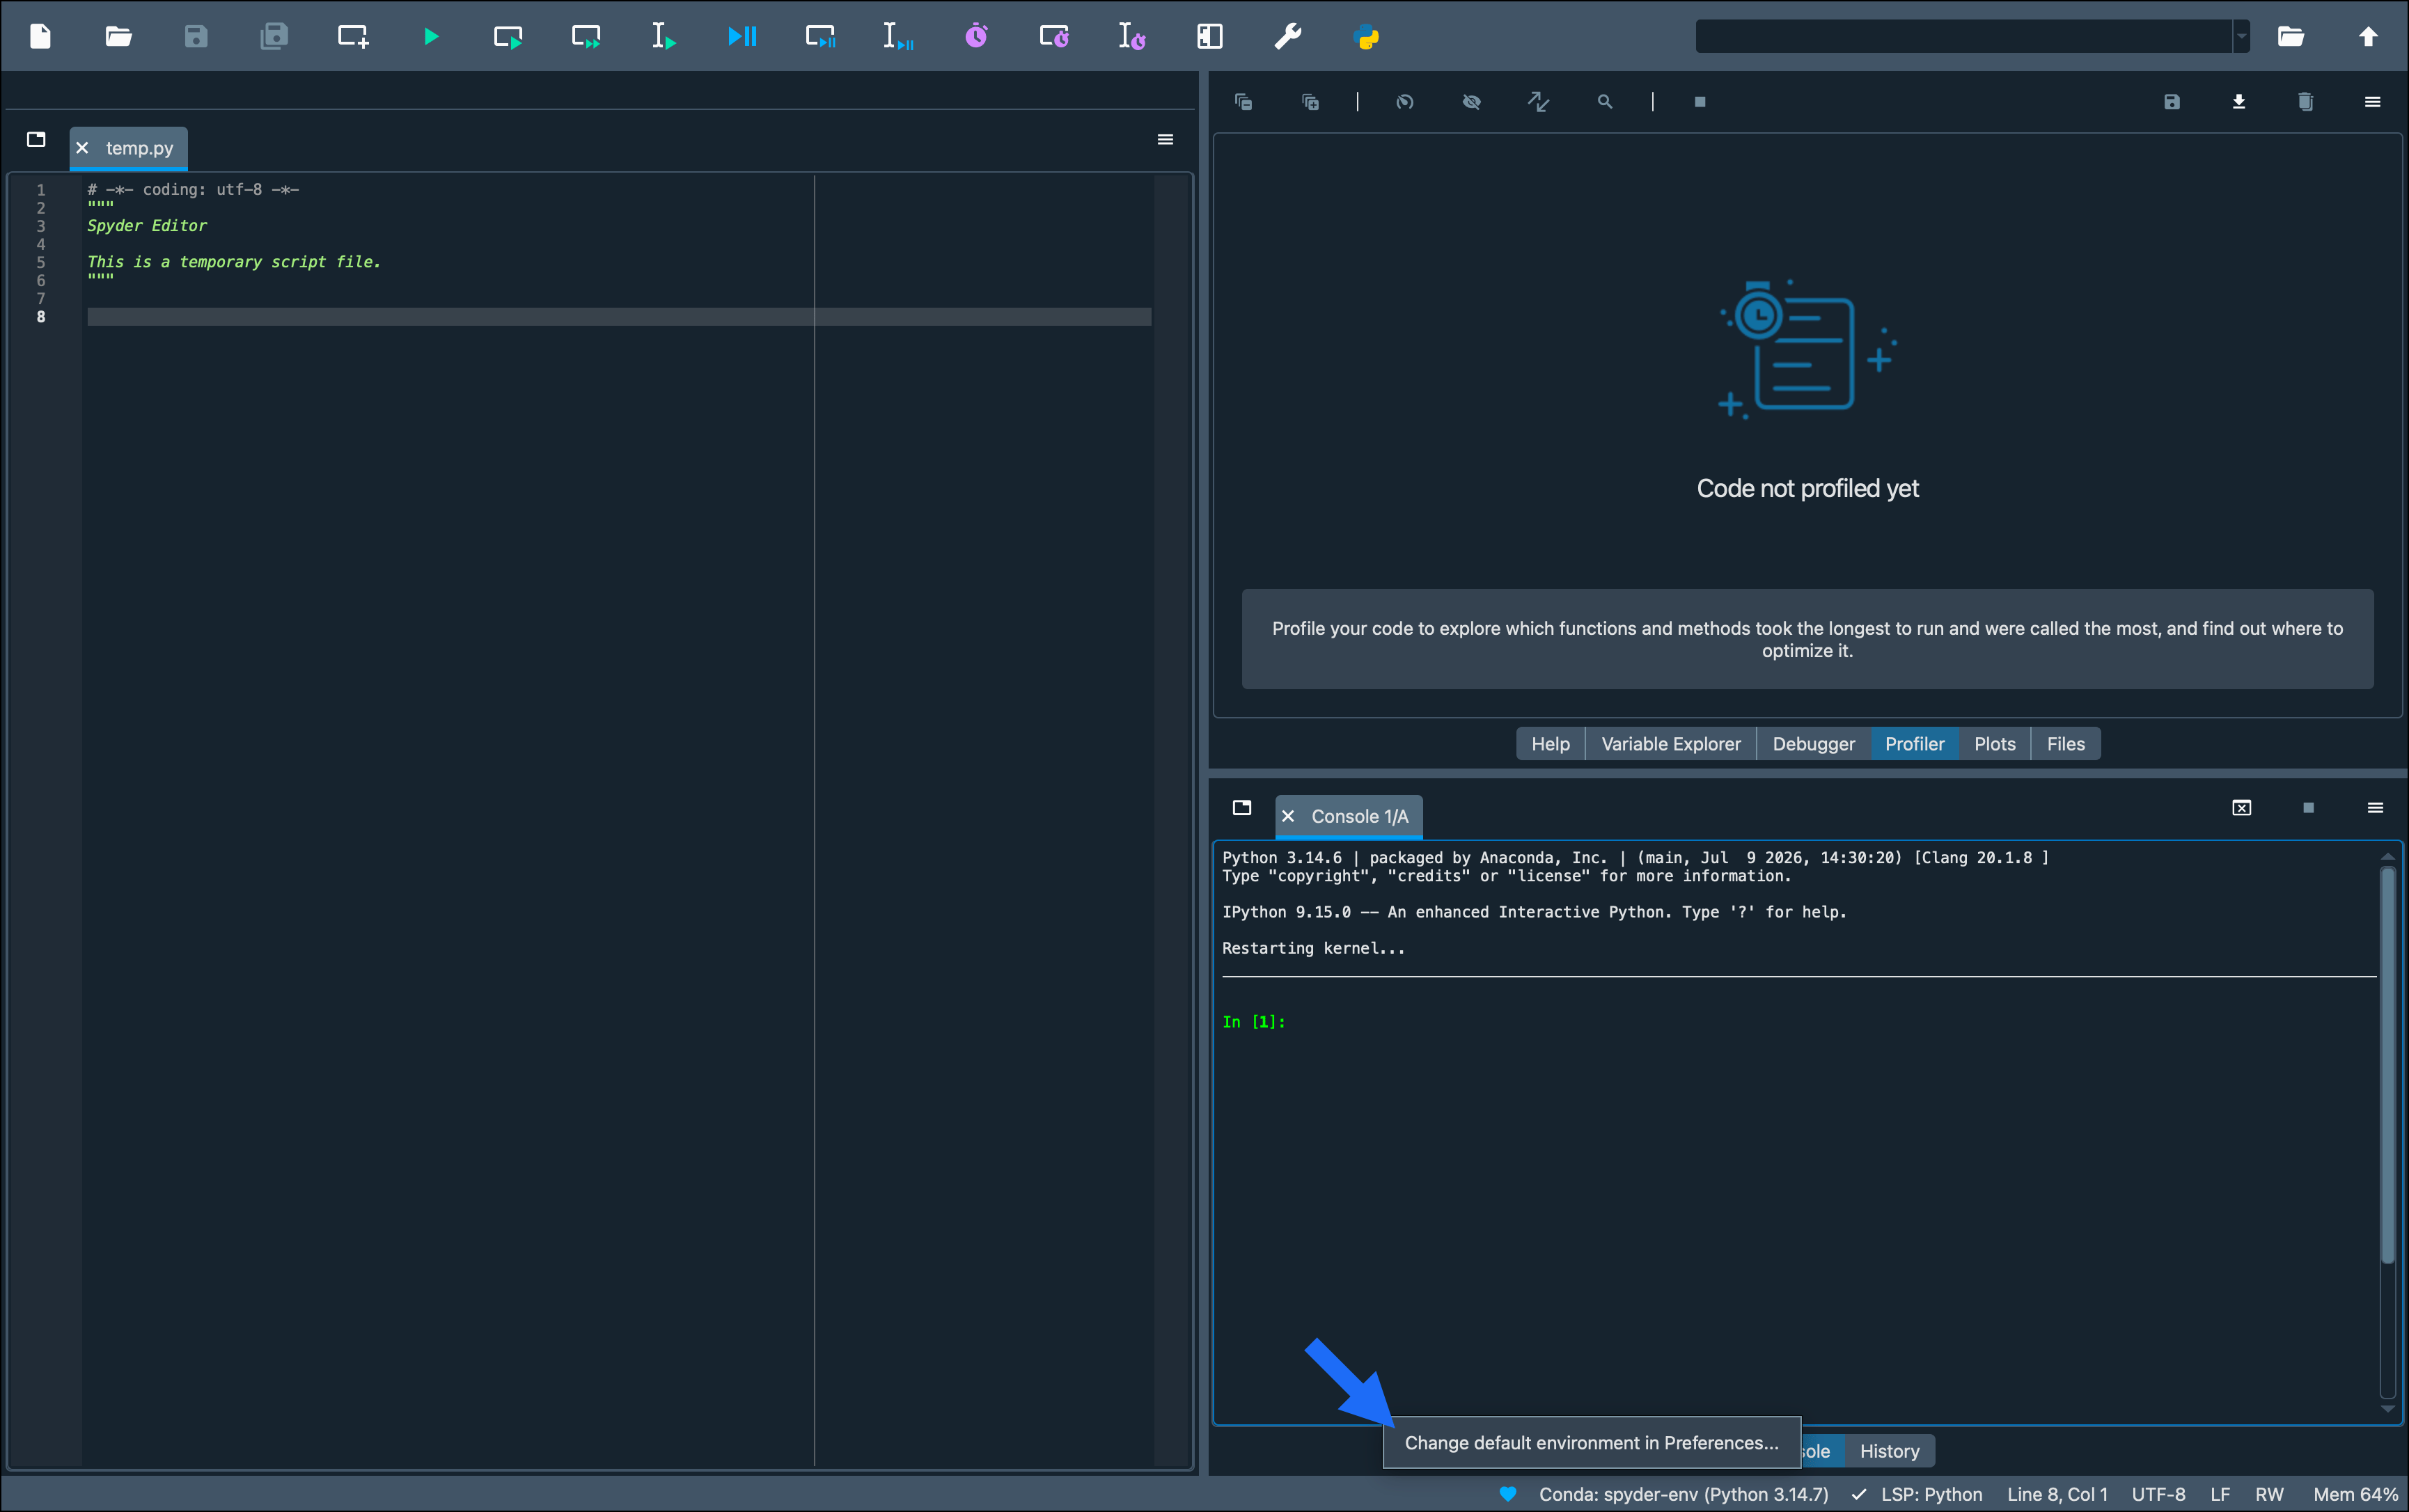
Click the environment name in the status bar at the bottom of the Spyder window, then click Change default environment in Preferences… to open the Python interpreter preferences.
- Select Selected interpreter.
- Select your environment from the dropdown. If it isn’t listed, enter or browse to the path of its Python interpreter.
- Click OK.
Using an external conda environment
If you want to run code in a conda environment that does not have Spyder installed, you must install thespyder-kernels package in that environment. Spyder uses spyder-kernels to connect its IPython Console to external interpreters.
To set up an external environment for use with Spyder:
- Open (Terminal on macOS/Linux).
-
Activate the environment you want to use:
-
Install a compatible version of
spyder-kernels:The required version ofspyder-kernelsmust match your installed version of Spyder. If the IPython Console displays a version error after restarting the kernel, install the version shown in the error message. - In Spyder, select the environment as your Python interpreter.
- Click Restart kernel in the Consoles menu for the change to take effect.
Adding packages to your environment
To add packages to the conda environment you are using with Spyder:- Open (Terminal on macOS/Linux).
-
Activate the environment:
-
Install the package:
- In Spyder, click Restart kernel in the Consoles menu so the new package is available.
Updating Spyder
To update Spyder to the latest version available in your configured channels:- Open (Terminal on macOS/Linux).
-
Activate the environment where Spyder is installed:
-
Update Spyder:
If you installed Spyder in the Anaconda Distribution
base environment, run conda update anaconda before updating Spyder to ensure package compatibility. For more information, see How do I update Spyder using conda? in the Spyder FAQ.Additional resources
- For help with Spyder’s interface and features, see the official Spyder documentation.
- To create, update, or remove conda environments, see Environments.
- To add packages to your environment, see Installing conda packages.