What is a high-compute second?
What is a high-compute second?
A CPU second is one second of running code on a single CPU core at 100%. We refer to CPU seconds as “high-compute seconds” on our pricing page to clearly distinguish CPU seconds from real-world seconds. Simply running JupyterLab, writing code, and using the interface doesn’t really use up your quota (though it has a small impact). Only running Python code from within a notebook and running commands from the terminal counts against your quota, and even then most command functions don’t heavily use the CPU.For example, if your code makes an HTTP request, it will use a tiny amount of CPU time assembling the request and sending it out over the network, but will use no CPU at all while it’s waiting for a response. When the response comes back from the other end, it will again use a small amount of CPU to interpret the response and provide your code with the results. So, in general, CPU time is only used while your program is actively making calculations, not while it is waiting for other systems.When does the clock on CPU seconds reset?Our notebook service accounts have a per-day limit for the maximum number of seconds fully utilizing the CPU. Once an instance hits that limit, it is not shut down, but instead given lower CPU priority and a limit to the amount of compute resources available. This limit is reset every day, so full compute access will be restored the next day.
Data storage
You can monitor your available cloud storage space with the Disk Usage meter at the top of the screen. If you’re maxing out your storage space, the most likely culprits are custom environments, which are all the environments you see in the Disk Manager. To gain more storage, delete these custom environments (and optionally download them for later use) or upgrade your subscription.
What kind of storage does Anaconda Notebooks use?
What kind of storage does Anaconda Notebooks use?
Anaconda Notebooks uses persistent Elastic Block Store (EBS) storage: a fast, backed-up, SSD storage that supports common data science and machine learning workloads. EBS storage is generally faster and more reliable than most cloud-hosted options.
Managing disk usage
You can view and manage all your files by clicking anywhere on the Disk Usage meter to open the Disk Manager: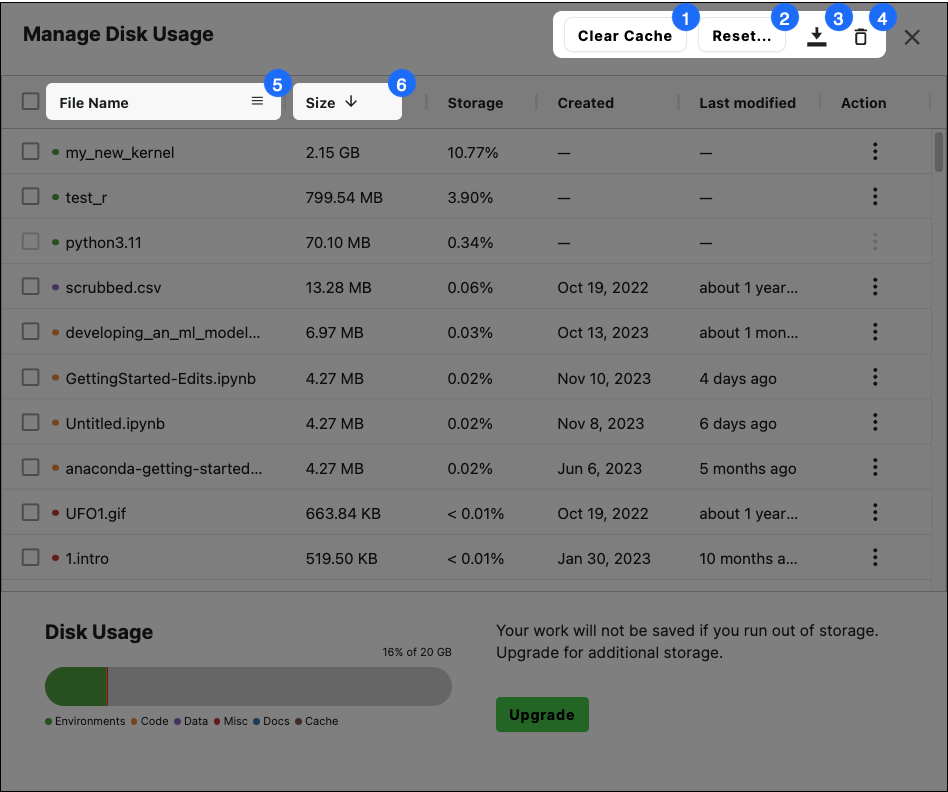
Reset…
Restores all selected items to their default state. Select Download items before deleting to ensure you don’t lose valuable work.
File Name
Hovering over the File Name column header exposes a filter tool to further sort through your files. Clicking File Name orders (and reverses the order of) files alphabetically.
Removing custom environments
-
In a terminal within Anaconda Notebooks, run
conda env listand see if there are any environments NOT in/opt/conda. -
If there are, you can remove those unwanted environments in the Disk Manager as shown in the previous section, or by running:
Replace <ENV_NAME> with the environment name.
-
Further, clear out the cache and other artifacts by clicking Clear Cache in the Disk Manager as shown in the previous section, or by running:
Memory
If your notebook is running slowly, you might have exceeded your CPU usage limit for the day. You will still be able to work when this happens, but the performance will be affected (for example, loading a.csv file with Pandas may take 10 seconds instead of half a second). The limit resets daily.
Anaconda Notebooks limits processes to 6GB of RAM per kernel. Exceeding this limit terminates your process, at which point you will need to restart your kernel. If you need to run larger processes, please contact us at [email protected].
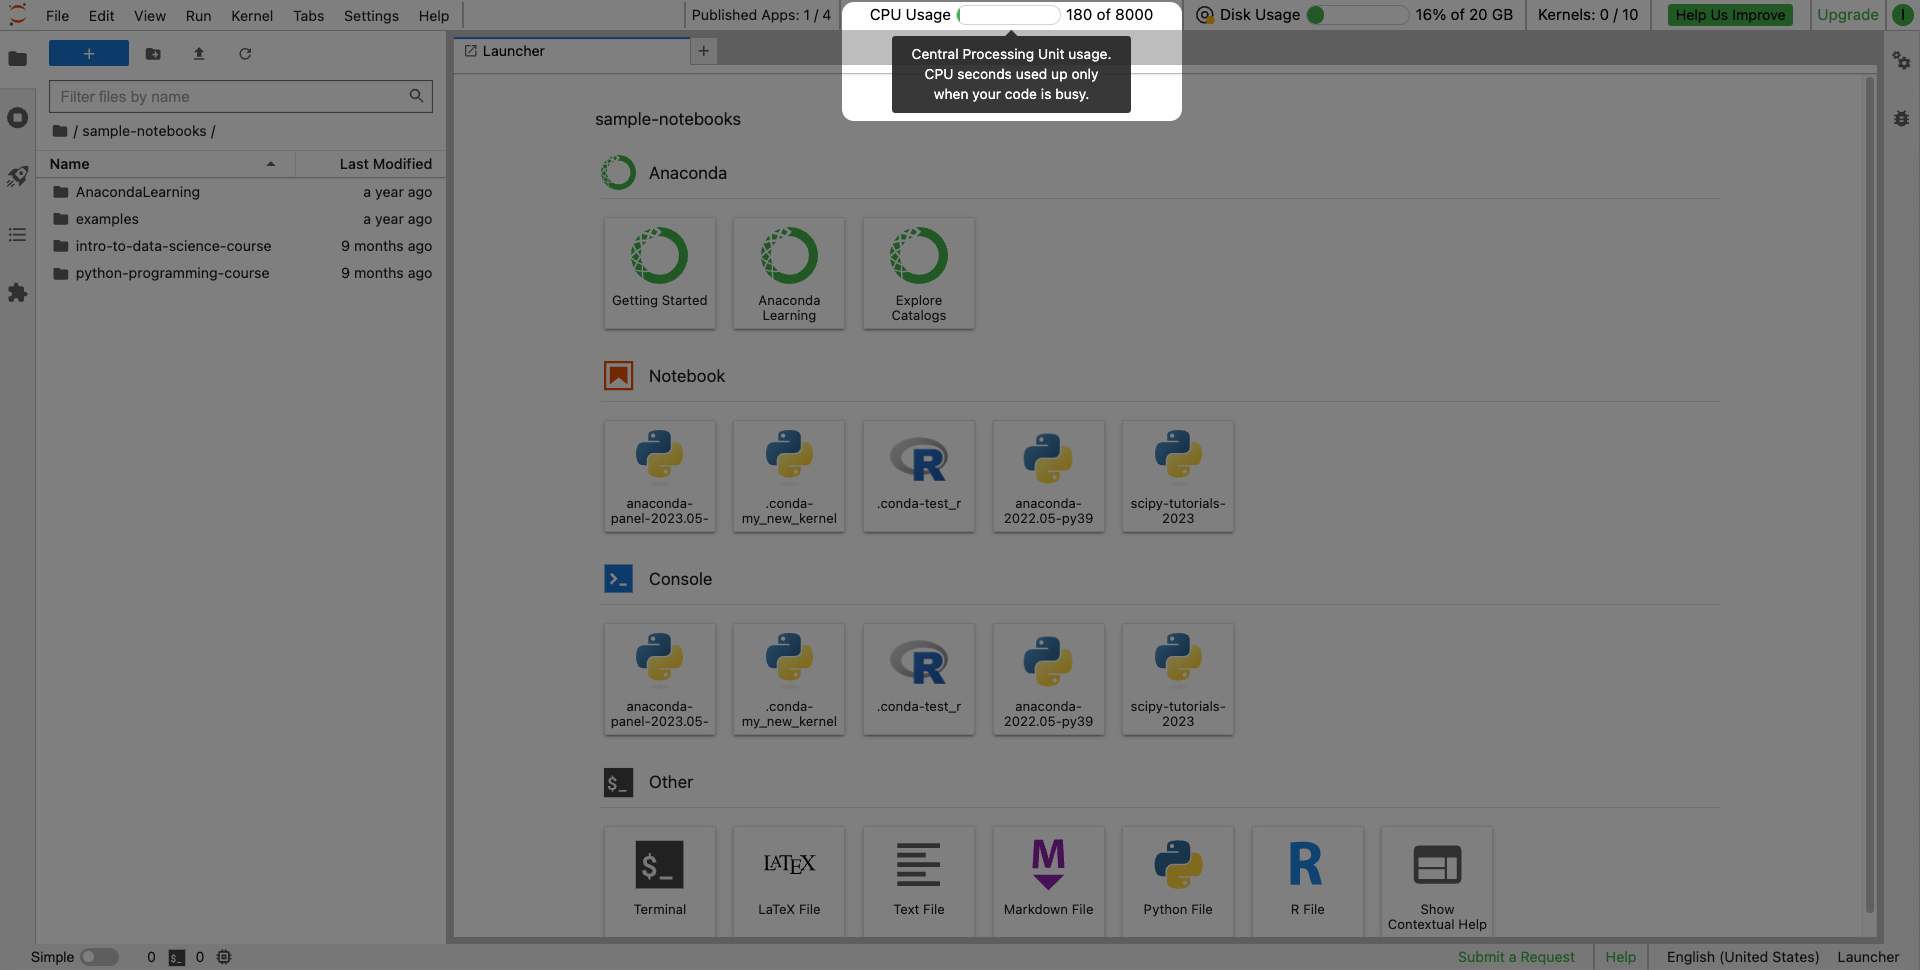
To see current progress towards your daily quota, refer to the CPU Usage widget at the top of Anaconda Notebooks.
Troubleshooting
All CPU seconds have been used up in Notebooks
Cause
You’ve used up all your available CPU seconds.
Solution
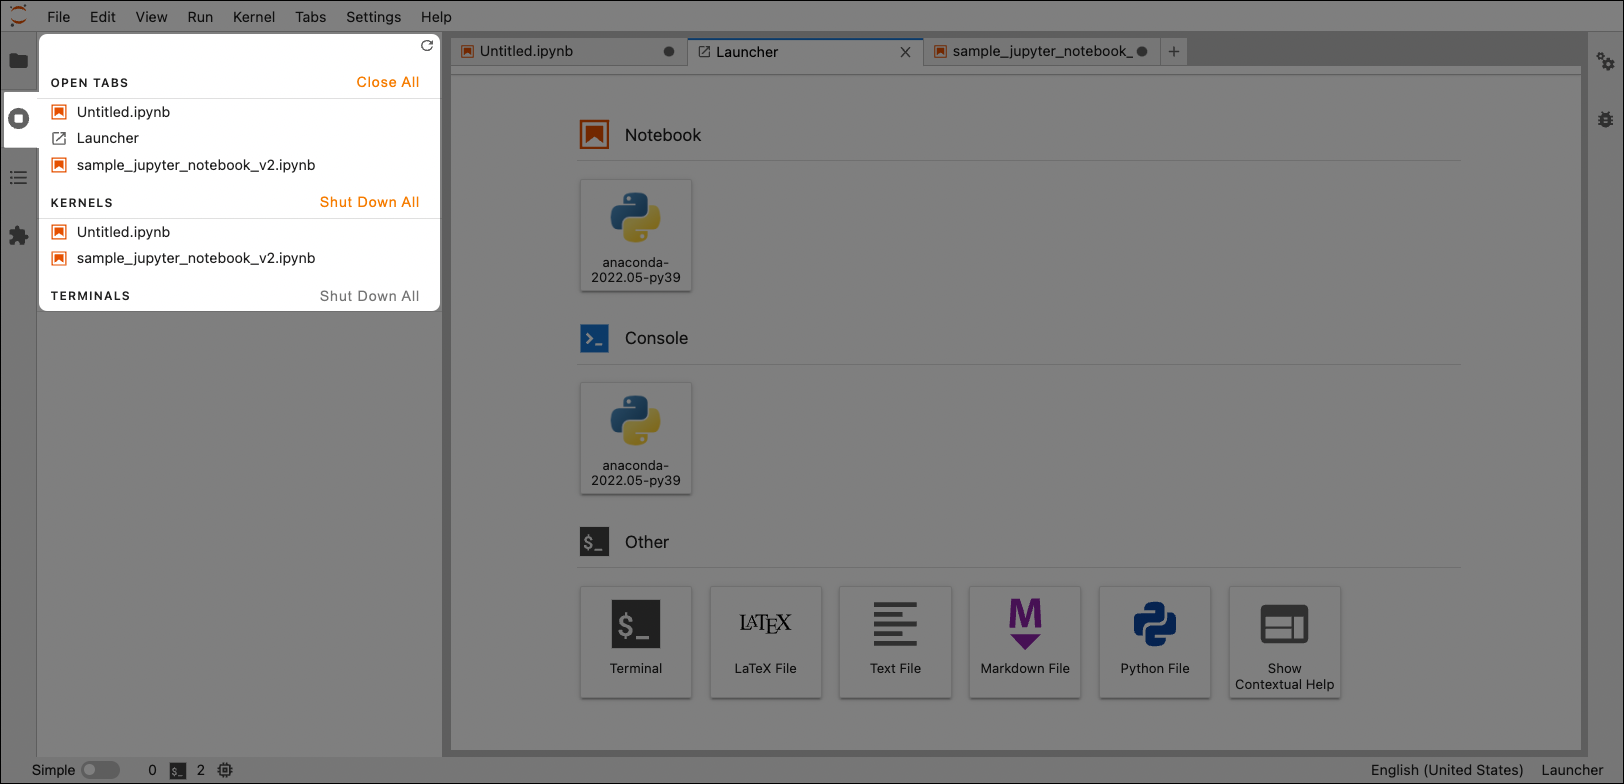
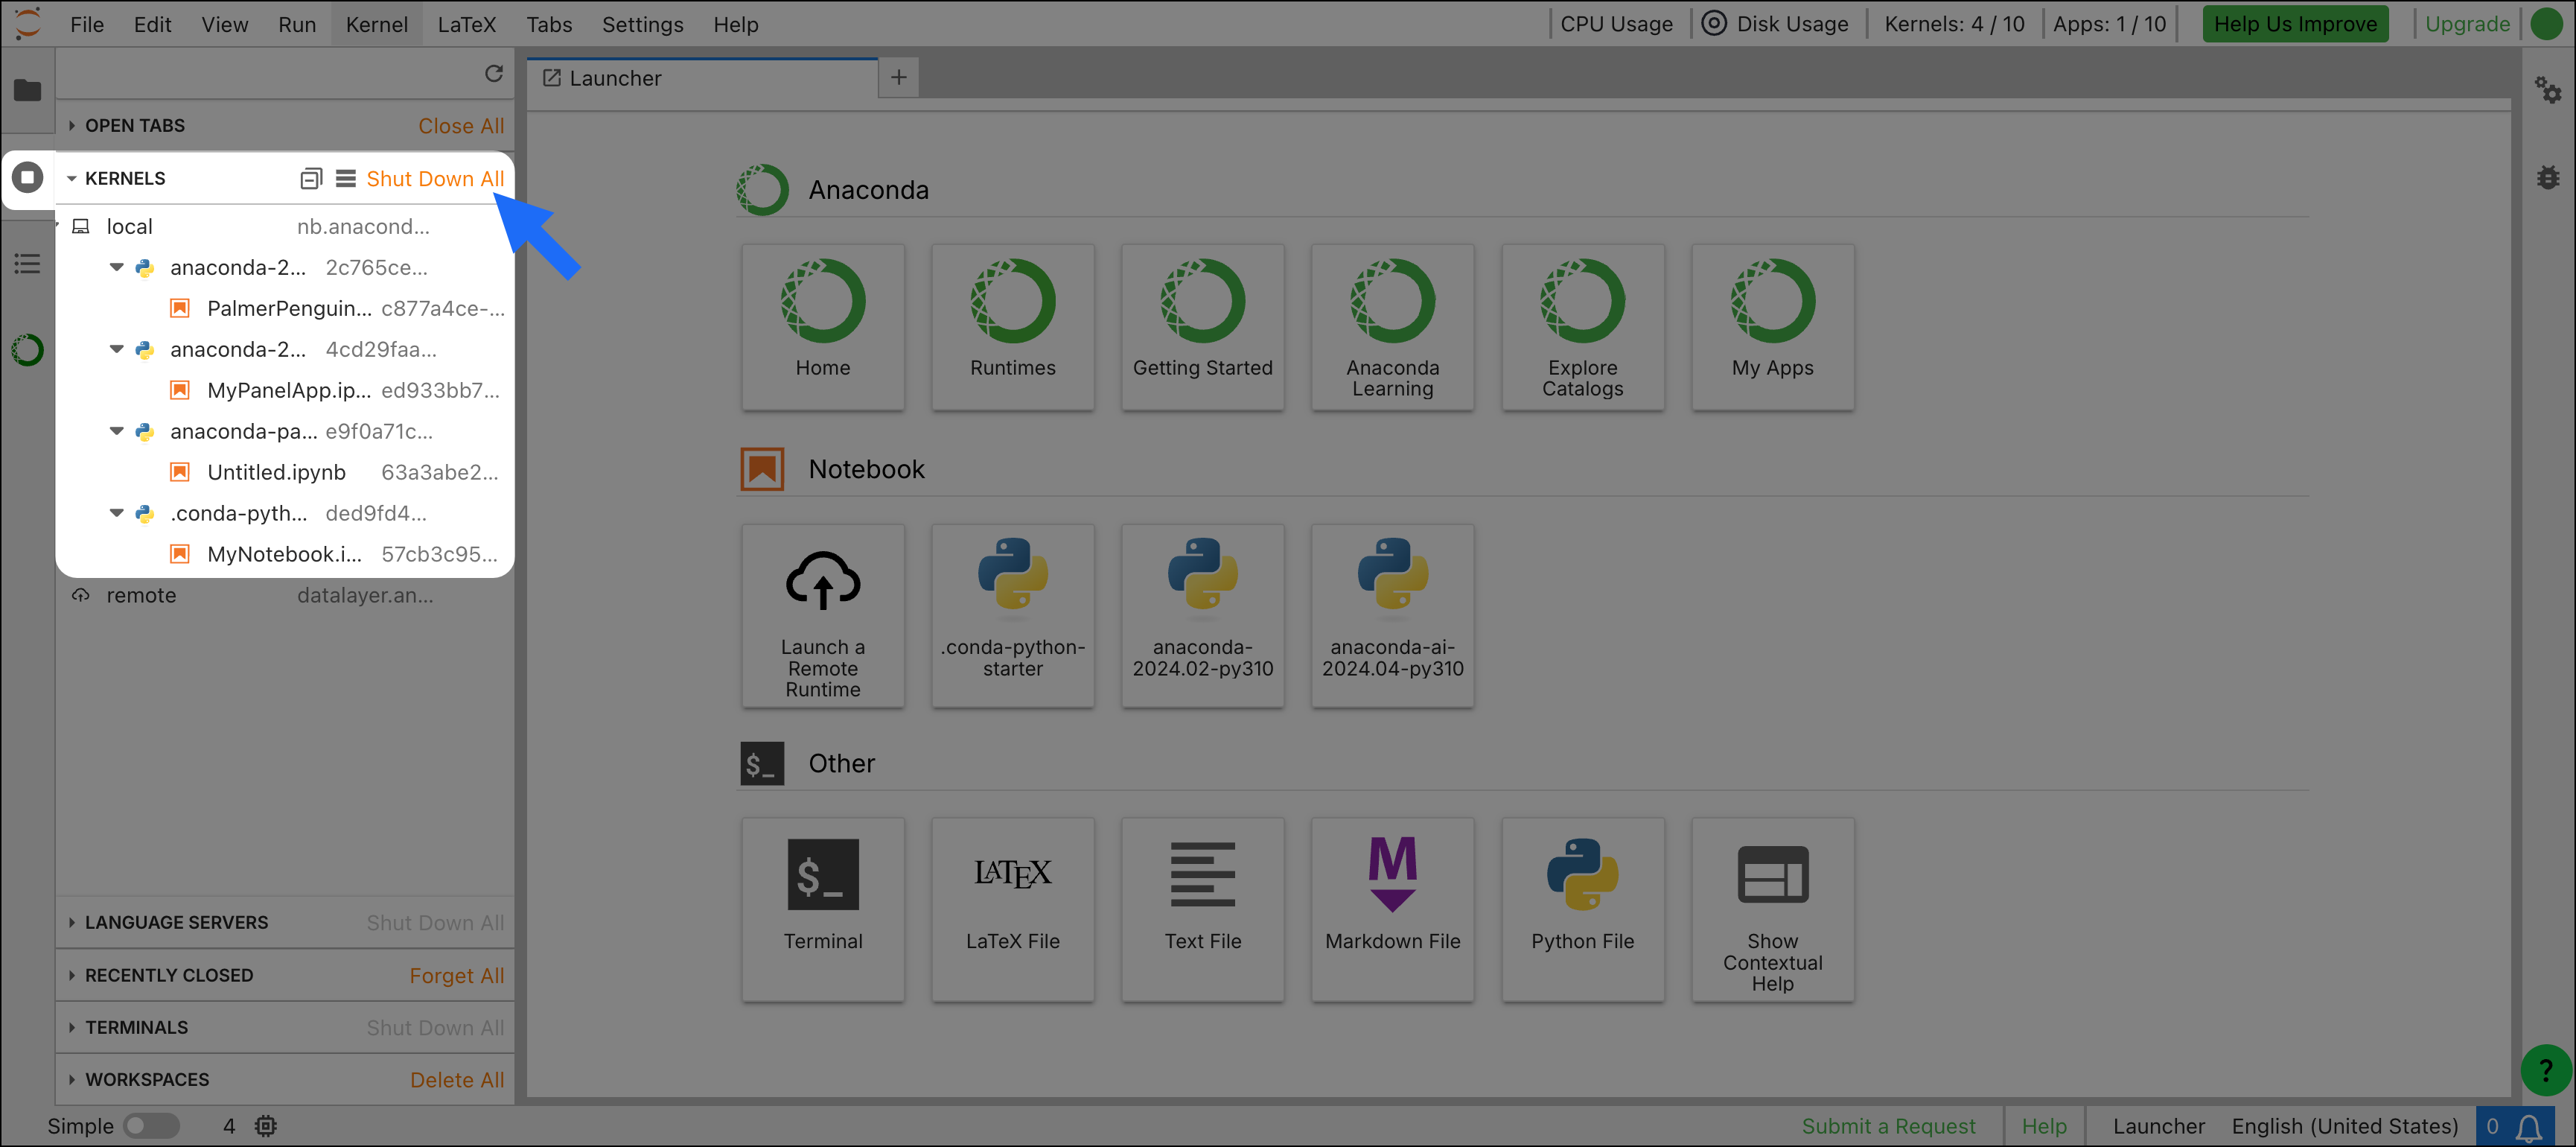
CPU seconds are consumed by active runtimes, which can continue to run in the background even after you’ve logged out of Notebooks or switched to a different browser tab.
To prevent your CPU seconds from being used while you are not actively using Notebooks, make sure you shut down all runtimes in all open instances of Notebooks before logging off for the day. You can do this from the Running Terminals and Kernels tab:
If the problem persists, please raise the issue in the Anaconda community forums or file a support ticket.
You can upgrade your subscription plan to access additional CPU seconds. See our pricing page for further details.
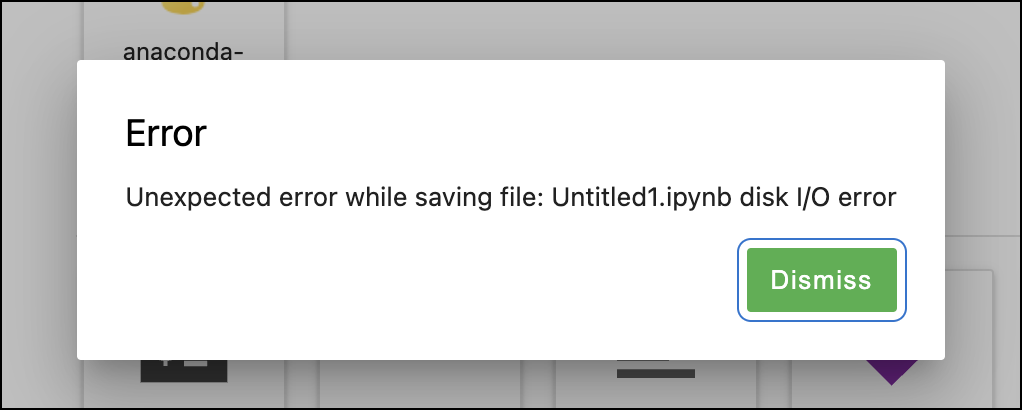
”File load error,” “unhandled error,” or “unexpected error” message
Cause
If you receive a “file load error,” “unhandled error,” or “unexpected error,” like in the following figure, you have most likely exceeded the storage space for your current plan.
Solution
Follow the steps in the storage question above to remove items from your Notebooks instance, or upgrade to a higher subscription plan.