ipykernel package and all the packages from the latest Anaconda Distribution release, giving you immediate access to a comprehensive data science toolkit.
Environments, kernels, and runtimes
What is an environment?
An environment is a folder or directory that contains a specific collection of conda packages and their dependencies. Working in separate environments allows you to maintain and run packages without interference from other collections of packages. For example, you might require separate conda environments to maintain distinct versions of Python based on distinct package dependencies.What is a kernel?
A kernel is a programming-language-specific process that interprets your code, runs it, and gives you the results. In Jupyter Notebooks, kernels allow users to run code in cells and receive immediate output. For example,ipykernel enables interactive computing in Python.
What is a runtime?
A runtime in Anaconda Notebooks is a conda environment that has been associated with a specific kernel, enabling it to execute code. For an environment to be usable in JupyterLab, it must contain a kernel package (such asipykernel for Python). Without this kernel association, JupyterLab cannot recognize the environment as an available option for running notebooks.
The default runtimes provided in Anaconda Notebooks come with the ipykernel package already installed, making them immediately available for your Python notebooks.
To add a kernel package to a custom environment and create your own runtime, see creating custom runtimes.
Using default runtimes
Custom runtimes often use large amounts of your limited Anaconda Notebooks storage space. Because of this, Anaconda provides a number of read-only default runtimes that contain all the packages from the latest release of Anaconda Distribution. The default runtime naming convention is typicallyanaconda-<YEAR>.<MONTH>-py<PYTHON_VERSION>, which maps to Anaconda Distribution releases:
| Environment Name | Status | Description |
|---|---|---|
| anaconda-2025.12-py312 | Live | Latest Anaconda Packages (stable & recommended) |
| anaconda-ai-2025.12-py312 | Live | Latest Anaconda Packages + AI Packages (stable & recommended) |
Creating custom runtimes
If you need a specific set of packages that are not included in one of our default runtimes, you can create your own runtime to customize to your needs.Custom runtimes are stored using your dedicated, persistent Anaconda Notebooks cloud storage. This ensures the custom runtime remains available after your current session ends. Custom runtimes use your personal storage space and can easily get quite large, so only include the packages you need.
-
Open a terminal from the Launcher, which you can access by selecting the blue plus in the top-left corner of the File Browser.

-
Create a new runtime by running the following command:
Adding
ipykernelcreates a Python runtime.
Creating a custom runtime from an environment.yml file
This feature is only available for the local version of Toolbox.
environment.yml file, you can create a custom runtime by uploading it to an Anaconda Toolbox project and installing it directly from there.
Uploading an environment.yml file
- Launch Anaconda Notebooks and select the left-side Anaconda Toolbox icon.
- Select Manage Projects.
-
Select actions beside the project where you want to add your
environment.ymlfile, then select Upload. -
Select the
environment.ymlfile you want to create a custom runtime from. You can use any filename, but the file extension must be.yml. - Select Upload to Project.
Installing the custom runtime
-
Navigate to the project where you uploaded the
environment.ymlfile. -
Select Install beside the
environment.ymlfilename.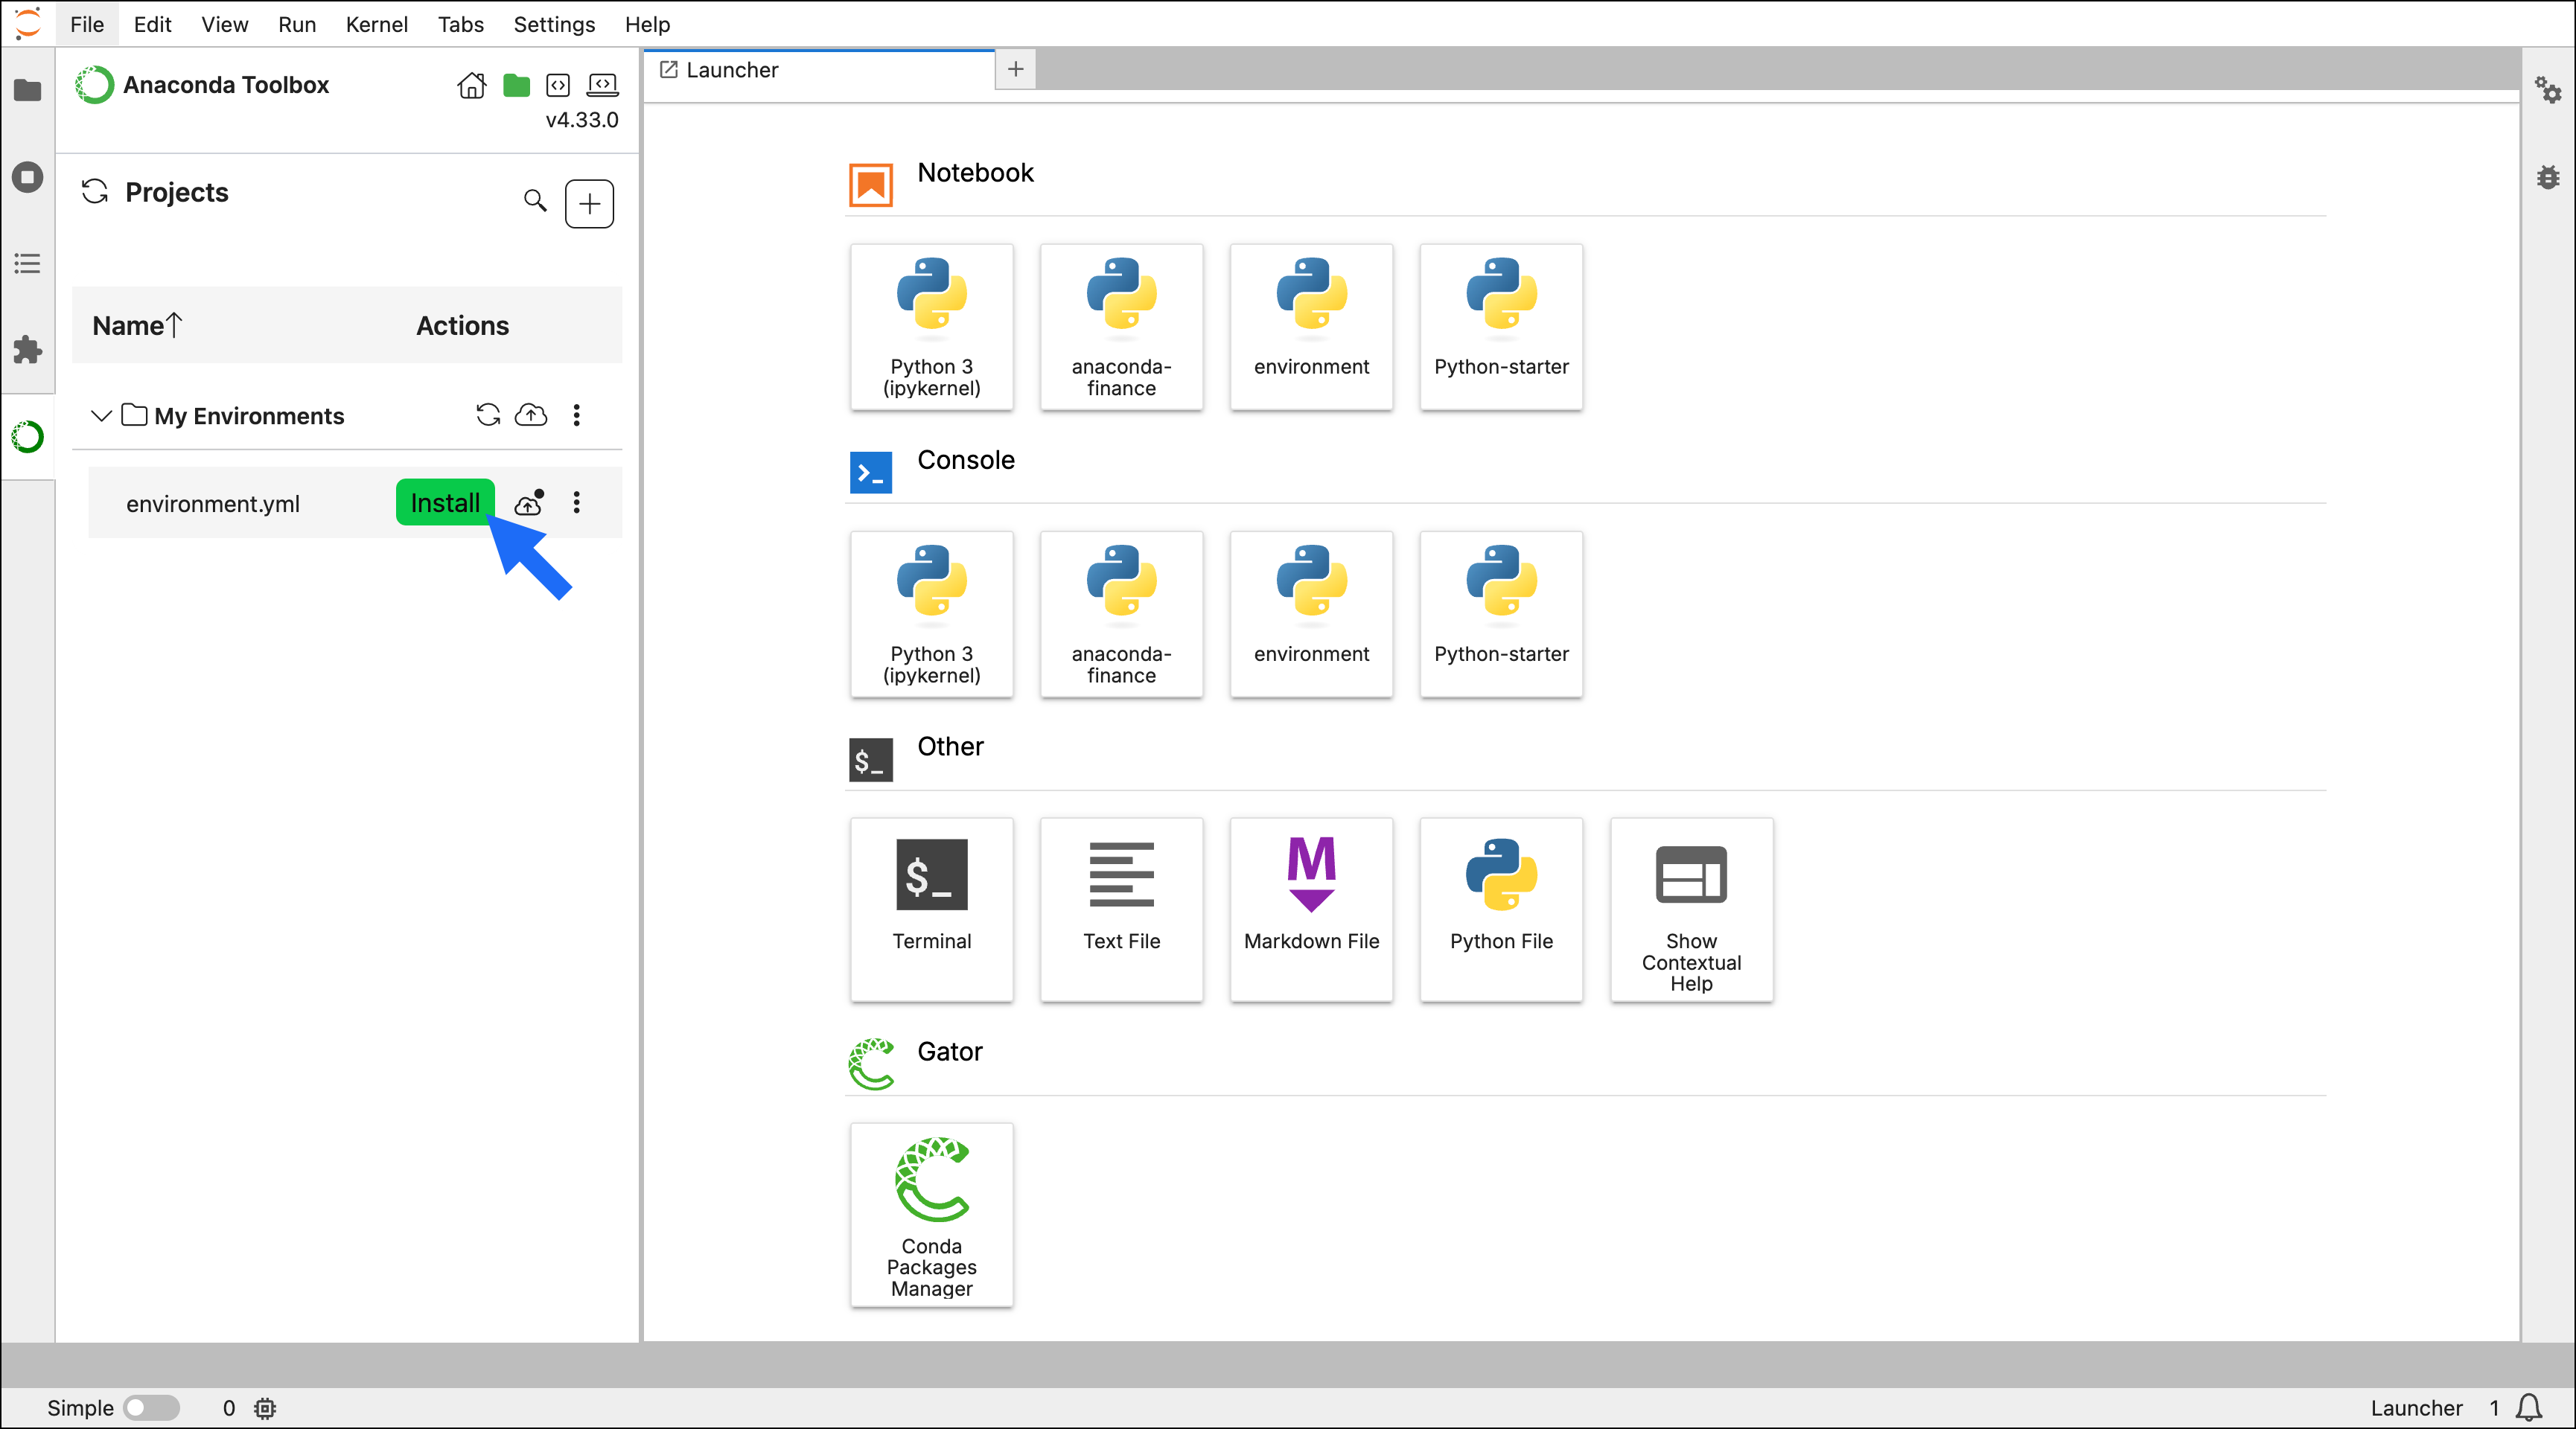
- In the modal that appears, choose a unique name for your environment, then select Install.
ipykernel package in your dependencies list.
It might take a minute for your custom runtime to be created and available for use. You might need to close and reopen your active notebook or refresh the browser for your new runtime to appear.
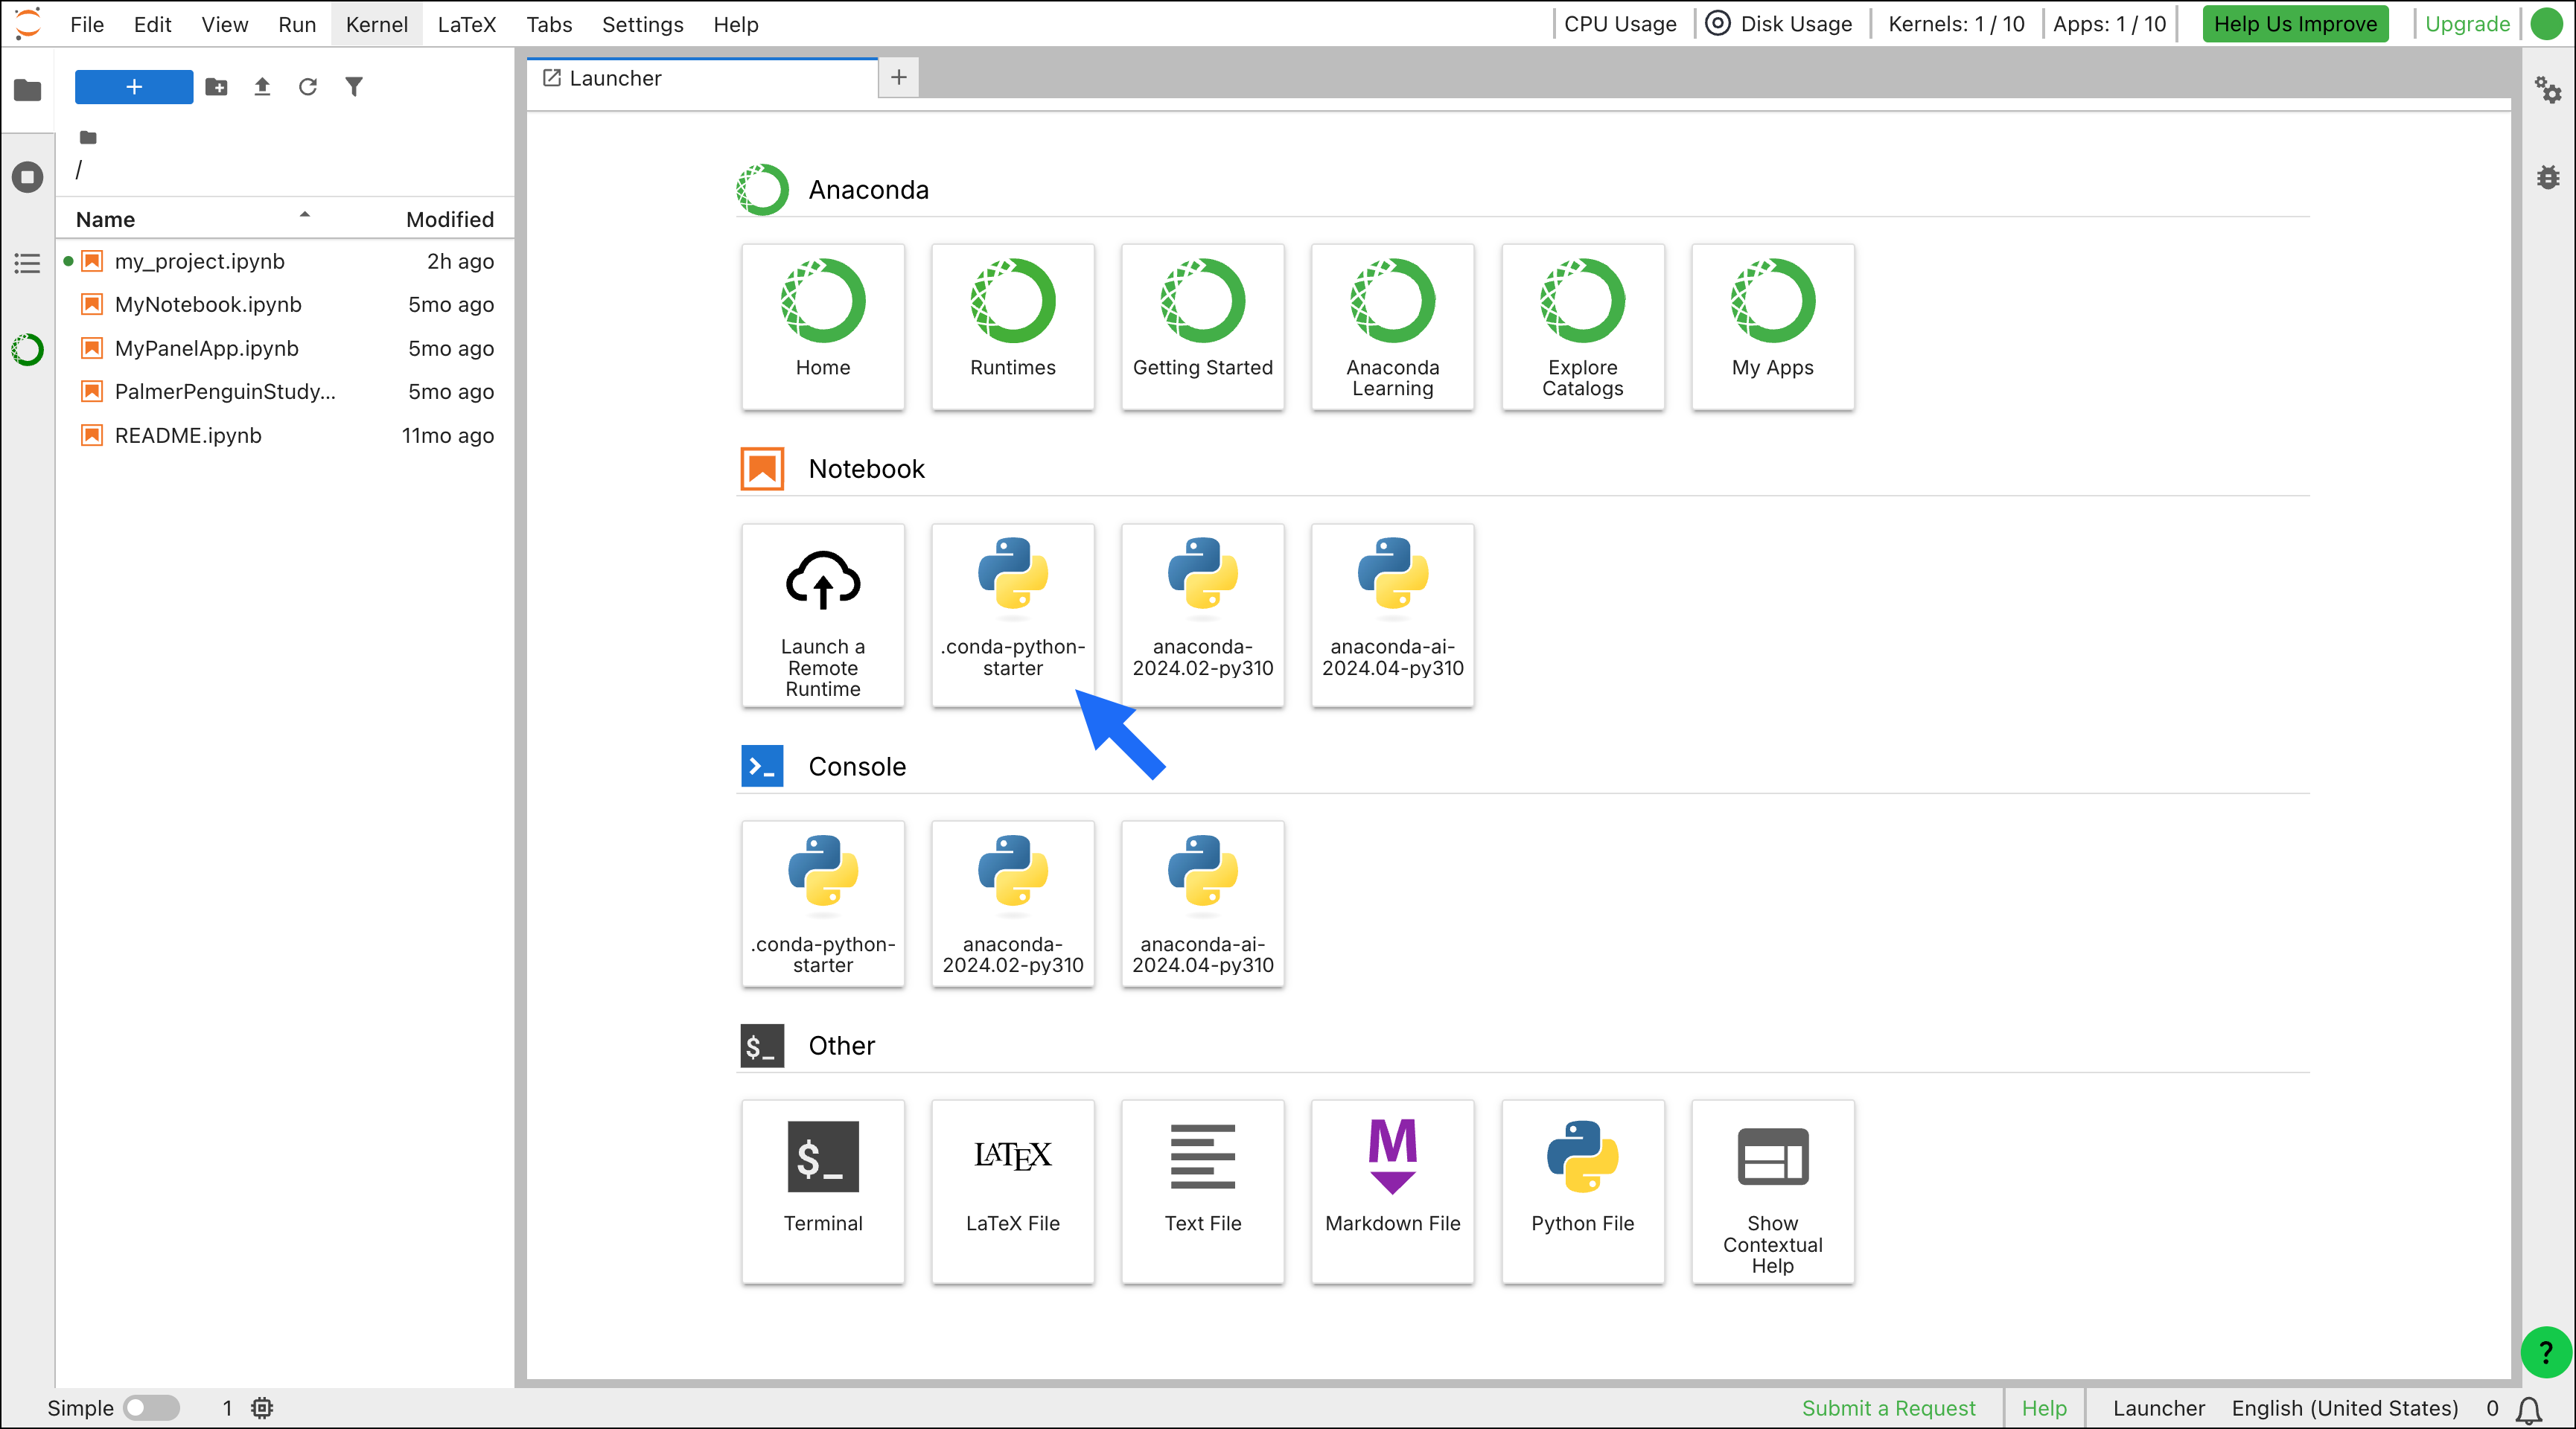
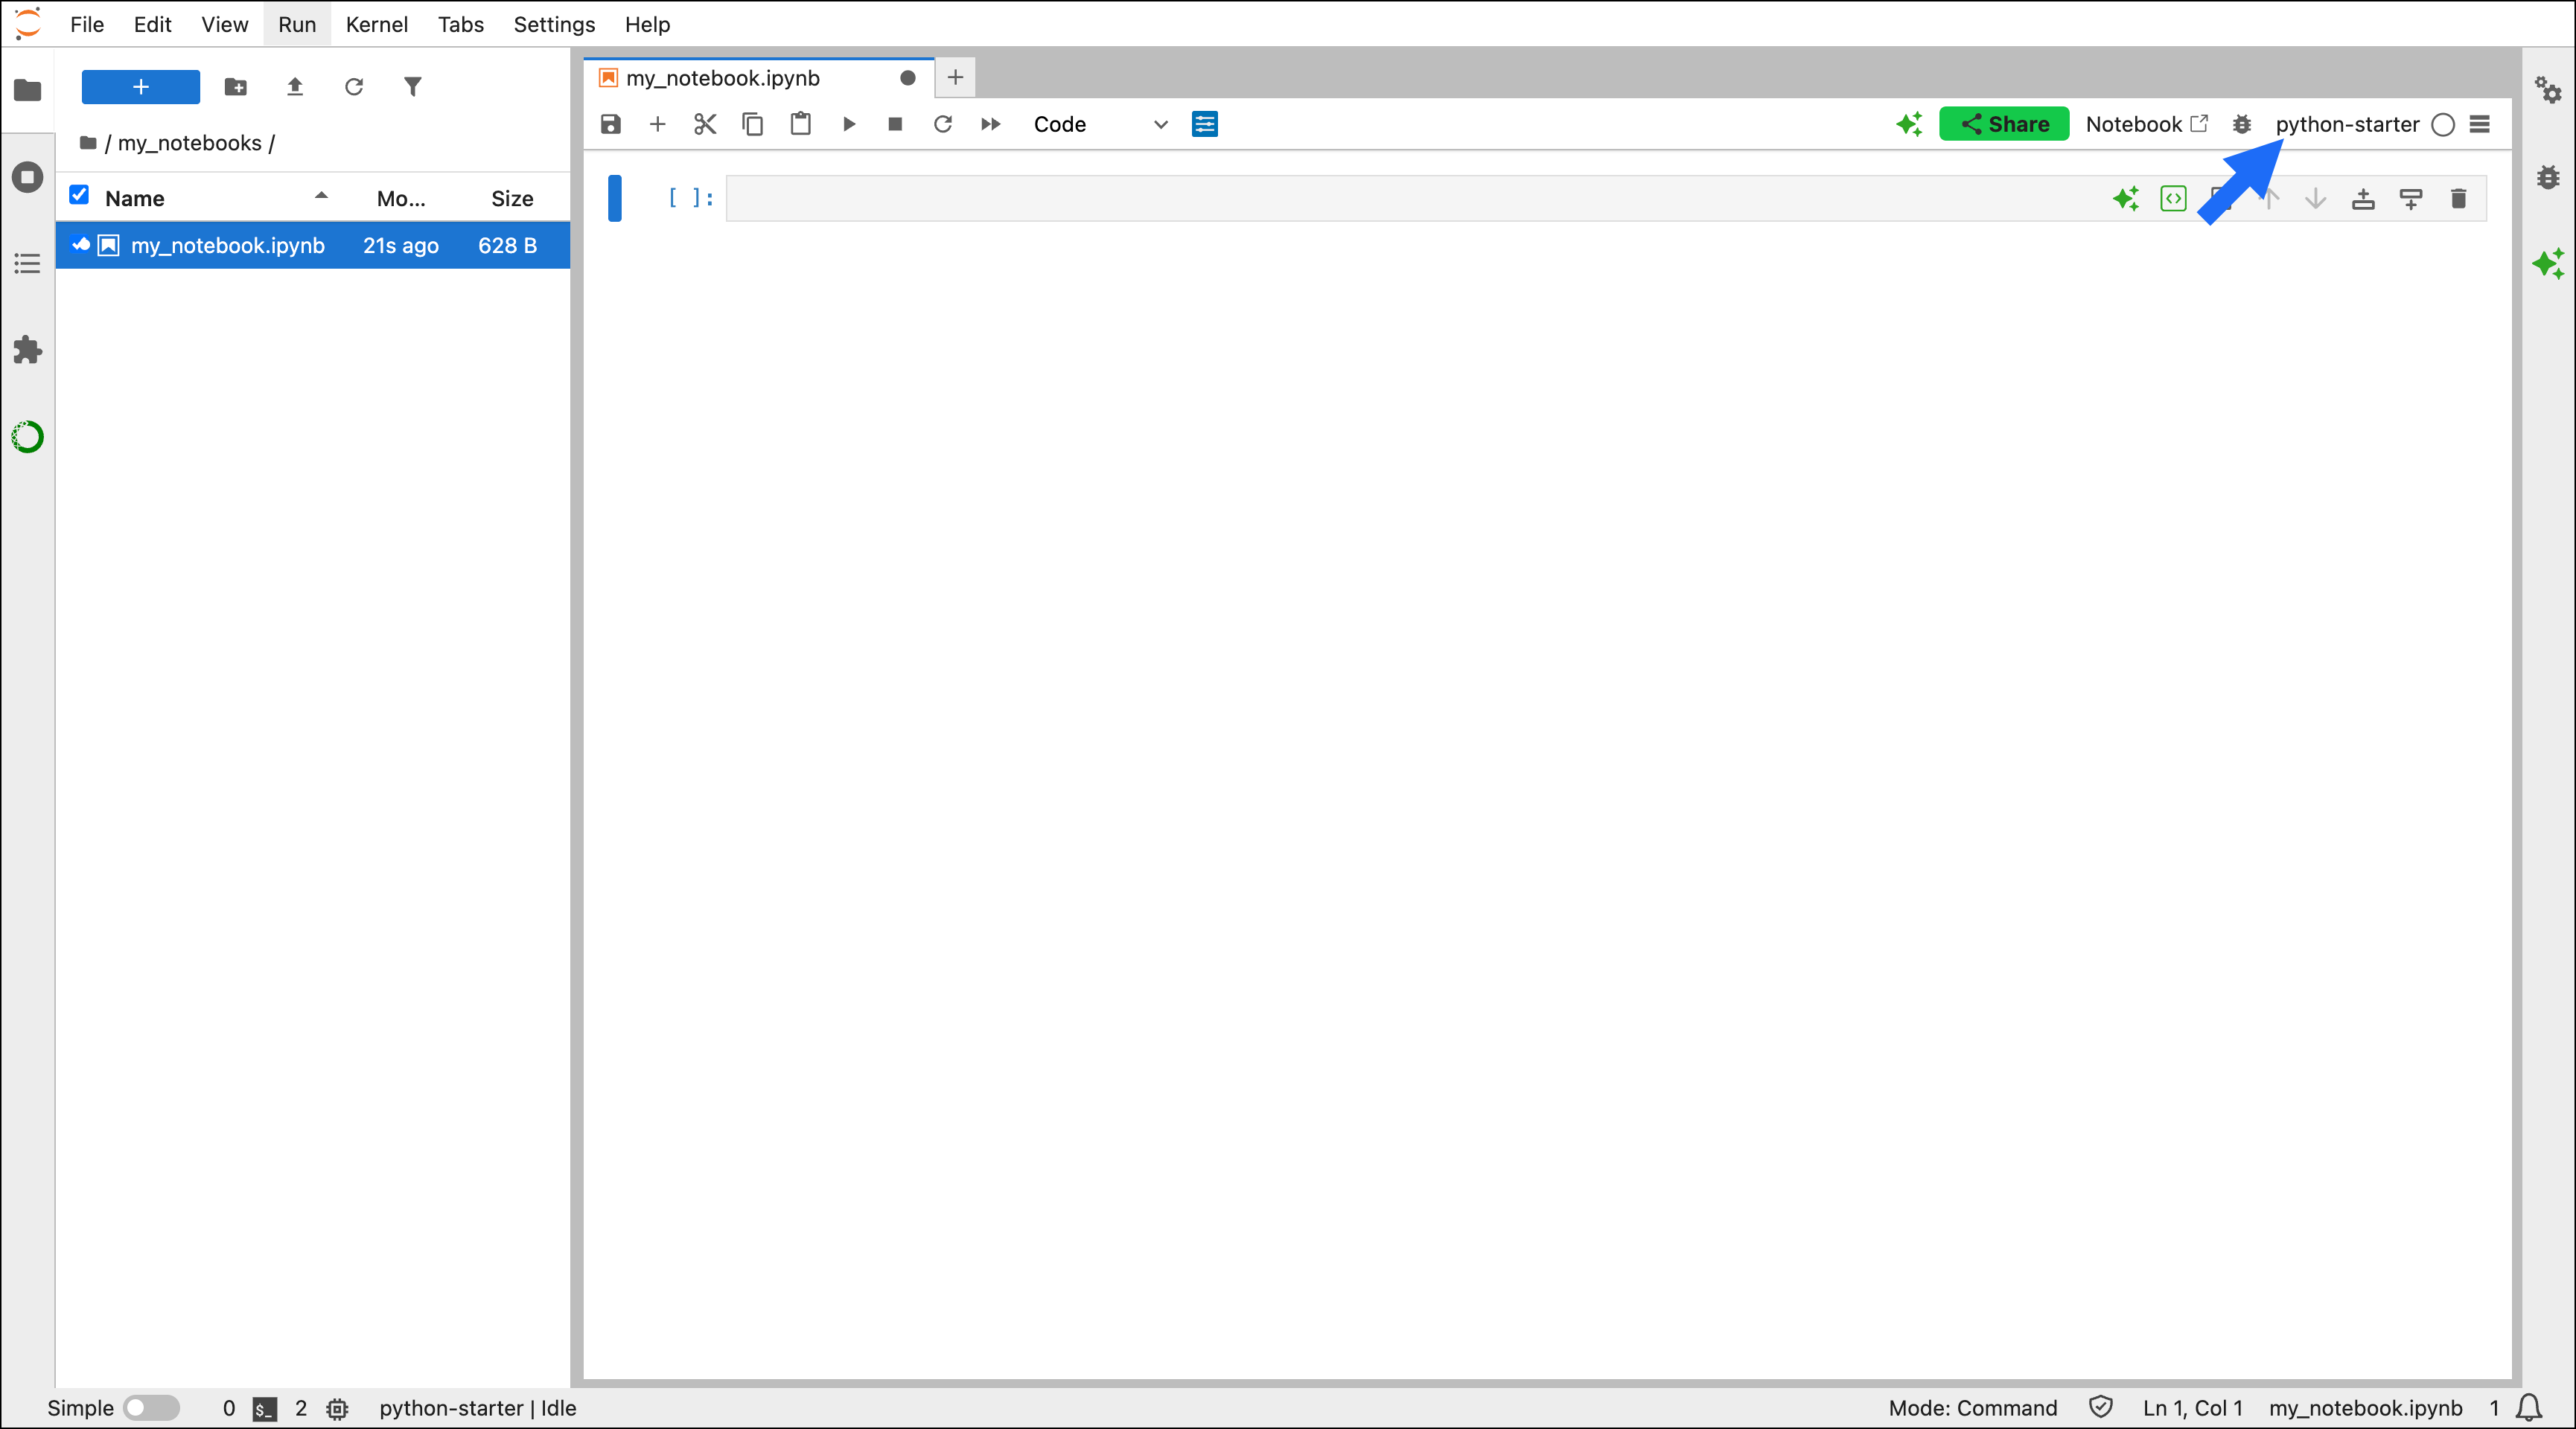
Activating runtimes
There are a few locations from which you can activate a runtime:- Terminal
- Launcher
- Notebook
- Open a terminal from the Launcher.
- Run the following command:
Shutting down runtimes
It is best practice to shut down a runtime when you are finished working in it. To shut down a runtime, click Kernels in the top menu, then select the specific runtime you want to shut down or Shut Down All.Managing packages in a runtime
Installing additional packages
Even after you’ve created a runtime, you can continue to add packages as needed. To add a package to a custom runtime:- Open a terminal from the Launcher.
-
Activate the runtime environment where you want to add the package by running the following command:
-
Install the packages you want to add to the environment:
Updating packages
To update packages in your runtime:- Open a terminal from the Launcher.
-
Activate the runtime environment with the package you want to update by running the following command:
-
Update the package:
Removing packages
To remove packages in your runtime:- Open a terminal from the Launcher.
-
Activate the environment with the package you want to remove by running the following command:
-
Remove the package:
Removing custom runtimes
To remove a custom runtime:- Open a terminal from the Launcher.
- Run the following command to remove the custom runtime: