Anaconda Platform
7.0.0 is available through a limited early access program. Contact your Anaconda Technical Account Manager (TAM) if you’re interested in adopting the latest version.Viewing servers
To view servers, select Model Servers from the left-hand navigation. The Servers page displays all existing servers in Anaconda Platform, listed in a table. Each row displays the server’s name; the hosted model’s name, type, quantization level; who owns (created) the server; and the last time the server was started. Servers are sorted by Last Started, with the most recently started servers at the top of the list. The Status column displays each server’s state and your access permissions. Servers that display No Access are hosting models you don’t have permission to use.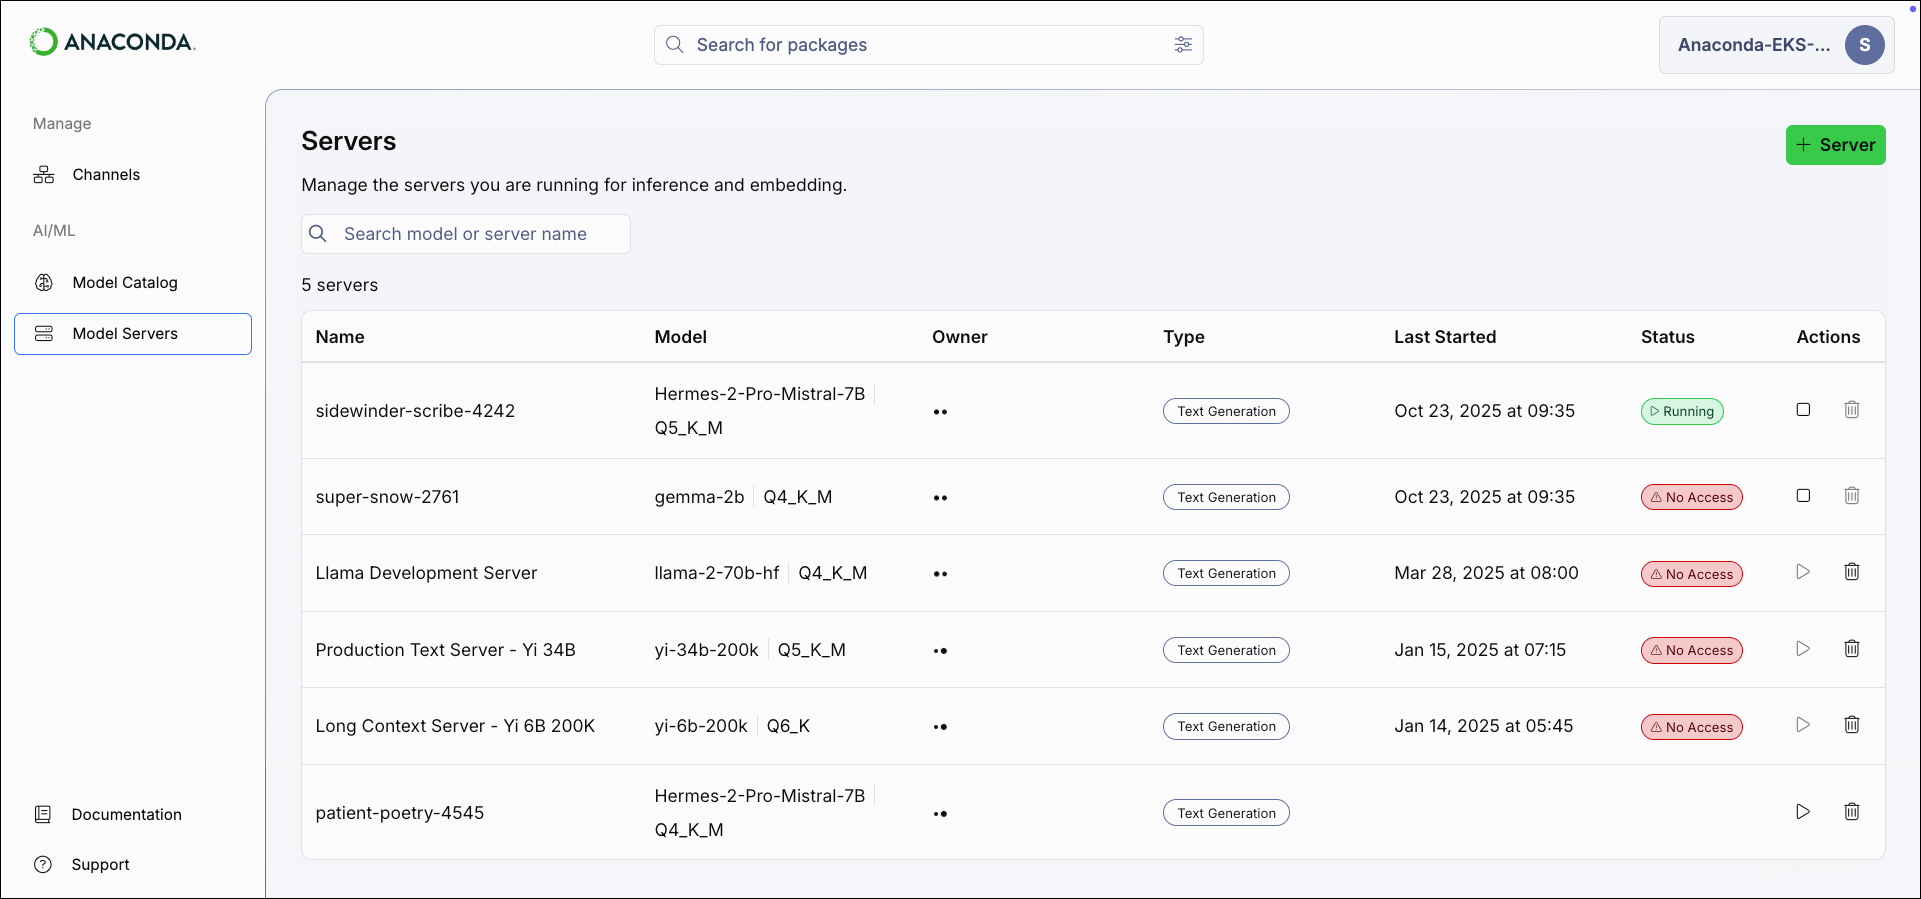
Creating a server
- Select Model Servers from the left-hand navigation.
- Select Server in the upper-right corner of the Servers page. The Create Server modal appears.
-
Enter a name for the server.
A random name is automatically generated for all new servers. You can edit this name if preferred.
-
Open the Model dropdown and select a model.
Only the models you have access to are available.
- Open the Quantization dropdown and select a quantization level for the model.
- Select Create.
Viewing server details
Select a server from the list to open its details page. The server’s details page displays the server’s IP address and port number and which model and quantization level the server is hosting.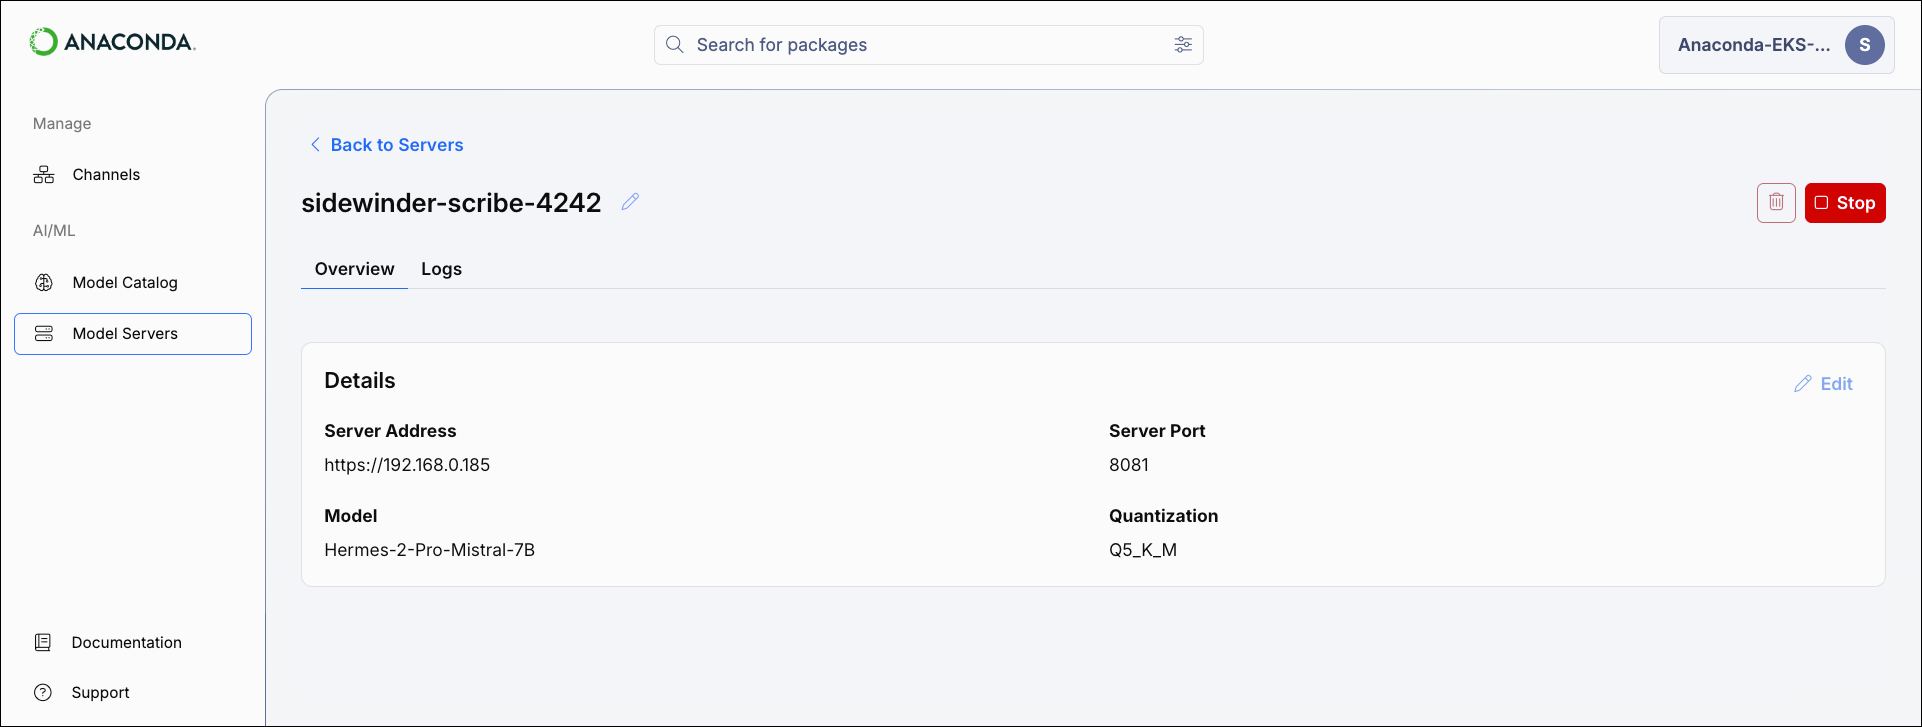
Editing servers
From the server’s details page, select Edit to update the server’s hosted model or quantization level.The server’s IP address and port cannot be changed.
You cannot edit a server that is currently running.
You cannot edit a server that is currently running.
Managing servers
Start a server to make its hosted model available for inference and embedding API calls. Starting a server consumes system resources to operate the model.
Stop a running server to free system resources. To stop a server, select the stop icon beside its name or from the server’s details page.
Connecting applications to servers
Connecting your application to a model server requires setting two environment variables: thebase_url, which directs your API calls to the server hosting your model, and the api_key, which authenticates your requests.
Follow the steps below to find these variables’ values and save them as environment variables in your application.
Find your base URL
From a server’s details page, use the copy button beside the Server Address to copy the server’s URL. You’ll use this as your
base_url.Generate an API key
Follow the steps on the API keys page to create and copy an API key. You’ll use this as your
api_key.User Resources must be set to at least Read-only to be able to connect to the server.
Configure your application
Set your credentials as environment variables:
Environment variables set directly in the terminal will only last as long as the terminal session is active. To make these environment variables permanent, follow your system’s standard process for persisting environment variables.
OpenAI API compatibility
Anaconda Platform model servers are OpenAI API compatible for chat completions. See OpenAI’s Chat Completion API documentation for more information on making chat completion requests.Make sure the model server is running before making API requests.
The
The
model parameter is required but can be left as an empty string since the model is already loaded on the server.- OpenAI client
- anaconda-ai SDK