Anaconda Team Edition 6.1.3: Easier management and curated CVEs


Over the past few weeks, we have made some exciting changes to Pangeo’s cloud deployments. These changes will make using Pangeo’s clusters easier for users while making the deployments more secure and maintainable for administrators.
Going all the way back to the initial prototype, Pangeo’s cloud deployments have combined a user interface like Jupyterlab with scalable computing. Until recently, Pangeo used Dask Kubernetes to start Dask clusters on a Kubernetes cluster. This worked well for several years, but there were a few drawbacks.

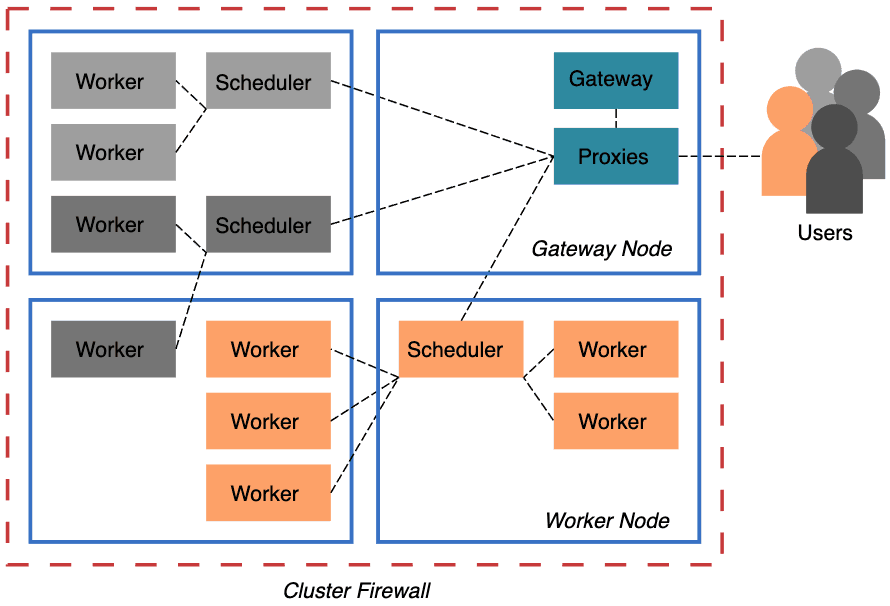
To address these problems, we’ve included Dask Gateway, a secure, multi-tenant server for managing Dask clusters, in Pangeo’s Helm Chart. Pangeo’s Binders and Jupyterhubs now have Dask Gateway enabled, which benefits both users and cluster administrators (who are often just the users wearing a different hat).
Previously, users wishing to customize their Dask cluster would often need to interact directly with the Kubernetes API, which is overwhelmingly large. For example, suppose we have a workload that’s relatively memory intensive: we’re loading a lot of data but doing some very simple transformations. So we’d like to adjust the ratio of CPU-cores to memory to have more memory. The Pangeo admins provided some default values in a configuration file.
# file: dask_config.yaml
kubernetes:
  worker-template:
    spec:
      containers:
      - args:
          - dask-worker
          - --nthreads
          - '2'
          - --memory-limit
          - "7GB"
        resources:
          limits:
            cpu: 2
            memory: "7G"
          requests:
            cpu: 1
            memory: "7G"
Resources dask_config.yaml example
Those values are automatically used when creating a dask_kubernetes.KubeCluster. For our “high-memory” workload, we’d need to adjust a few places to get the desired ratio of CPU-cores to memory.
containers = [
    {
        "args": [
            "dask-worker", "--nthreads", "1",
            "--memory-limit", "14GB",
        ],
        "resources": {
            "limits": {"cpu": 1, "memory": "14G"},
            "requests": {"cpu": 1, "memory": "14G"},
        },
    }
]

dask.config.set(**{"kubernetes.worker-template.spec.containers": containers})
That’s a lot of specialized knowledge needed for this relatively simple request of “give me fewer cores and more memory”.
Compare that with Dask Gateway’s approach to the same problem. Cluster administrators can expose options to users. Users can select from these options using a graphical widget or through code.

This builds on the same technology used throughout the Jupyter ecosystem, so users of libraries like ipywidgets will find the interface familiar.
Dask-Kubernetes requires broader permissions on the Kubernetes pods, which may be problematic for some groups. With Dask Gateway, only the service deployed by the administrator needs to interact directly with the Kubernetes cluster. Users are completely isolated.
Pangeo administrators now have greater control over how the cluster is used. We can set server-side limits on things like the maximum size of a cluster, and the number of concurrent clusters per user. Previously, users could create huge Dask clusters that swamped our Kubernetes cluster, degrading the experience for anyone else using the cluster and costing Pangeo money.
Now that Dask Gateway is available by default on all Pangeo cloud deployments, we’re looking to help users familiar with Dask-Kubernetes transition to Dask Gateway. Luckily, transitioning between the two is pretty simple.
A typical usage of Dask-Kubernetes cluster:
from dask.distributed import Client
from dask_kubernetes import KubeCluster


cluster = KubeCluster()  # create cluster
cluster.scale(...)  # scale cluster

client = Client(cluster)  # connect Client to Cluster
Now, to create a Dask Client using Dask Gateway:
from dask.distributed import Client
from dask_gateway import Gateway


gateway = Gateway()  # connect to Gateway

cluster = gateway.new_cluster()  # create cluster
cluster.scale(...)  # scale cluster

client = Client(cluster)  # connect Client to Cluster
Dask Gateway provides some great documentation on how to use its API but we’ll unpack a few of the differences anyways:
gateway = Gateway(): Connects to the Dask Gateway deployment. This gateway will manage Dask clusters and broker access to the Kubernetes API.cluster = gateway.new_cluster(): Rather than instantiating a KubeCluster, we ask the Gateway to create a new cluster for us. This returns an object that behaves quite similar to other Dask Cluster objects.cluster.scale(): No change here. Scale your cluster up and down using .scale() or .adapt(). Note that Dask Gateway may enforce per-user or per-cluster limits on things like CPU or memory use.client = Client(cluster): Again, no change here. Attaching the client to the cluster ensures that the cluster is used for all future computations.So that’s it! The primary change is that we’re interacting with the Gateway, rather than directly with the Kubernetes cluster. Everything else, including cluster persistence and scaling, will be the same as before.
This binder has a runnable example of using Dask Gateway on a Pangeo binder.
If you’re using one of Pangeo’s binder deployments (on Google or on AWS), you’ll now need to include Dask Gateway in your environment, rather than dask-kubernetes. See the pangeo-binder documentation for more.
Wrapping up
We hope this gentle introduction to Dask Gateway and why Pangeo has adopted it proves useful for you. For more details, follow this GitHub issue and the linked pull requests. While we expect to continue supporting Dask-Kubernetes on Pangeo’s deployments for a while, we will eventually be turning this integration off.
Talk to one of our experts to find solutions for your AI journey.