Adding VSCode to Anaconda Enterprise
You can install VSCode as an optional component of Anaconda Enterprise. Technically, the stock Microsoft version of VSCode will not run in a browser-based environment, so Anaconda relies on
If your command returns an “address already in use” error, your installation was successful.
code-server, a patched version of VSCode that allows it to be run in the browser.
Anaconda recommends installing VSCode during a scheduled maintenance interval to prevent users from creating new sessions during installation. Existing sessions or deployments do not need to be halted.
Installing VSCode
- Download the VSCode tarball file.
-
Open a browser and log in to Anaconda Enterprise as the
anaconda-enterpriseuser. - Open any existing project and view its settings.
- If necessary, change the Default Editor to JupyterLab.
- Open a project session.
- Upload the VSCode tarball you just downloaded into the project.
- Open a terminal for your session.
-
Unpack the tarball you just downloaded into the tools directory by running the following command:
Enabling VSCode as an editor option
Once you have unpacked the tarball, you must enable VSCode as an editor option for project sessions.- Access your Kubernetes cluster resource management console.
-
Open the
anaconda-enterprise-anaconda-platform.ymlConfigMap file. -
Find the
vscode:section of the file. -
Change the
hidden:value fromtruetofalse. - Save your work and close the file.
-
Restart the UI pod by running the following command:
Removing VSCode as an editor option
- Access your Kubernetes cluster resource management console.
-
Open the
anaconda-enterprise-anaconda-platform.ymlfile. -
Find the
vscode:section of the file. -
Change the
hidden:value fromfalsetotrue. - Save your work and close the file.
-
Restart the UI pod by running the following command:
Verifying your installation
- Return to Anaconda Enterprise in your browser and navigate to the projects grid.
- Create a new project.
- Open your project and view its settings.
-
Open the Default Editor dropdown menu and select Visual Studio Code.
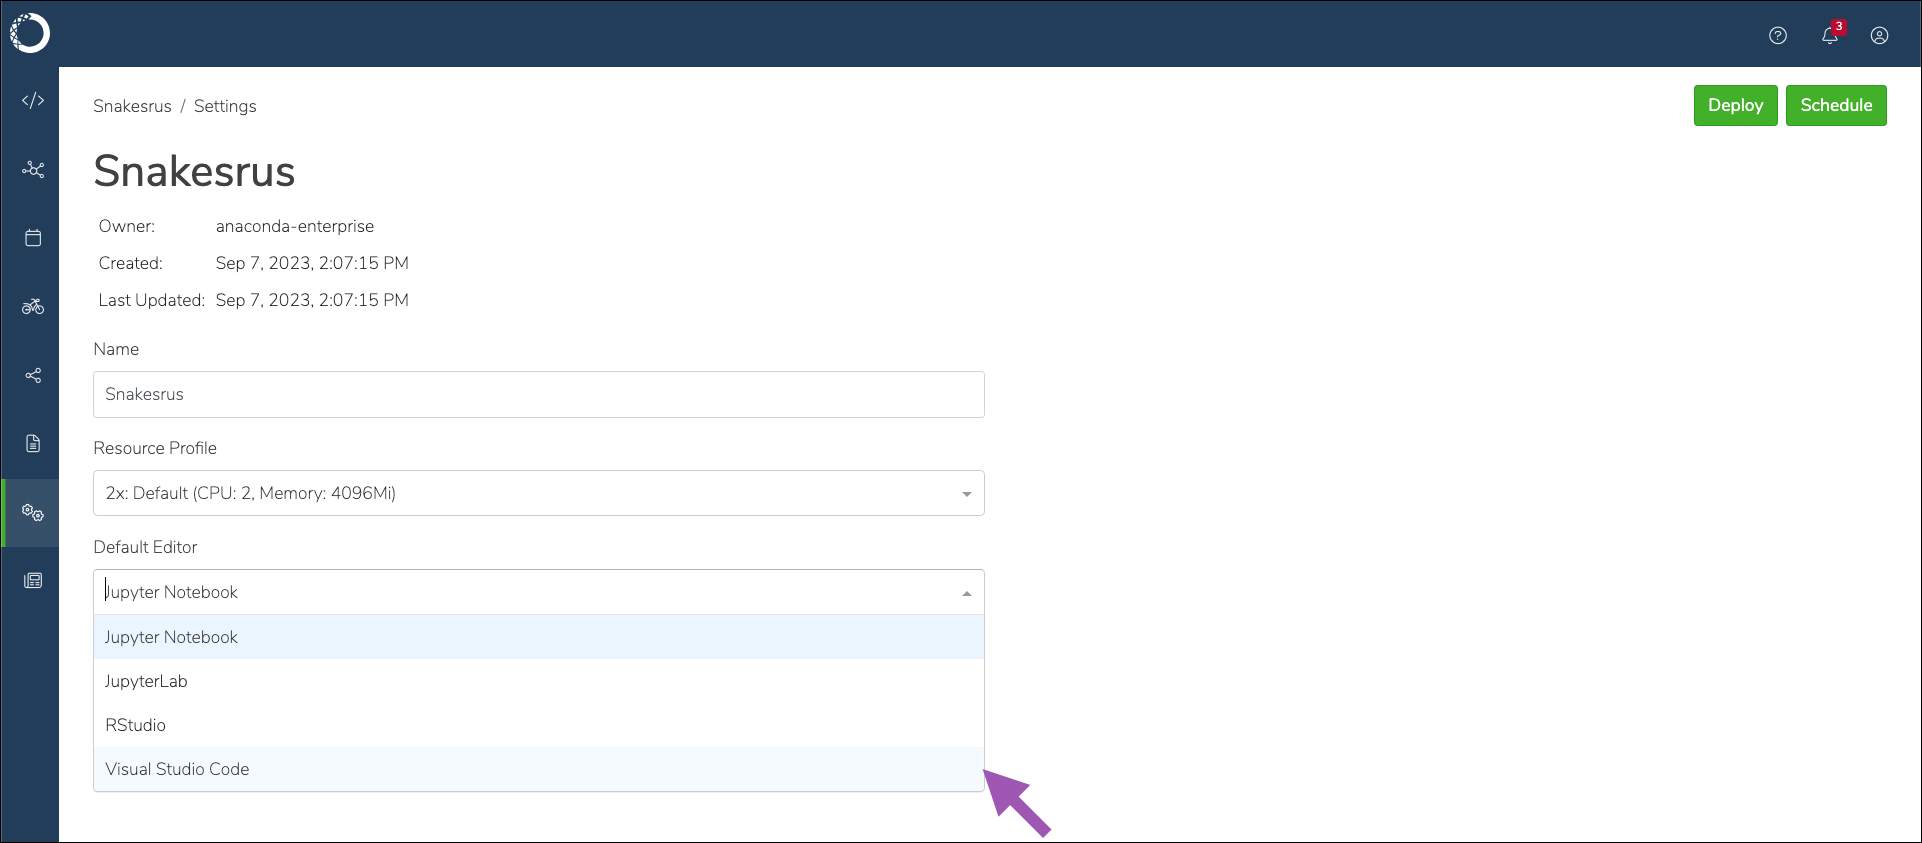
- Click Save.
-
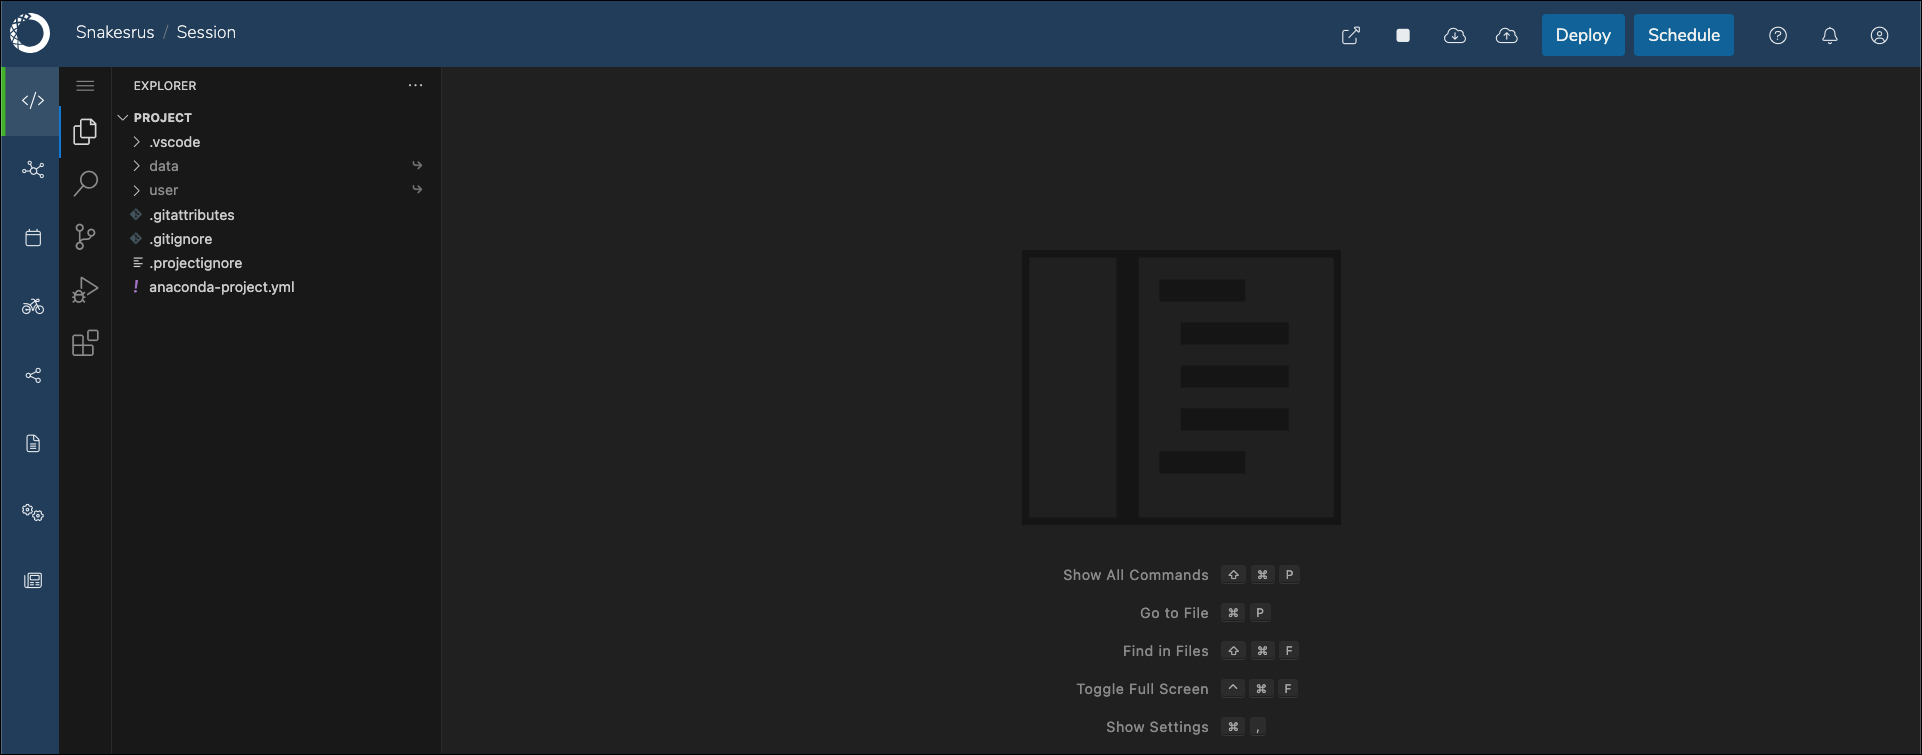
Open a session for your project.
Uninstalling VSCode
To completely remove VSCode from your instance of Anaconda Enterprise:-
Stop any existing project session that is currently using VSCode. These sessions must also choose a different default editor, such as JupyterLab.
If you do not choose a different default editor, sessions will fail to open from these projects.
- Access your Kubernetes cluster resource management console.
-
Open the
anaconda-enterprise-anaconda-platform.ymlfile. -
Search for the
/tools:portion of thevolume:section. -
Remove the
/vscode:portion of the file.
Upgrading to a new version of Anaconda Enterprise
Upgrading Anaconda Enterprise will not affect the VSCode installation. However, the upgrade process will re-hide VSCode as an editor option. For more information, see Enabling VSCode as an editor option.Updating the VSCode installation
Anaconda recommends performing a fresh installation if you need to upgrade VSCode, as this minimizes the risk of unexpected issues.- Stop any existing project session that is currently using VSCode.
- Download the latest VSCode installation project and save it locally.
-
Open a browser and log in to Anaconda Enterprise as an administrator with managed persistence permissions.
The anaconda-enterprise user account has these permissions.
- Open a session for your VSCode installation project.
- Open a terminal in your session.
-
Move the existing VSCode installation aside in case you need it by running the following command:
If an error occurs, you can restore this file to avoid downtime.
-
Remove the directory by running the following command:
- Upload your new VSCode tarball file to the project.
-
Install VSCode by running the following command:
- Verify your installation by running the following command:
- Remove the /tools/vscode.old directory once the update is complete.
Installing VSCode extensions
Anaconda relies on the Open VSX Registry as a source for VSCode extensions.Installing an extension into a project
- Open a session in your project using the VSCode editor.
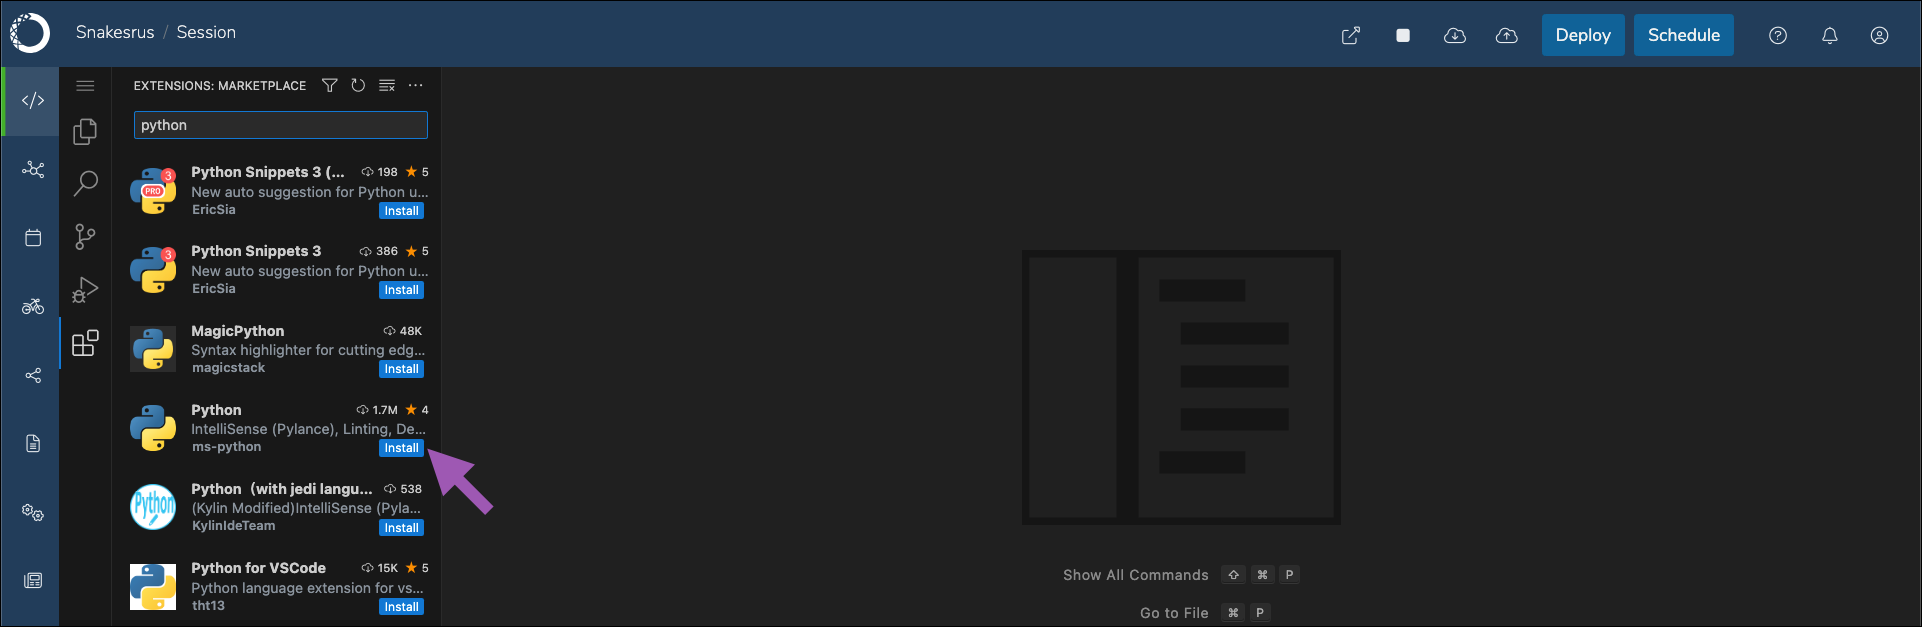
- Click the extensions icon in the left-hand navigation.
- Enter an extension’s name in the search field.
-
Click Install next to the extension you want.
.vsix file manually, then upload it to the project you want to use it in.
Installing an extension manually
- Open a browser and log in to Anaconda Enterprise as an administrator with managed persistence permissions.
The anaconda-enterprise user account has these permissions.
- Open a project session using the VSCode editor.
-
Upload your
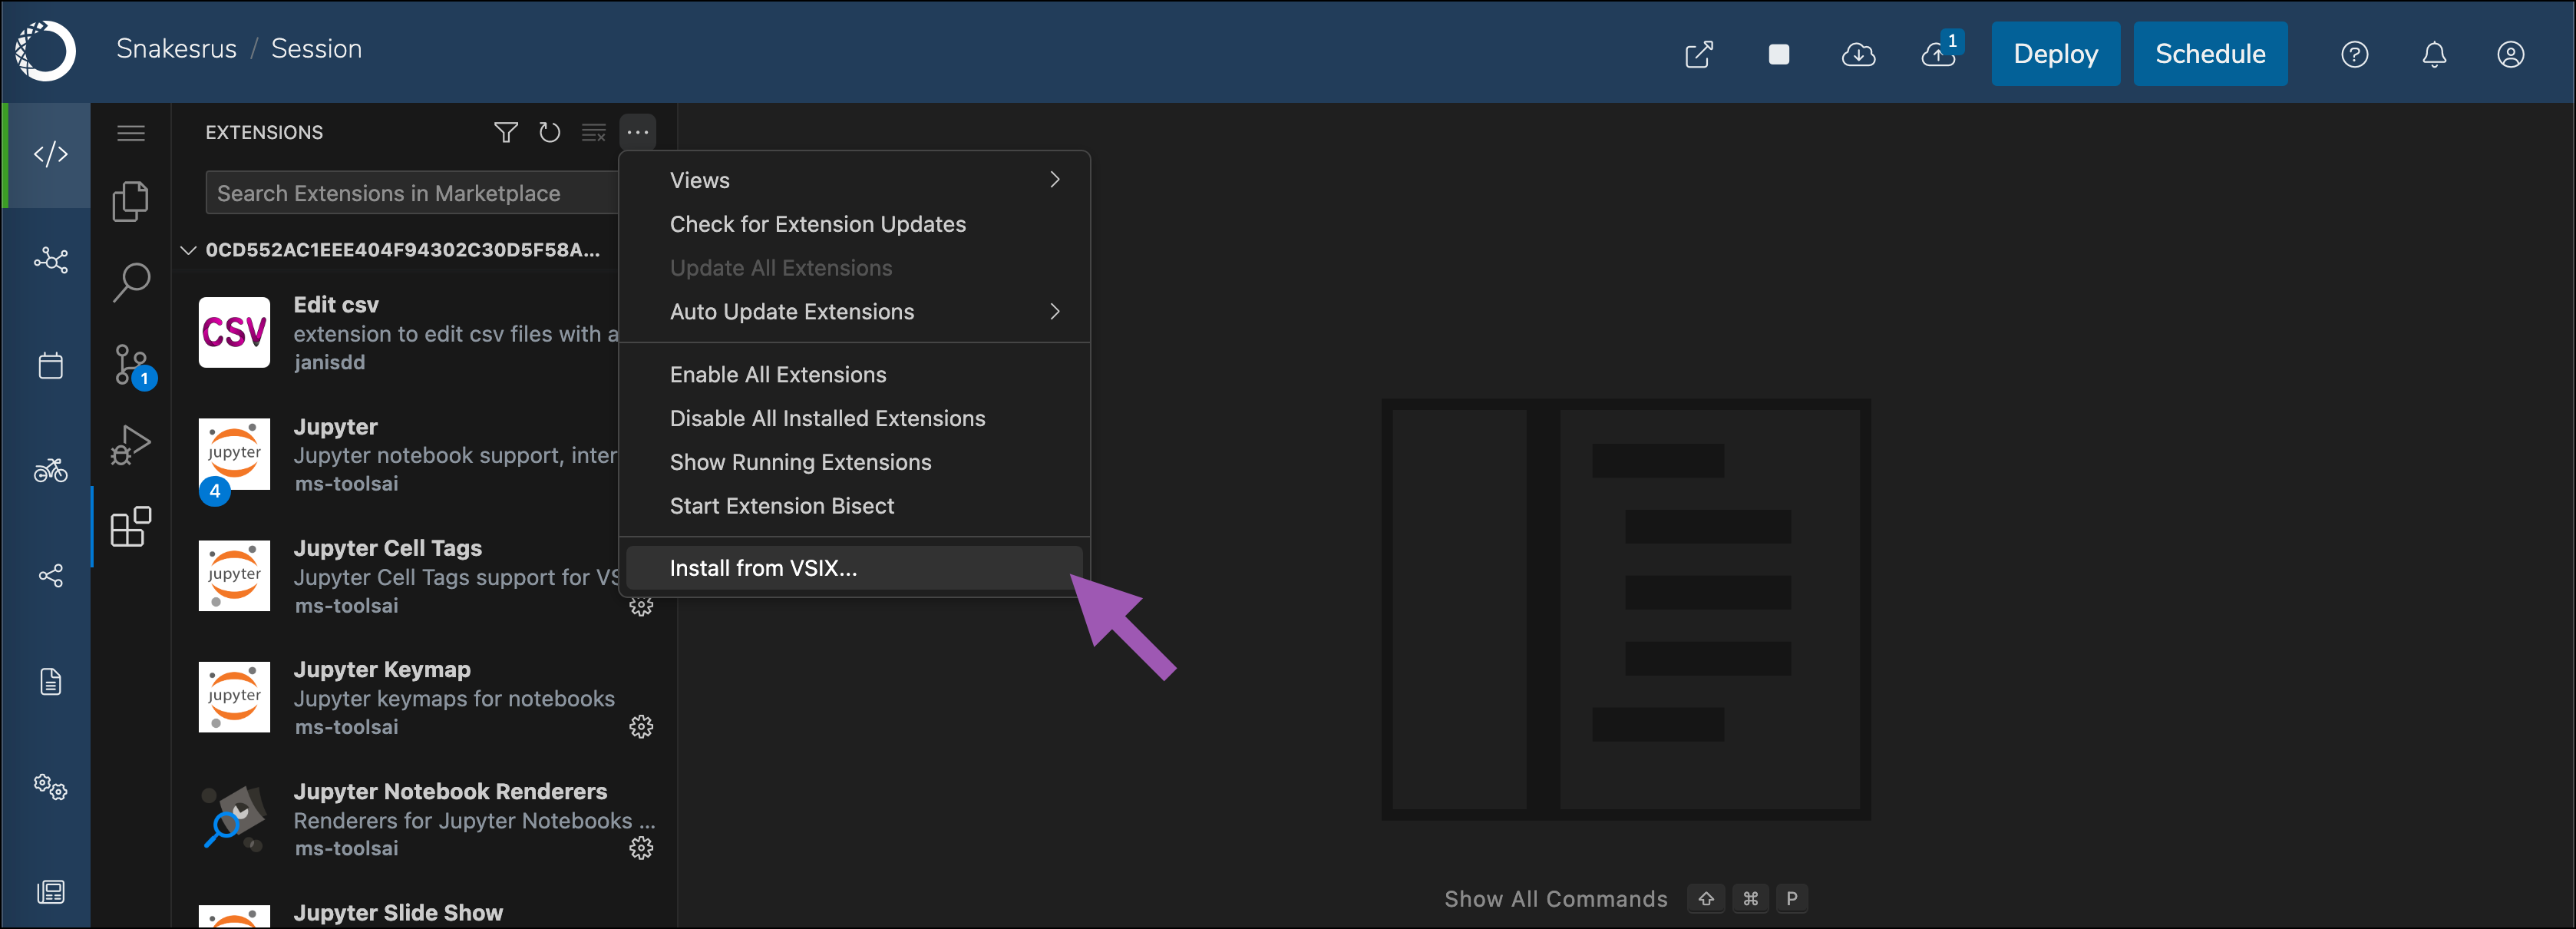
.vsixfile to the project. - Click the extensions icon in the left-hand navigation.
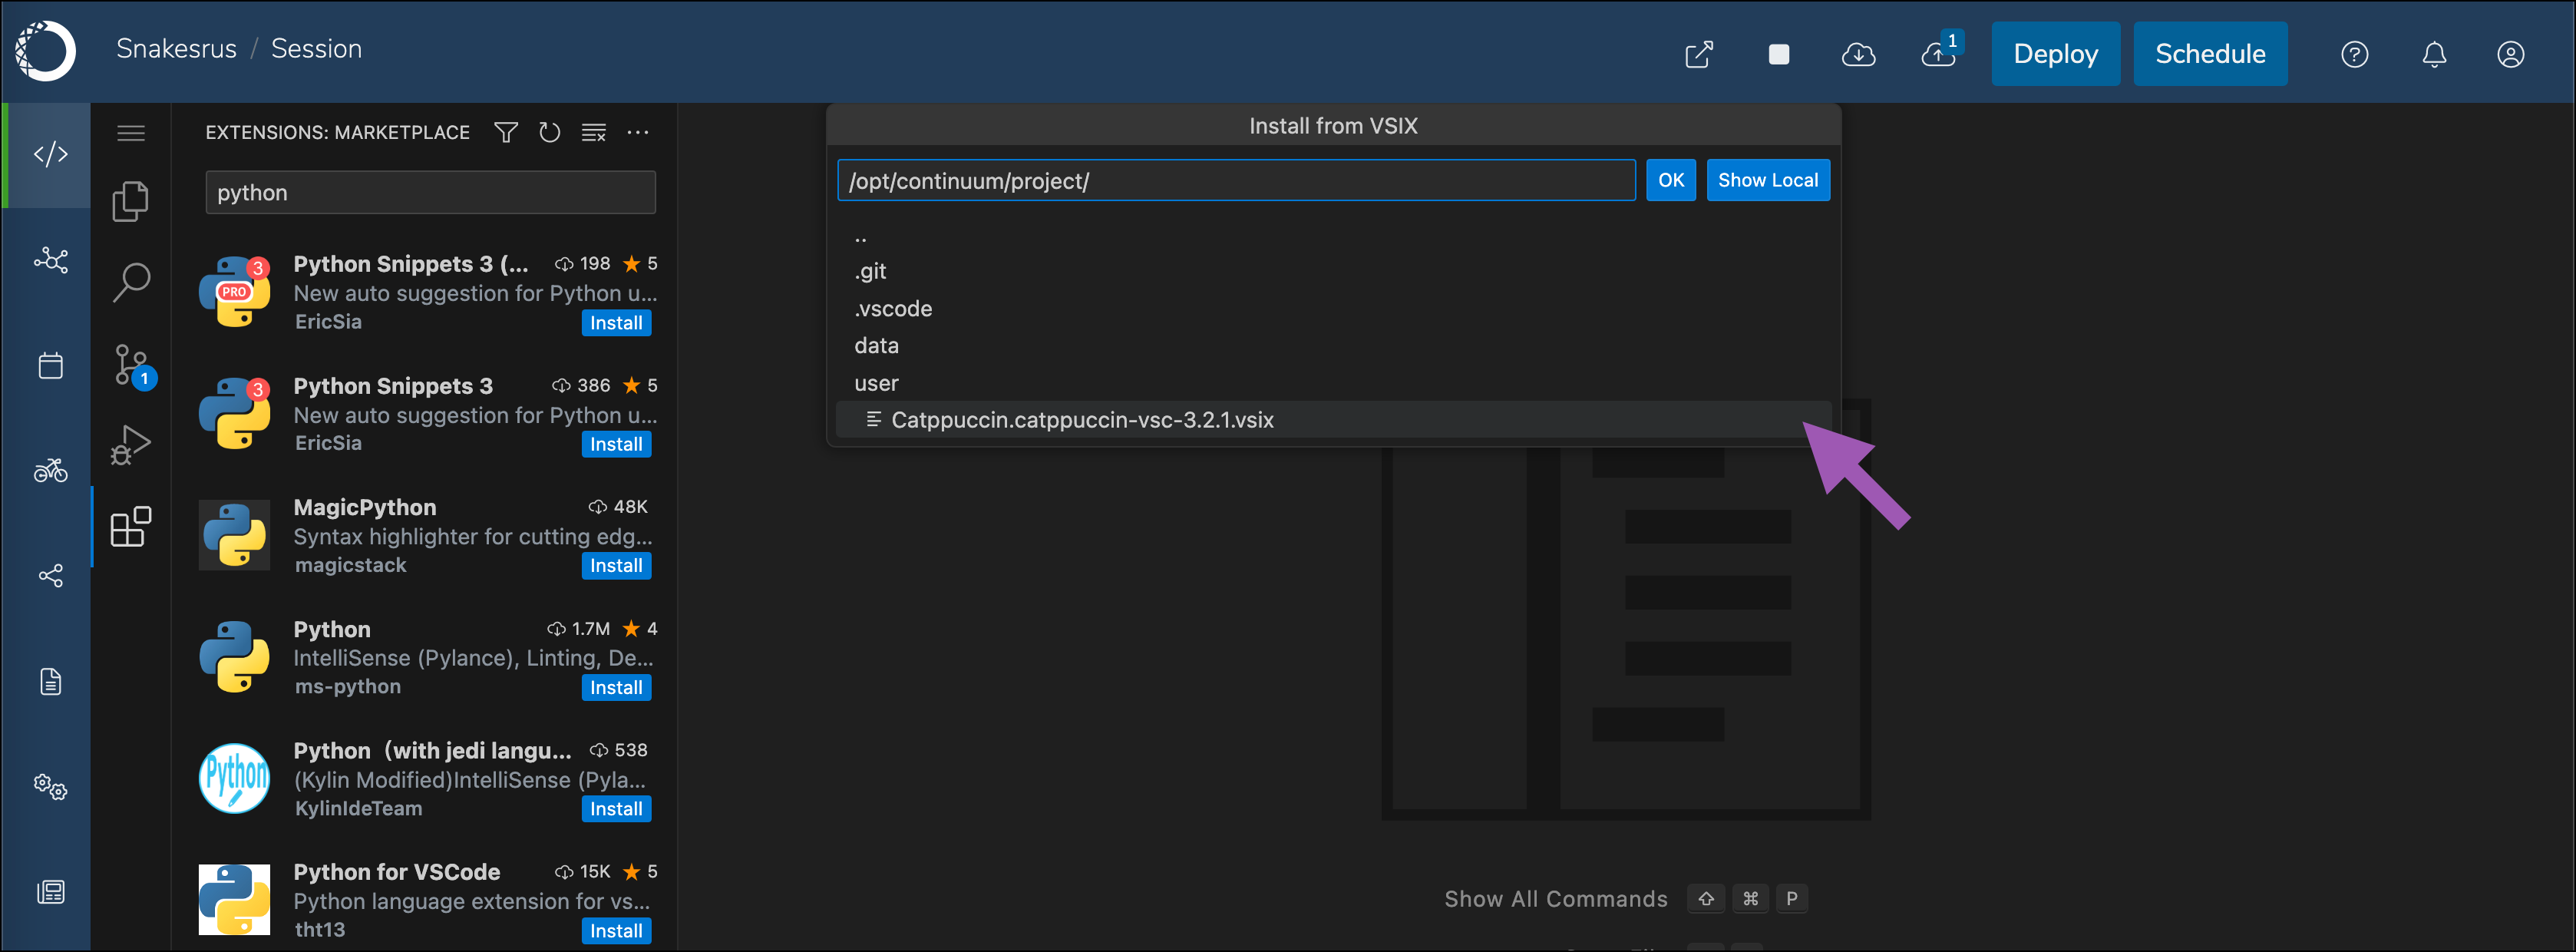
-
Click the more actions icon, then select Install from VSIX….
-
Navigate to
/opt/continuum/project/and select your extension from the list.