Install requirements
To gain a deeper understanding of the considerations around Anaconda Enterprise system requirements, you may visit our Understanding Anaconda Enterprise system requirements topic.
- The Ops Center is not a part of a Non-Gravitational based install, as this feature was provided by Gravity.
- An external internet connection is required. This allows you to pull docker images from repo.
- These instructions work for Kubernetes version 1.15 or lower.
Hardware requirements
The following are minimum specifications for the master and worker nodes, as well as the entire cluster.- Persistent Volume will be 500GB
- SSD storage recommended for provisioner
Anaconda recommends having 1 master and (at least) 1 worker per cluster, as well as using a 1:4 ratio for CPU cores / GB RAM.
| Master node | Minimum | Recommended |
|---|---|---|
| CPU | 4 cores | 16 cores |
| RAM | 16GB | 64GB |
| Worker nodes | Minimum | Recommended |
|---|---|---|
| CPU | 4 cores | 16 cores |
| RAM | 16GB | 64GB |
nproc.
GPU requirements
GPU deployments should use one of the following models:- Tesla V100 (recommended)
- Tesla P100 (adequate)
TLS/SSL certificate requirements
Anaconda Enterprise uses certificates to provide transport layer security for the cluster. To get you started, self-signed certificates are generated during the initial installation. You can configure the platform to use organizational TLS/SSL certificates after completing the installation. You may purchase certificates commercially, or generate them using your organization’s internal public key infrastructure (PKI) system. When using an internal PKI-signed setup, the CA certificate is inserted into the Kubernetes secret. In either case, the configuration will include the following:- a certificate for the root certificate authority (CA),
- an intermediate certificate chain,
- a server certificate, and
- a certificate private key.
DNS requirements
Web browsers use domain names and web origins to separate sites, so they cannot tamper with each other. Anaconda includes deployments from many users, and if these deployments had addresses on the same domain, such ashttps://anaconda.yourdomain.com/apps/001 and
https://anaconda.yourdomain.com/apps/002, one app could access the cookies of the other, and JavaScript in one app could access the other app.
To prevent this potential security risk, Anaconda assigns deployments unique addresses such as
https://uuid001.anaconda.yourdomain.com and
https://uuid002.anaconda.yourdomain.com, where yourdomain.com is replaced with your organization’s domain name, and uuid001 and uuid002 is replaced with dynamically generated universally unique identifiers (UUIDs), for example.
To facilitate this, Anaconda Enterprise requires the use of wildcard DNS entries that apply to a set of domain names such as *.anaconda.yourdomain.com.
For example, if you are using the fully qualified domain name (FQDN) anaconda.yourdomain.com with a master node IP address of 12.34.56.78, the DNS entries would be as follows:
Browser requirements
Anaconda Enterprise supports the following web browsers:- Chrome 39+
- Firefox 49+
- Safari 10+
JupyterLab and Jupyter Notebook don’t currently support Internet Explorer, so Anaconda Enterprise users will have to use another editor for their Notebook sessions if they choose to use that browser to access the AE platform.
OpenShift container platform (OCP)
OCP-specific requirements
- OCP 4.2.36 or older.
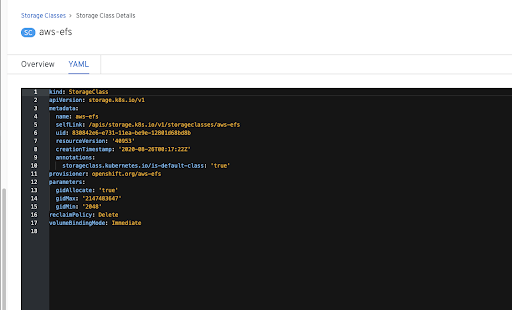
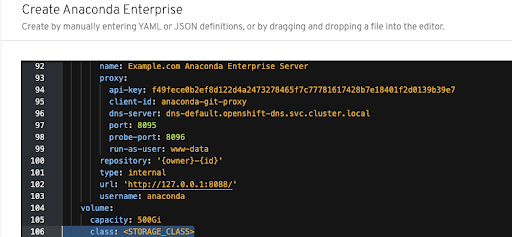
- Storage Class to be used for Persistent Volume
Prerequisite steps
- 2 nodes (at minimum) needed - this is to label one as AE-Master, and one (or more) for AE-Worker. The nodes should be labeled as such:
- AE-Master
- oc label node
<node>role=ae-master - oc label node
<node>cluster_role=ae-master - oc label node
<node>app_role=storage
- oc label node
- AE-WORKER
- oc label node
<node>role=ae-worker - oc label node
<node>cluster_role=ae-worker
- oc label node
- AE-Master
- DNS will need to be configured as:
<ae5>.apps.<OCP>[\*](#id1).<ae5>.apps.<OCP>
Installation
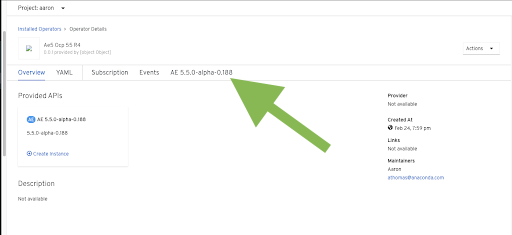
Anaconda will provide the OCP operator in .tar.gz format. If and when this is added to the OCP marketplace, you will be able to install from the the marketplace instead and skip this step, similar to Anaconda Team Edition. To install the Anaconda Enterprise 5.5 operator, run the following commands, in order, usingoc:
SSL support
You will need to create two routes by hand to correctly handle SSL. These example routes are formain and ui, respectively.
The Path cell is left empty.
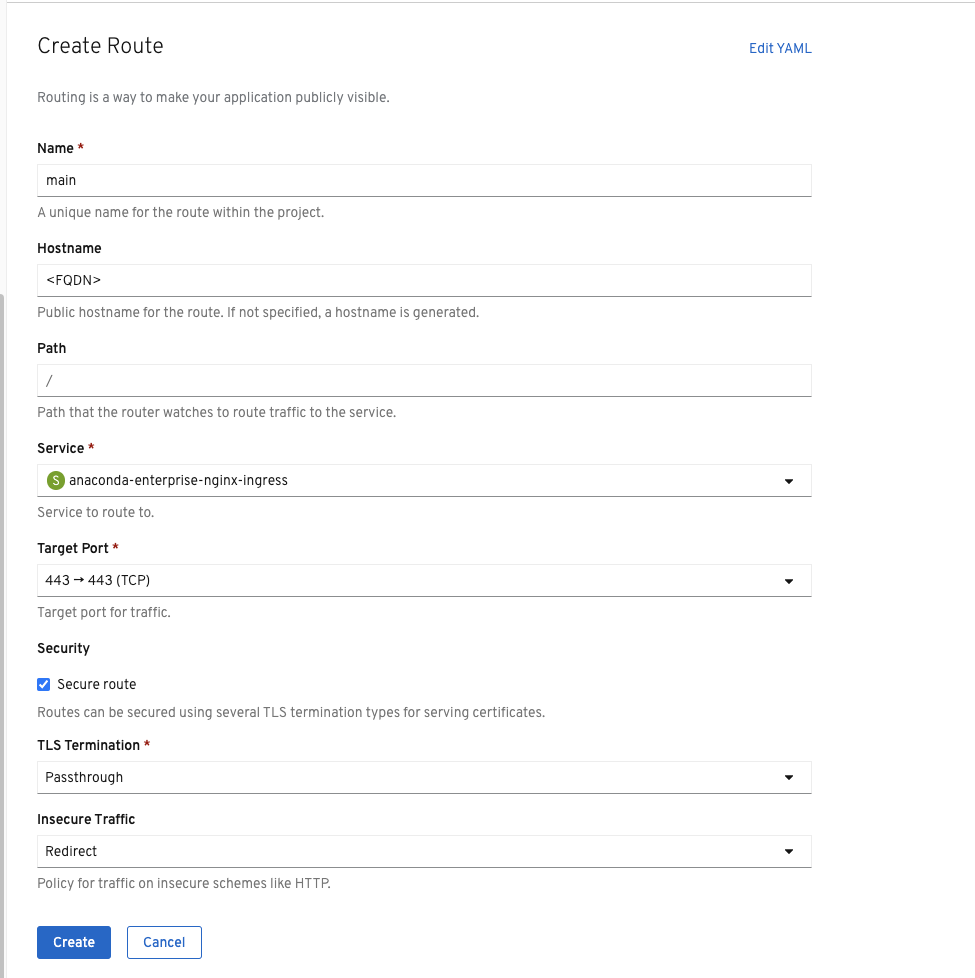
The Path cell contains a forward slash (“/”).
GPU support
Assuming this has not already been done, perform the following:- Ensure
gpu=truelabel is applied to all GPU nodes. - Follow these guides:
- https://www.openshift.com/blog/creating-a-gpu-enabled-node-with-openshift-4-2-in-amazon-ec2
- https://docs.nvidia.com/datacenter/kubernetes/openshift-on-gpu-install-guide/index.html#openshift-gpu-support
- https://www.openshift.com/blog/how-to-use-entitled-image-builds-to-build-drivercontainers-with-ubi-on-openshift
- Create a GPU resource profile in the configmap.
Google Kubernetes engine (GKE)
GKE-specific requirements
- Kubernetes 1.15.12-gke.6002
- Storage Class to be used for Persistent Volume
Prerequisite steps
Label your nodes in the following manner:- AE-MASTER
- kubectl label node
<node>role=ae-master - kubectl label node
<node>cluster_role=ae-master - kubectl label node
<node>app_role=storage
- kubectl label node
- AE-WORKER
- kubectl label node
<node>role=ae-worker - kubectl label node
<node>cluster_role=ae-worker
- kubectl label node

Installation
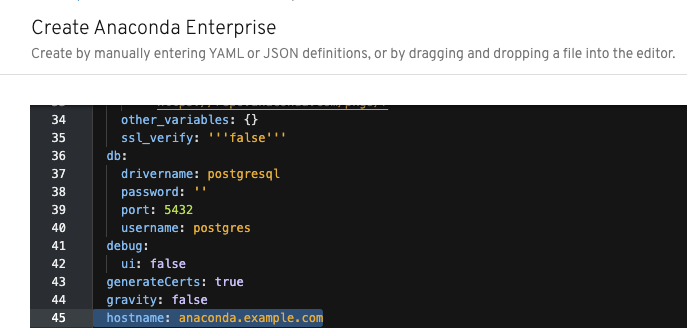
Anaconda will provide the necessary helm charts for installing on GKE.values.yaml will need to be customized with an FQDN and provisioner. Once done, run the following:
GPU support
Make sure GPU nodes have the label
gpu=true.Managing Anaconda Enterprise
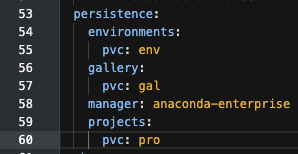
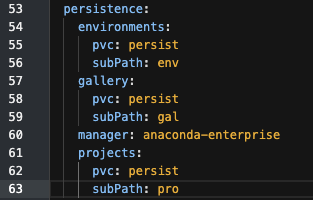
You can make changes to the Anaconda Enterprise configmap by editing the deployed yaml file in the Anaconda Enterprise operator. This can be necessary for creating or making changes to resource profiles or other configurations. To setup persistent storage, you will need to first create a Persistent Volume Claim to be consumed by the persistent storage. Ensure that this PVC is using a storage provisioner with the reclaim policy set to retain. You have the option of using a different PVC for each mount, or one PVC with a different subpath for each mount. For example: