Anaconda Platform
7.0.0 is available through a limited early access program. Contact your Anaconda Technical Account Manager (TAM) if you’re interested in adopting the latest version.Prerequisites
- System requirements are met and the environment is prepared.
- Access to the Replicated download portal for your organization (invite provided by Anaconda).
- SSH access, root/
sudoaccess, and permissions to upload/download files to the host where you’ll install Anaconda Platform. - A Fully Qualified Domain Name (FQDN) for the host where you’ll install Anaconda Platform.
- SSL/TLS plan:
- Preferred: Organizational certificates ready to upload during setup.
- Temporary: If organizational certs are not yet available, proceed with self-signed certificates during setup and replace them later from the Admin Console.
Installation overview
Anaconda Platform (Self-Hosted) is installed and managed using Replicated, a commercial software distribution platform. However, when interacting with Replicated, all web traffic is routed through anaconda.com domains.Installing Anaconda Platform
Download and run the installer
- Open a terminal and SSH into your prepared host environment.
- Open a browser and access the Replicated download portal.
- Follow the instructions provided in the portal to download, extract, and install Anaconda Platform in your terminal.
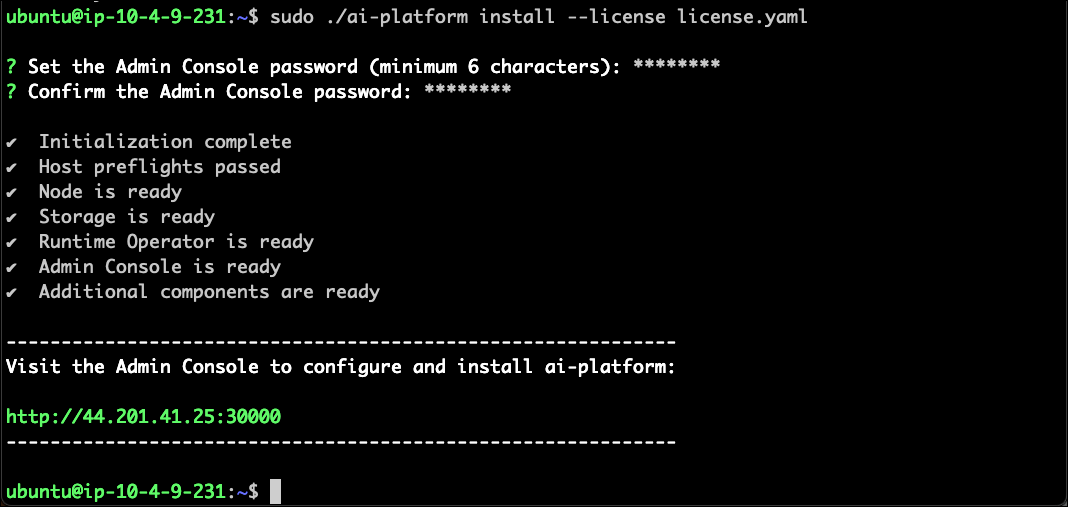
- Establish a password for your Admin Console when prompted.
- The installer initializes and runs preflight checks on your system.
-
Allow time for the installer to complete. A successful installation looks like this:
Configure the Admin Console
- Open a browser and navigate to the displayed Admin Console URL.
- Click Start and follow the instructions provided to proceed with setup.
- Enter your hostname’s FQDN.
-
Choose to upload your organization’s SSL/TLS certificate and private key or use the self-signed certificate to get started.
These SSL/TLS and Hostname configurations apply to the Admin Console only.
- Click Continue.
Configure the cluster
- Use the password you established during installation to access the Admin Console.
- Scroll down and select Continue to set up a single node cluster.
Configure the platform
- Enter your hostname’s FQDN.
-
Supply your SSL/TLS certificates, or clear the Upload a TLS Certificate checkbox and select the Use Let’s Encrypt Staging Environment checkbox to use self-signed certificates.
These SSL/TLS and Hostname configurations apply to the platform itself, not the Admin Console.
Using the Let’s Encrypt staging environment also requires you to enter a valid email address for expiration reminders. - Select the checkboxes for the features you want to include in your platform installation.
- Click Continue.
-
Wait for all services to report as Ready in the console dashboard.
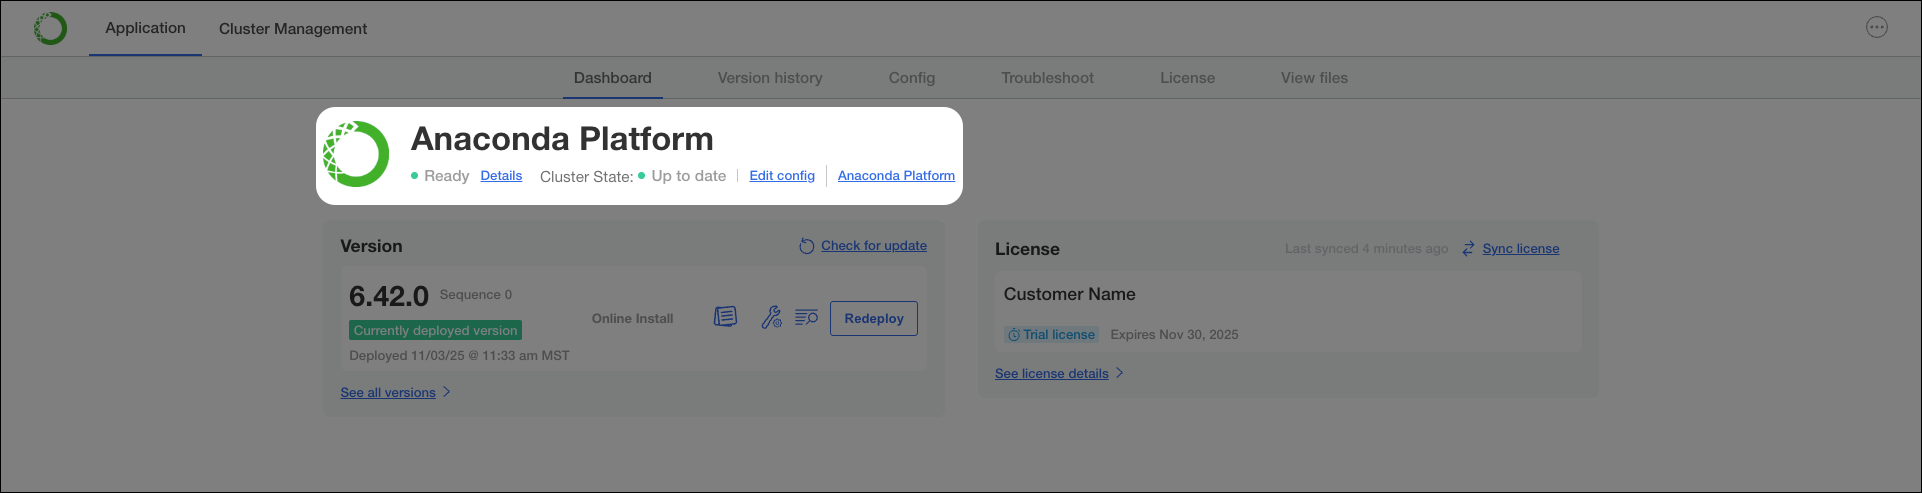
- When deployment is complete, open a new browser tab and navigate to your FQDN to access Anaconda Platform.
Post install setup
Once installation is complete and you can reach your Anaconda Platform URL, you must create a user to log in with. However, you must first extract and decrypt your administrator login information for Keycloak.Extract and decode your Keycloak password
-
Return to your terminal and enter the platform debug shell by running:
-
List all available namespaces in the cluster:
-
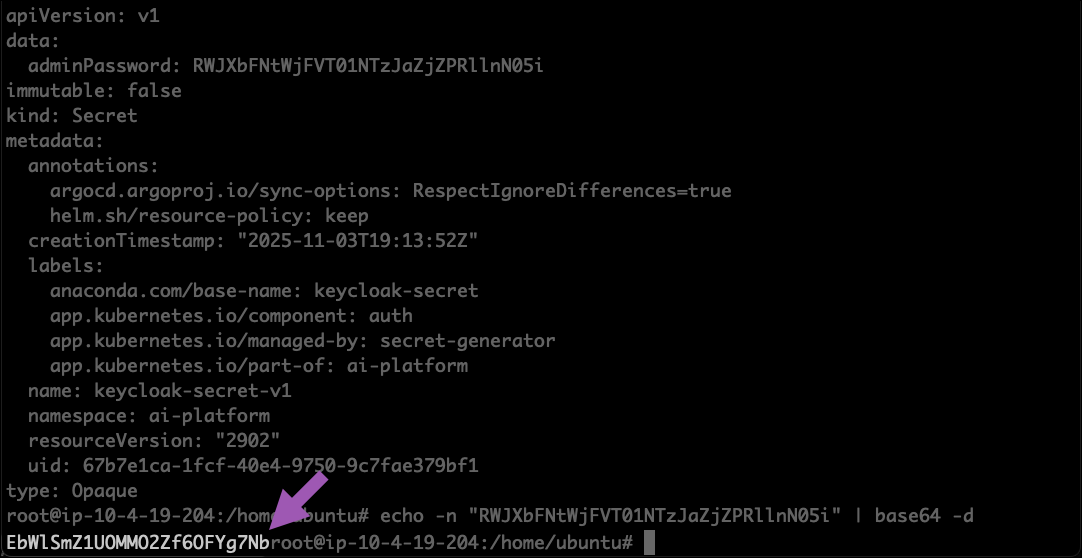
Find the KeyCloak secret:
-
Copy the value for
adminPassword. -
Decode the Keycloak admin password:
-
Copy the return from the command.
Create your first admin user
- Return to your browser and navigate to the Keycloak console at
https://<FQDN>/auth/adminin your browser, where<FQDN>is your Anaconda Platform fully qualified domain name. - Sign in as
adminusing the decoded password. - Click Manage realms.
- Select repo.
- Select Users from the left hand-navigation.
- Click Create new user.
- Enter
anacondaas the Username. - Click Join Groups.
- Select admins.
- Click Join.
- Click Create.
- Click the Credentials tab.
- Click Set password.
- Enter and confirm a password for the
anacondaadmin user. - Toggle Temporary
OFF. - Click Save.
- Return to your Anaconda Platform FQDN and sign in as the
anacondaadmin user. - Submit your license.